
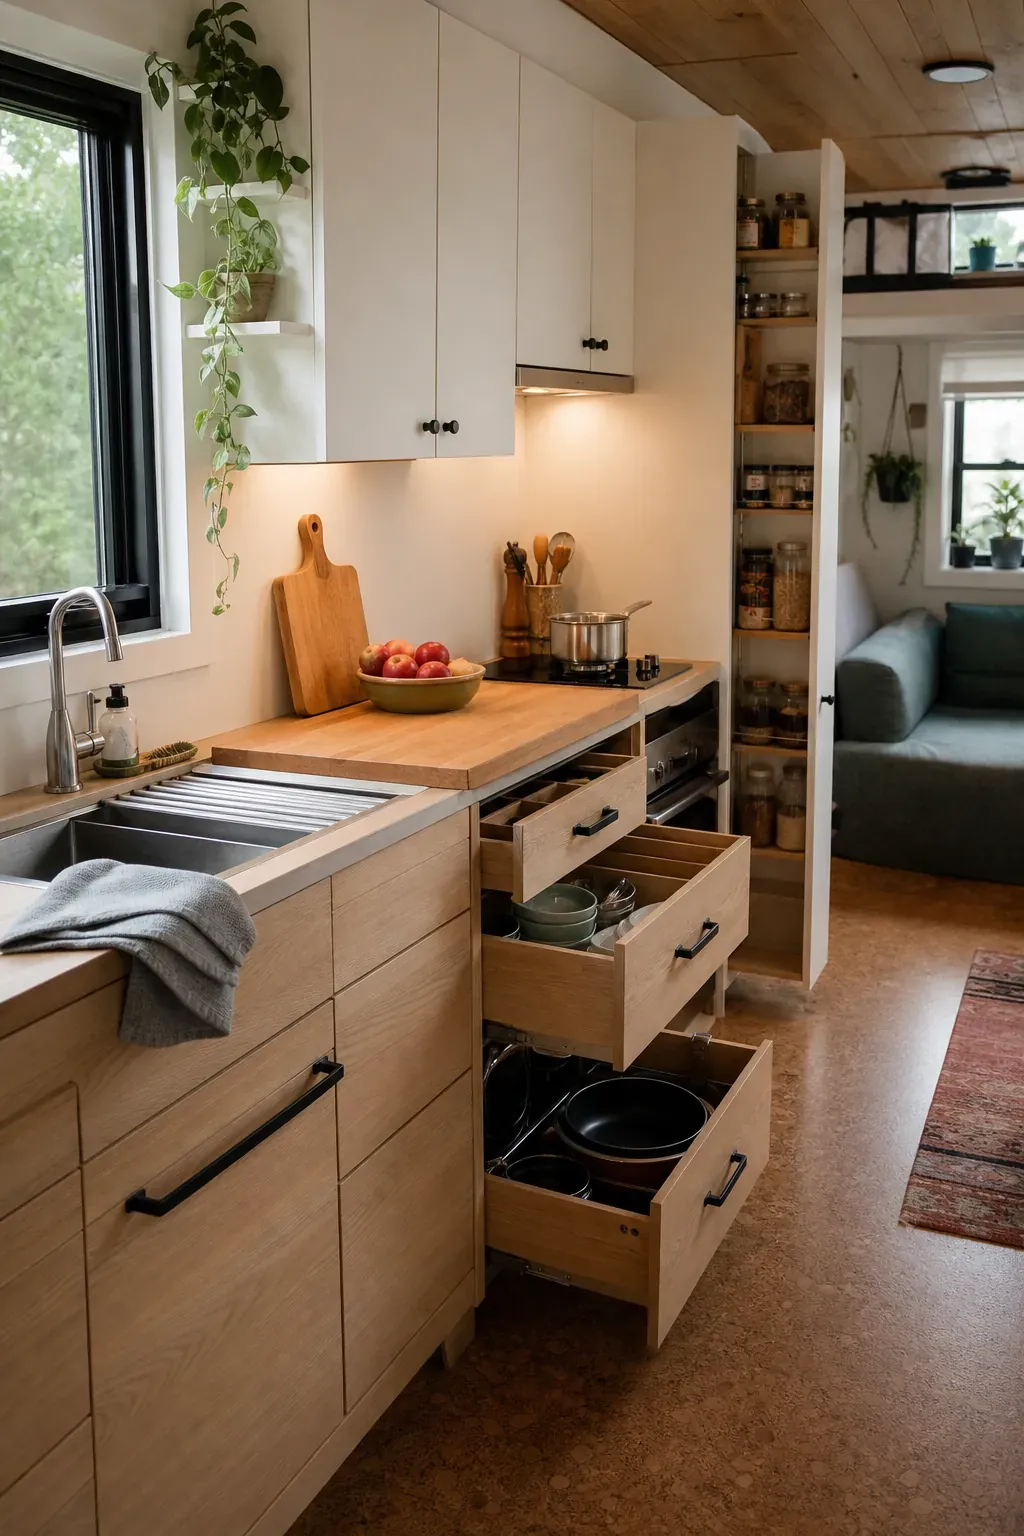
A tiny kitchen rarely fails because it has too few organizing products. It fails because every cabinet is asked to hold unrelated things. The pasta pot blocks the breakfast bowls, cleaning spray crowds the trash bags, and the tool you need every morning lives behind something used twice a year. The fix is to give each cabinet a job tied to an action. These 15 tiny home kitchen ideas use smart cabinet zones to make cooking, cleaning, and putting groceries away feel easier without pretending you have a full-size pantry.
Put everyday dishes beside the cleanup zone
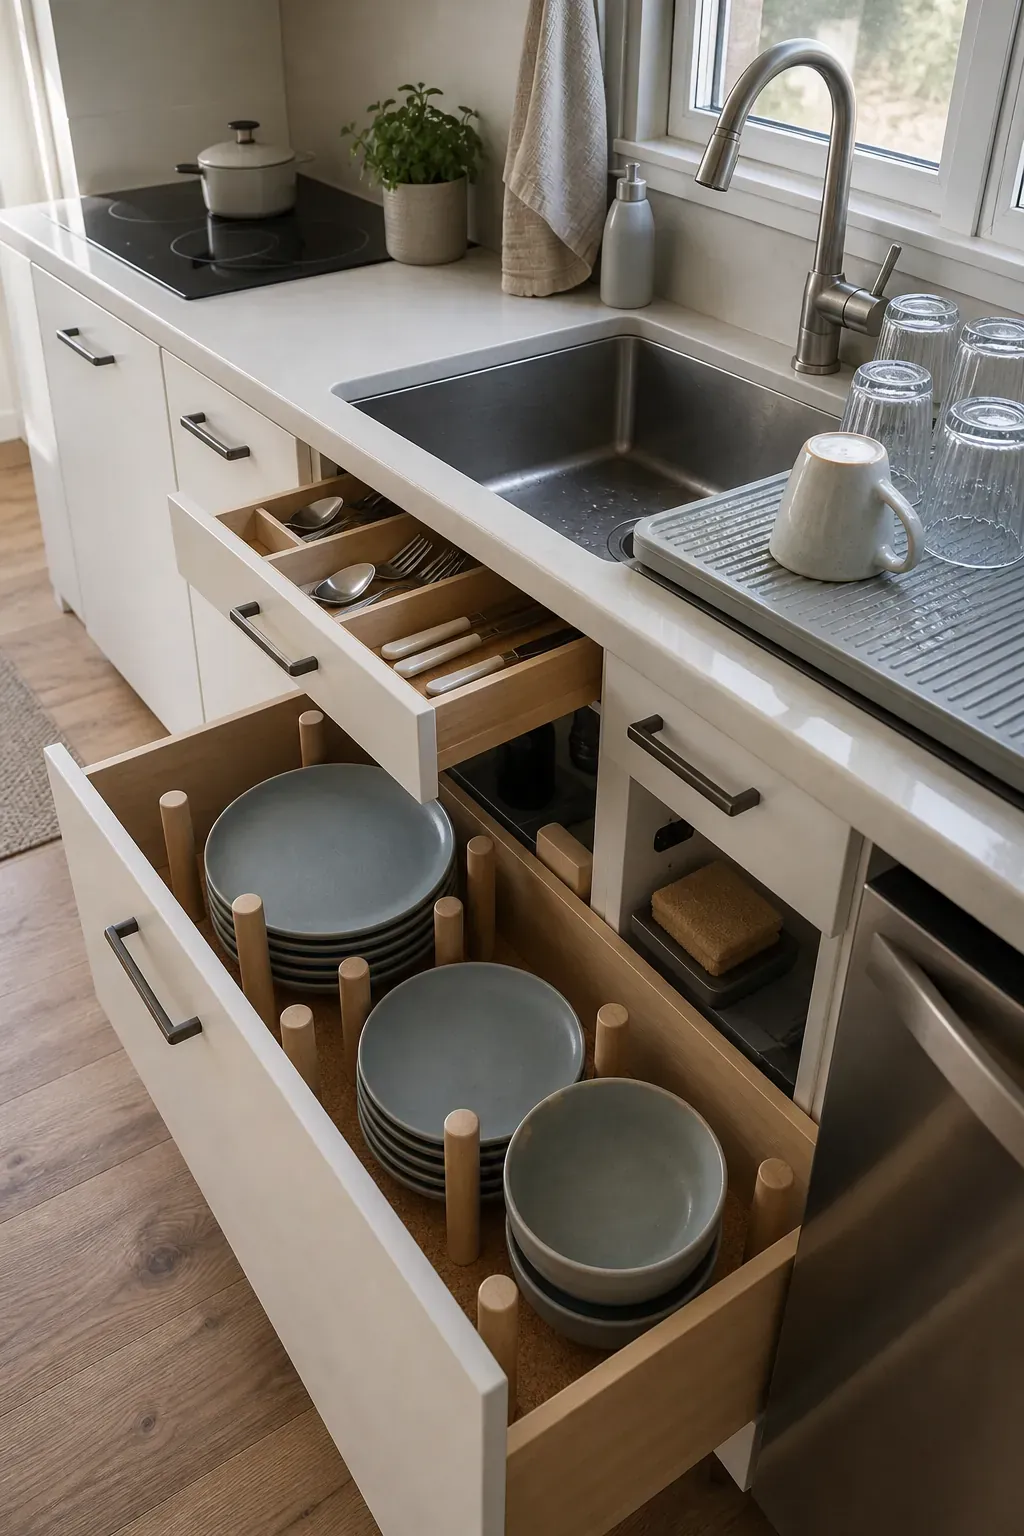
Store the plates, bowls, glasses, and daily cutlery closest to the sink or dish rack. That short route matters more in a tiny home kitchen because one person putting dishes away can otherwise block the whole aisle. Lower drawers work especially well: you can see every stack from above, and shorter household members do not have to reach over a counter.
Keep this zone limited to what you actually use each week. Four place settings for two people may be more practical than twelve crowded into one cabinet. If a special platter earns its place, store it vertically at the back or in a less convenient cabinet rather than letting it interrupt the daily reset.
Build a breakfast cabinet around the morning routine
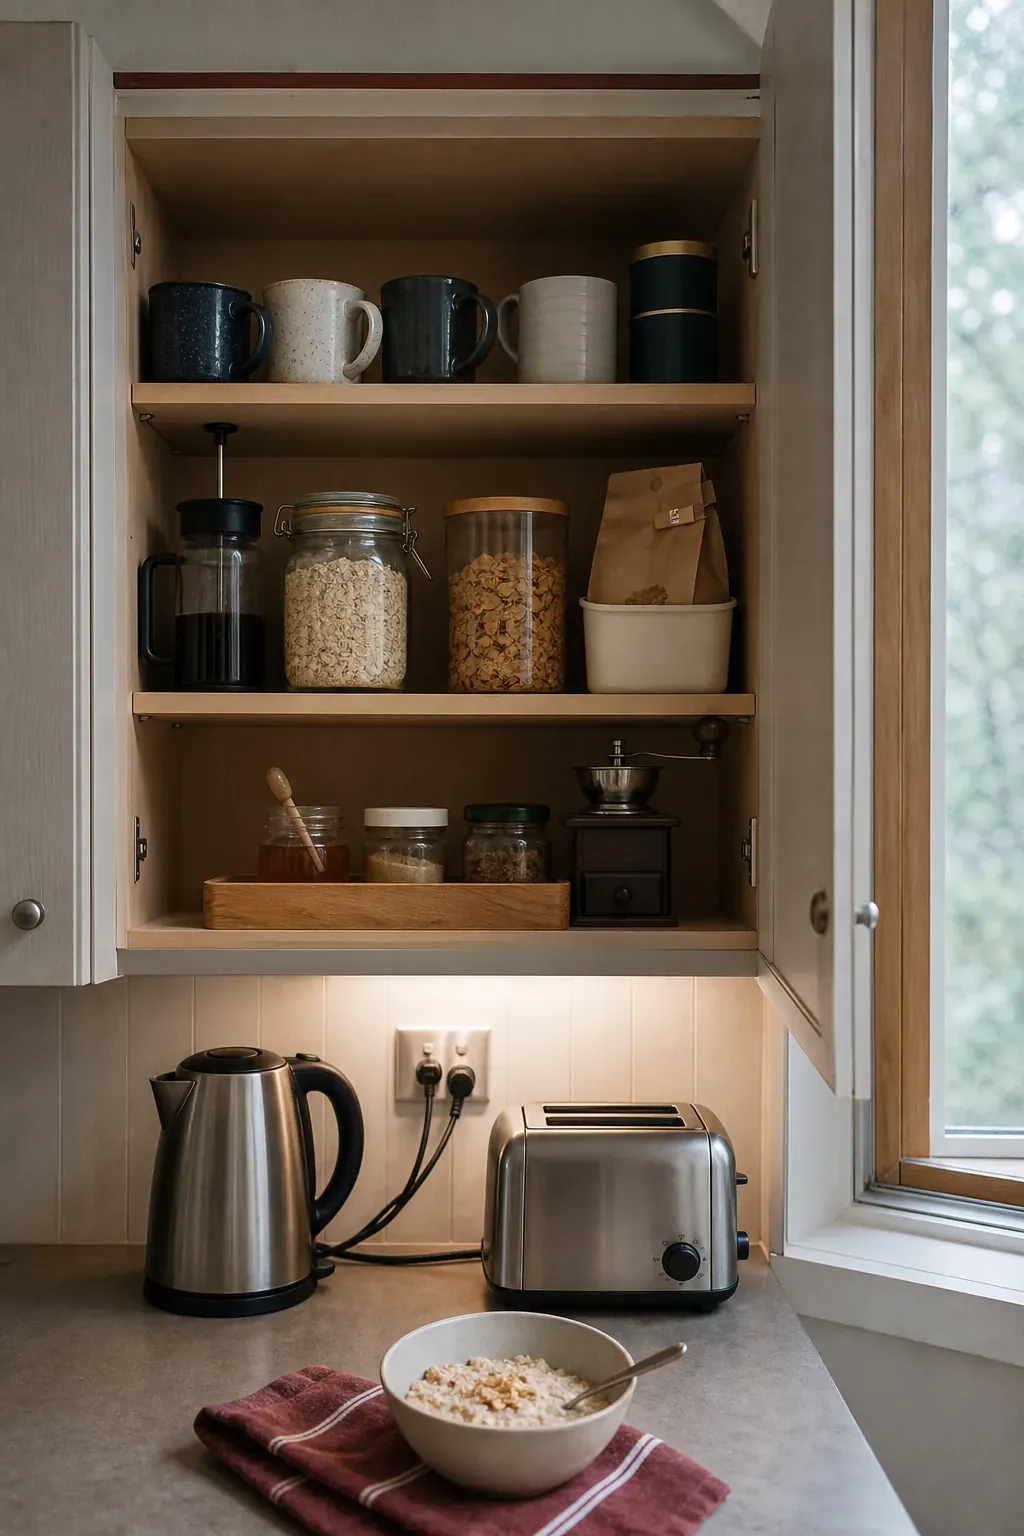
Group coffee, tea, mugs, cereal, oats, sweeteners, and the small appliance you use for breakfast in one cabinet or one narrow run. The goal is not a styled coffee bar. It is to let someone make breakfast without opening four doors and spreading packets across the only clear counter.
Place the most-used items between waist and eye level. Use one wipeable tray for sticky jars and loose packets, then leave a little open space so new groceries do not turn the cabinet into a puzzle. A useful cabinet zone should make the next action obvious.
Give meal prep one clear landing zone
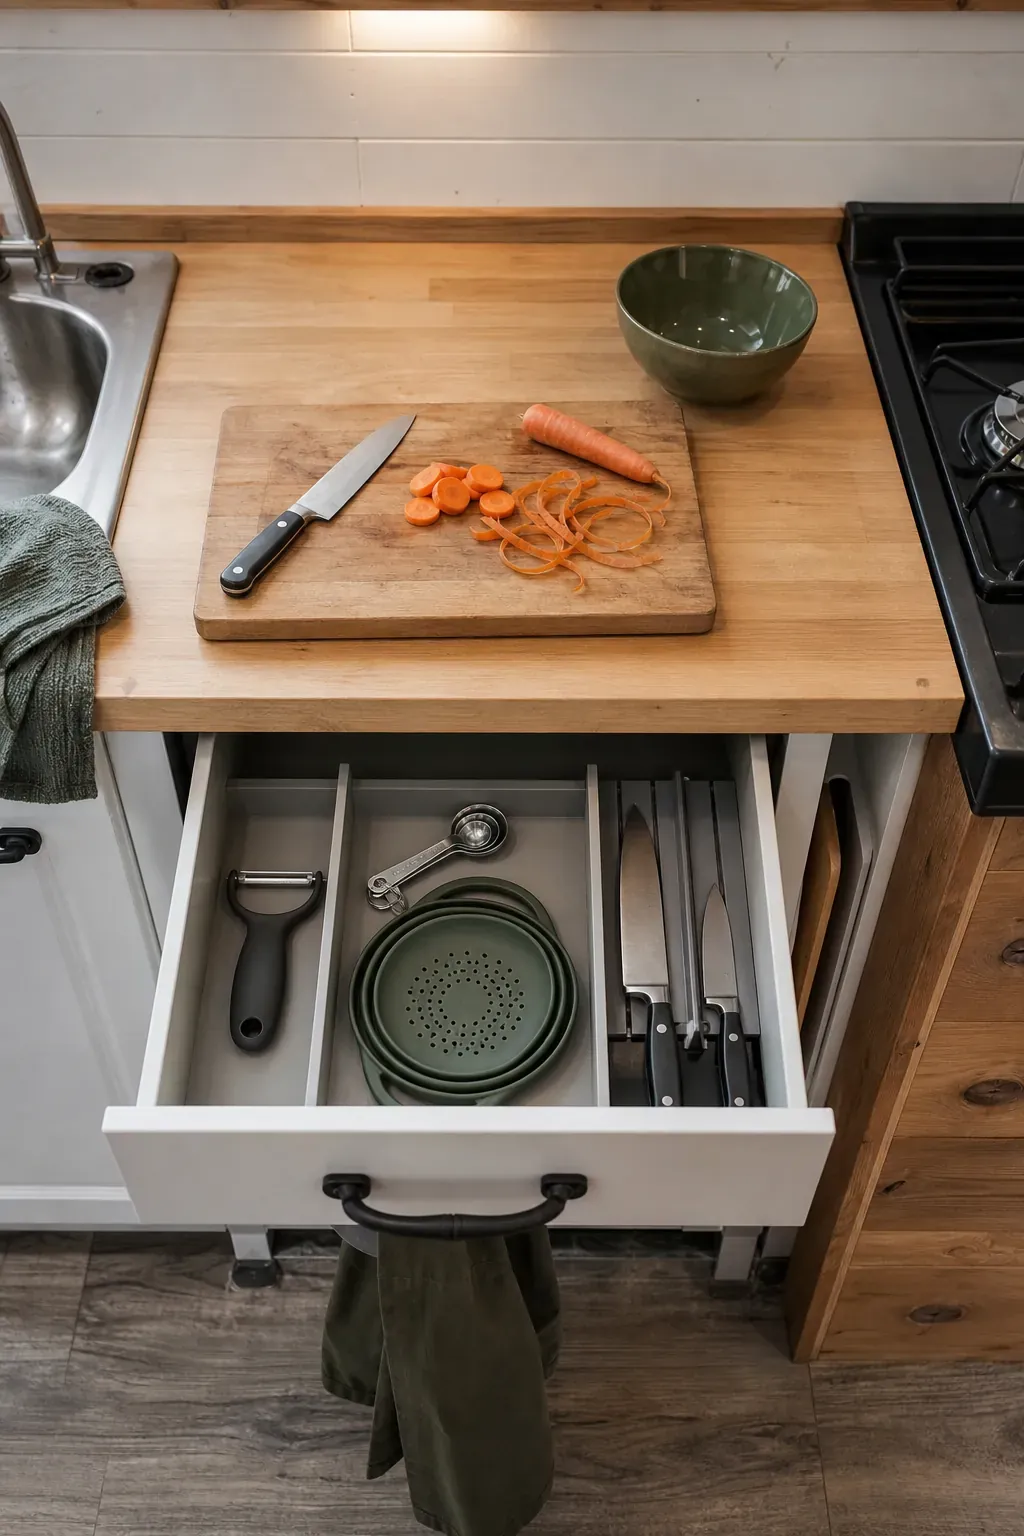
Choose the largest uninterrupted counter section as your meal prep zone, even if it is only two feet wide. The drawer or cabinet directly below should hold knives, cutting boards, peelers, mixing bowls, and the colander. When those tools live together, prep begins without a scavenger hunt.
Protect the surface from becoming permanent storage. A rail can hold two genuinely frequent tools, but a line of appliances quickly consumes the working area. If you need more room, a fitted sink cover can create temporary prep space, provided it has a dedicated slot to dry and store vertically afterward.
Center the cooking zone on the stovetop
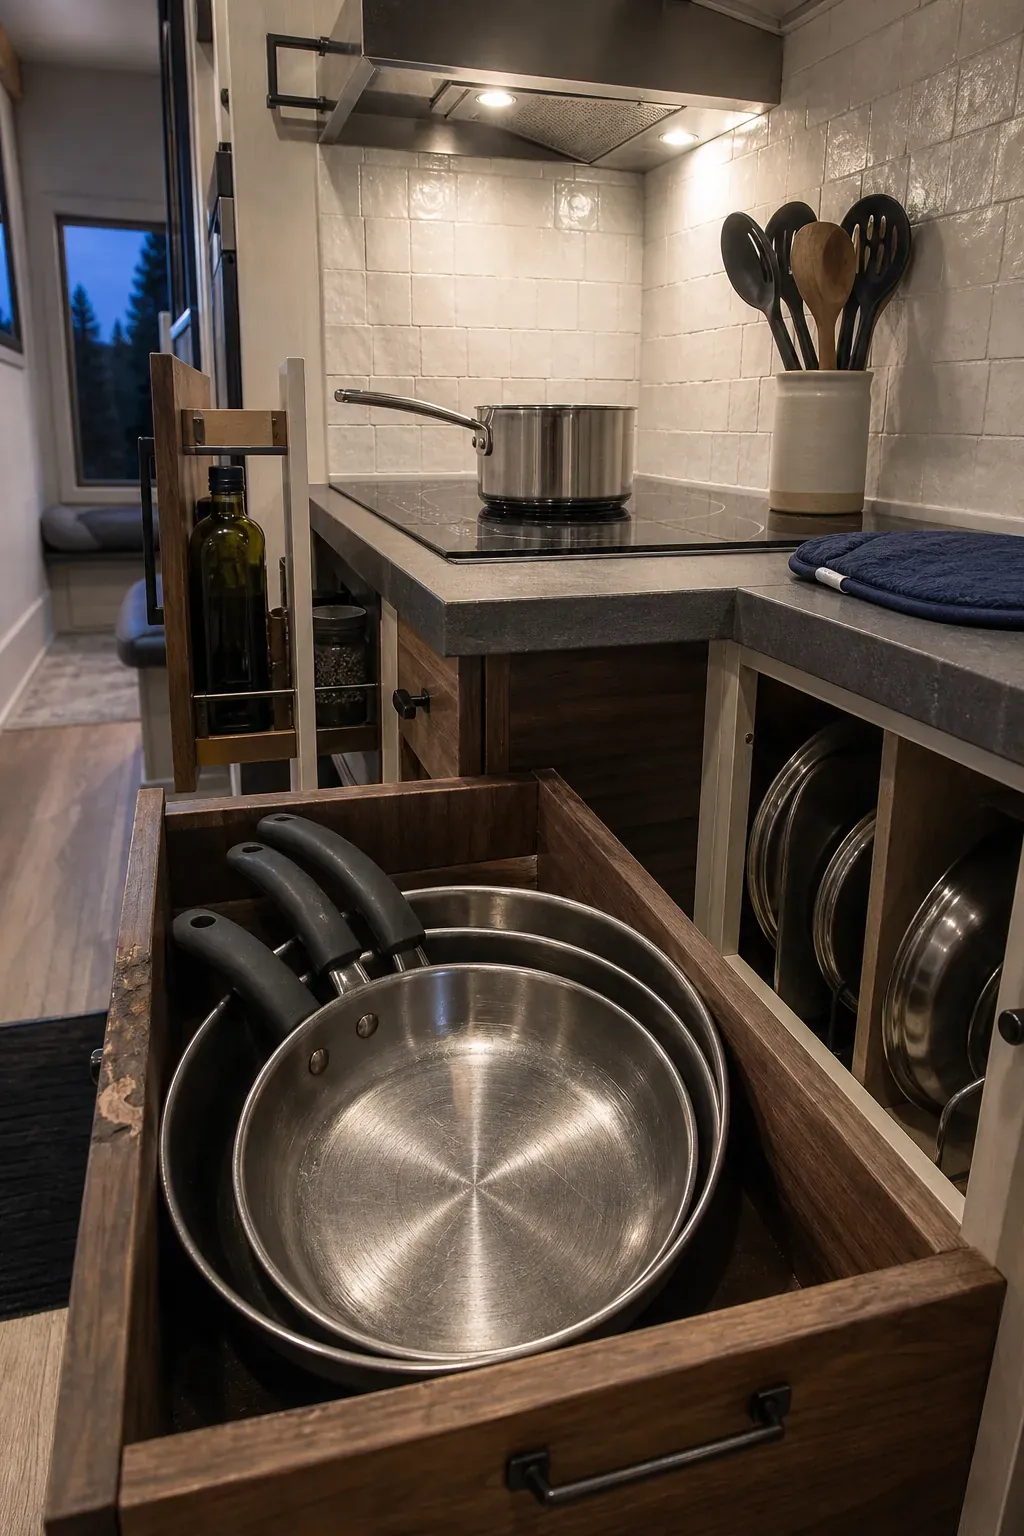
Keep pans, pot lids, cooking utensils, oil, and everyday seasonings within one step of the cooktop. Store heavy cookware below rather than overhead, with pans nested only when the stack stays easy to lift. A vertical divider for lids and shallow pans prevents the familiar crash of pulling one piece from the bottom.
Heat and grease change what belongs here. Oils need a cool cabinet rather than a ledge beside a hot burner, and utensils should sit far enough away that handles cannot be knocked into a flame. Convenience never outranks a clear, safe cooking area.
Turn a deep lower cabinet into pull-out storage
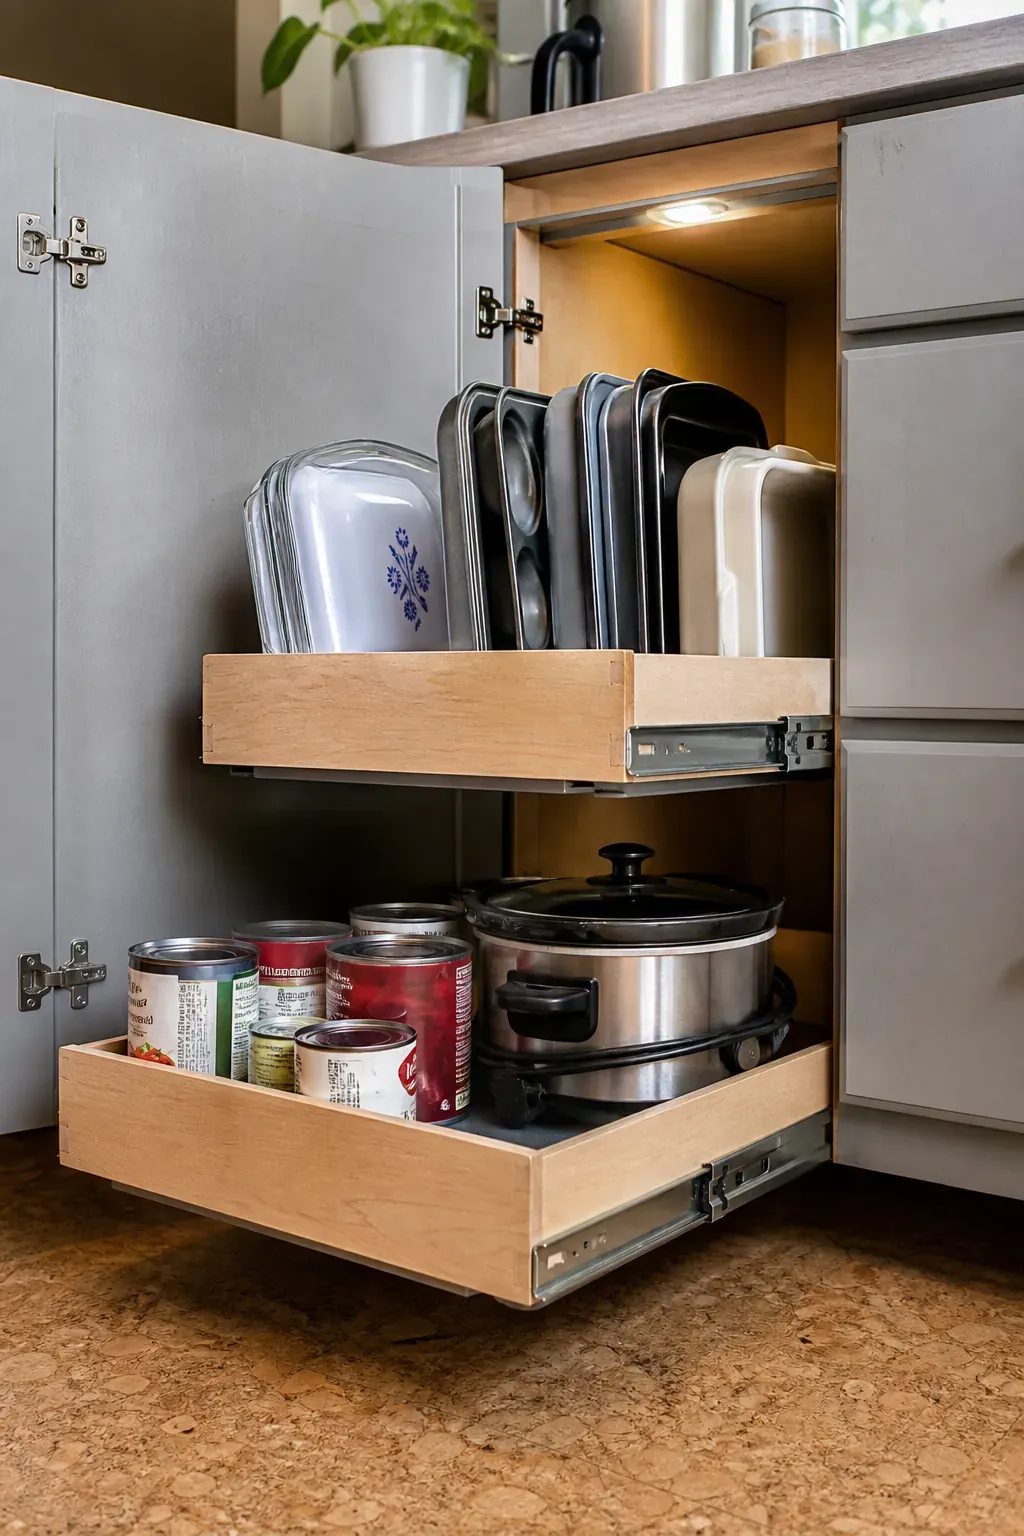
Deep shelves look spacious on a plan and behave badly in daily life. Items at the back disappear, so the front fills up with duplicates. Full-extension drawers or retrofit pull-out trays bring the entire cabinet into view and make the lowest level useful without kneeling and unloading everything.
Measure the clear opening, not just the cabinet box, and account for hinges and plumbing. If hardware is outside the budget, long handled bins can create a similar effect. Assign each pull-out a narrow category—baking supplies, canned food, or small appliances—so it remains a zone rather than a miscellaneous cave.
Use a narrow pantry for ingredients you can scan
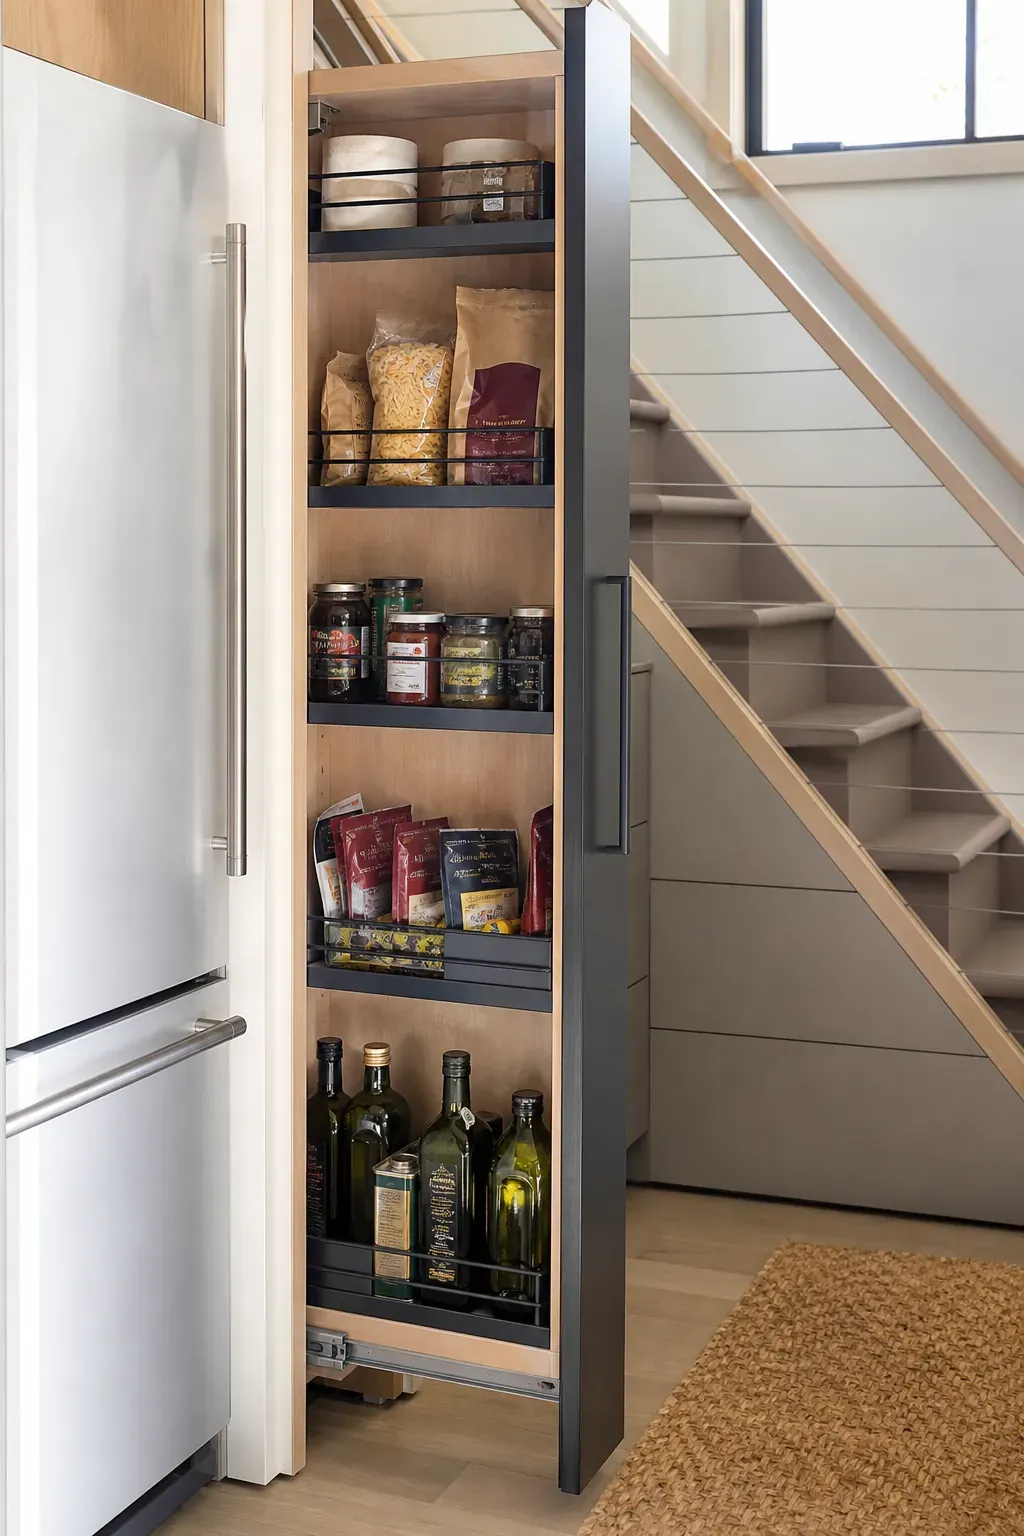
A six- or nine-inch pull-out can outperform a deep pantry because every label is visible. Use it for bottles, tins, jars, and repeat-purchase ingredients that fit the shelf depth. Keep heavier goods low and lighter packets higher so the unit stays balanced.
Do not decant everything for appearance. Matching containers help only when they fit the shelf, seal well, and simplify refilling. For irregular bags, one bin per food type is enough. Kitchen cabinet organization should reduce handling, not create another chore.
Reserve the highest cabinets for true backstock
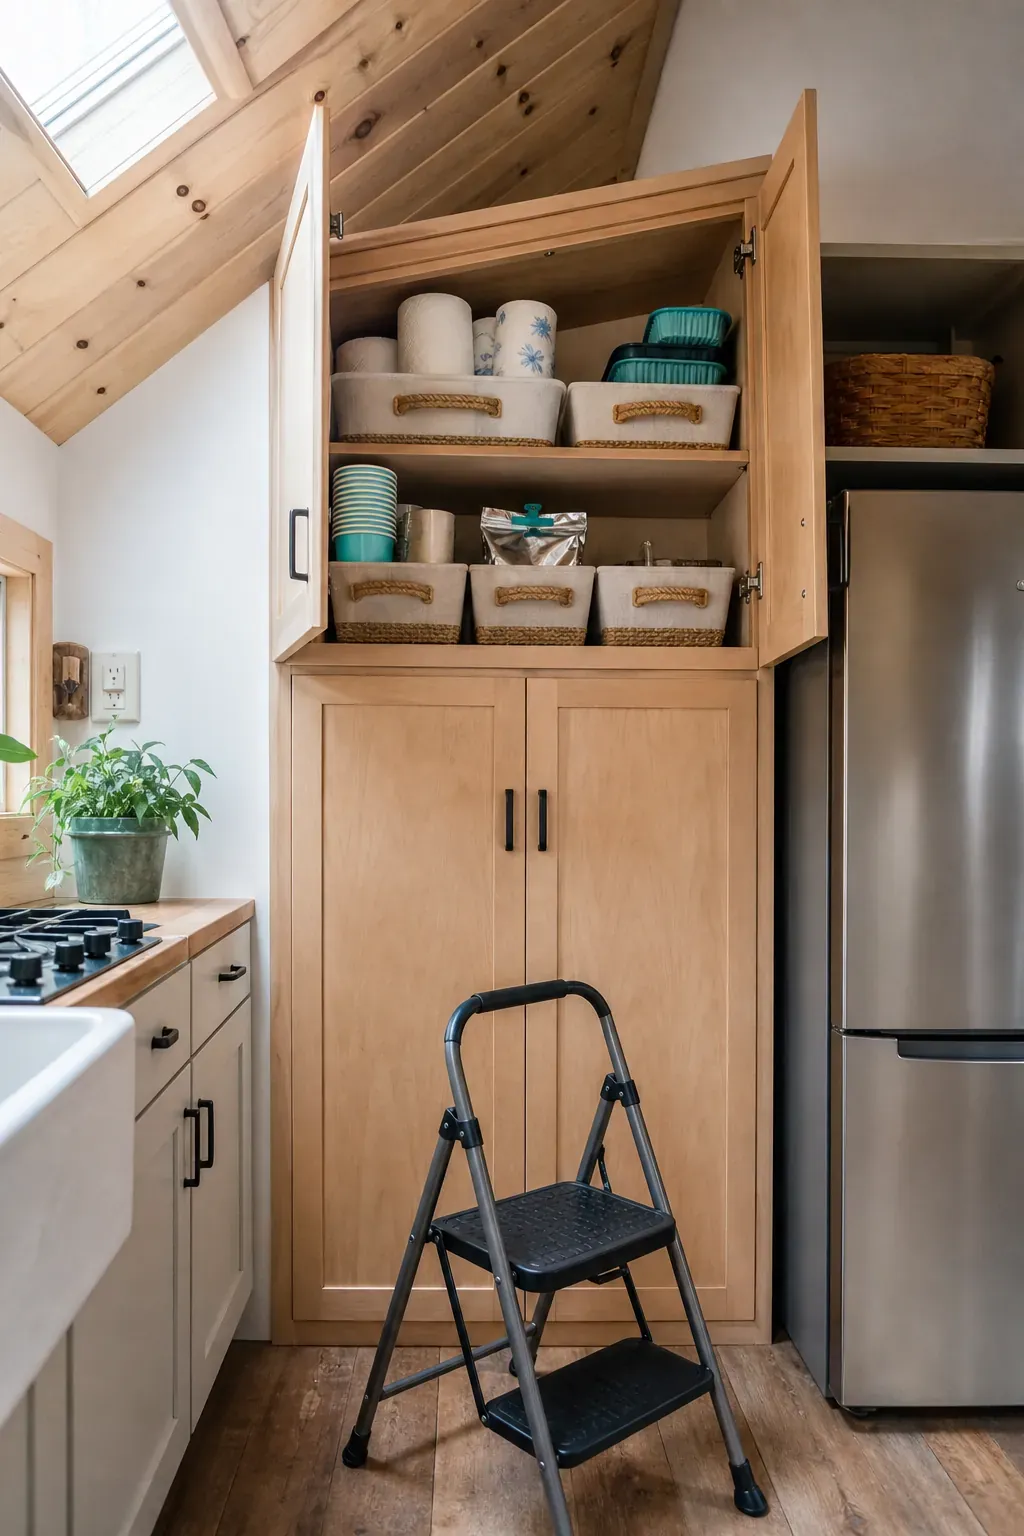
Uppermost shelves should hold lightweight, infrequently accessed stock: extra paper goods, a spare bag of coffee, picnic pieces, or seasonal baking tools. They are the wrong place for heavy appliances or anything you need while standing at a hot stove.
Use shallow bins with handles so the whole category comes down safely. A simple front label prevents forgotten duplicates. If you cannot reach the cabinet with a stable step stool, treat it as architectural dead space rather than filling it with items that will never come out.
Create a baking kit that moves as one unit
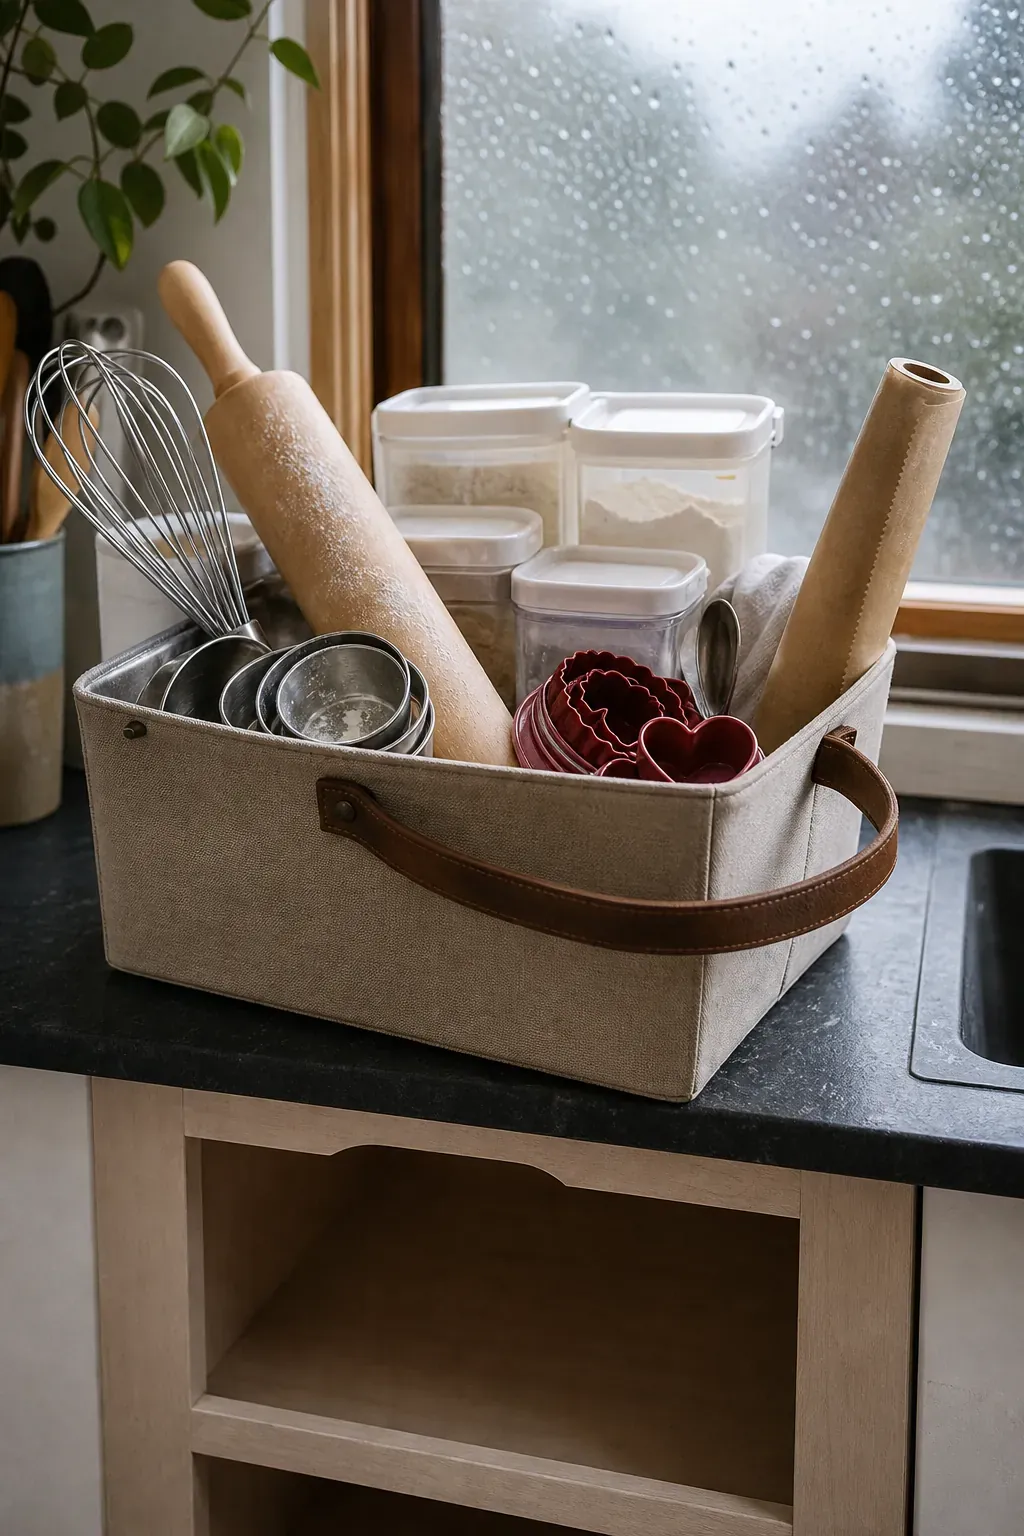
If you bake occasionally, your supplies do not need prime real estate across several cabinets. Put measuring cups, cutters, decorating tools, leaveners, and small packets in one sturdy bin. Store flour and sugar beside it if they are used for other cooking, or include compact sealed containers when the kit can safely carry the weight.
Pull the kit to the meal prep zone, use it, wipe the base, and return it. This works because it follows an activity rather than a product type. It also exposes the specialized tools you never reach for, making the next decluttering decision much easier.
Contain food containers by lid system
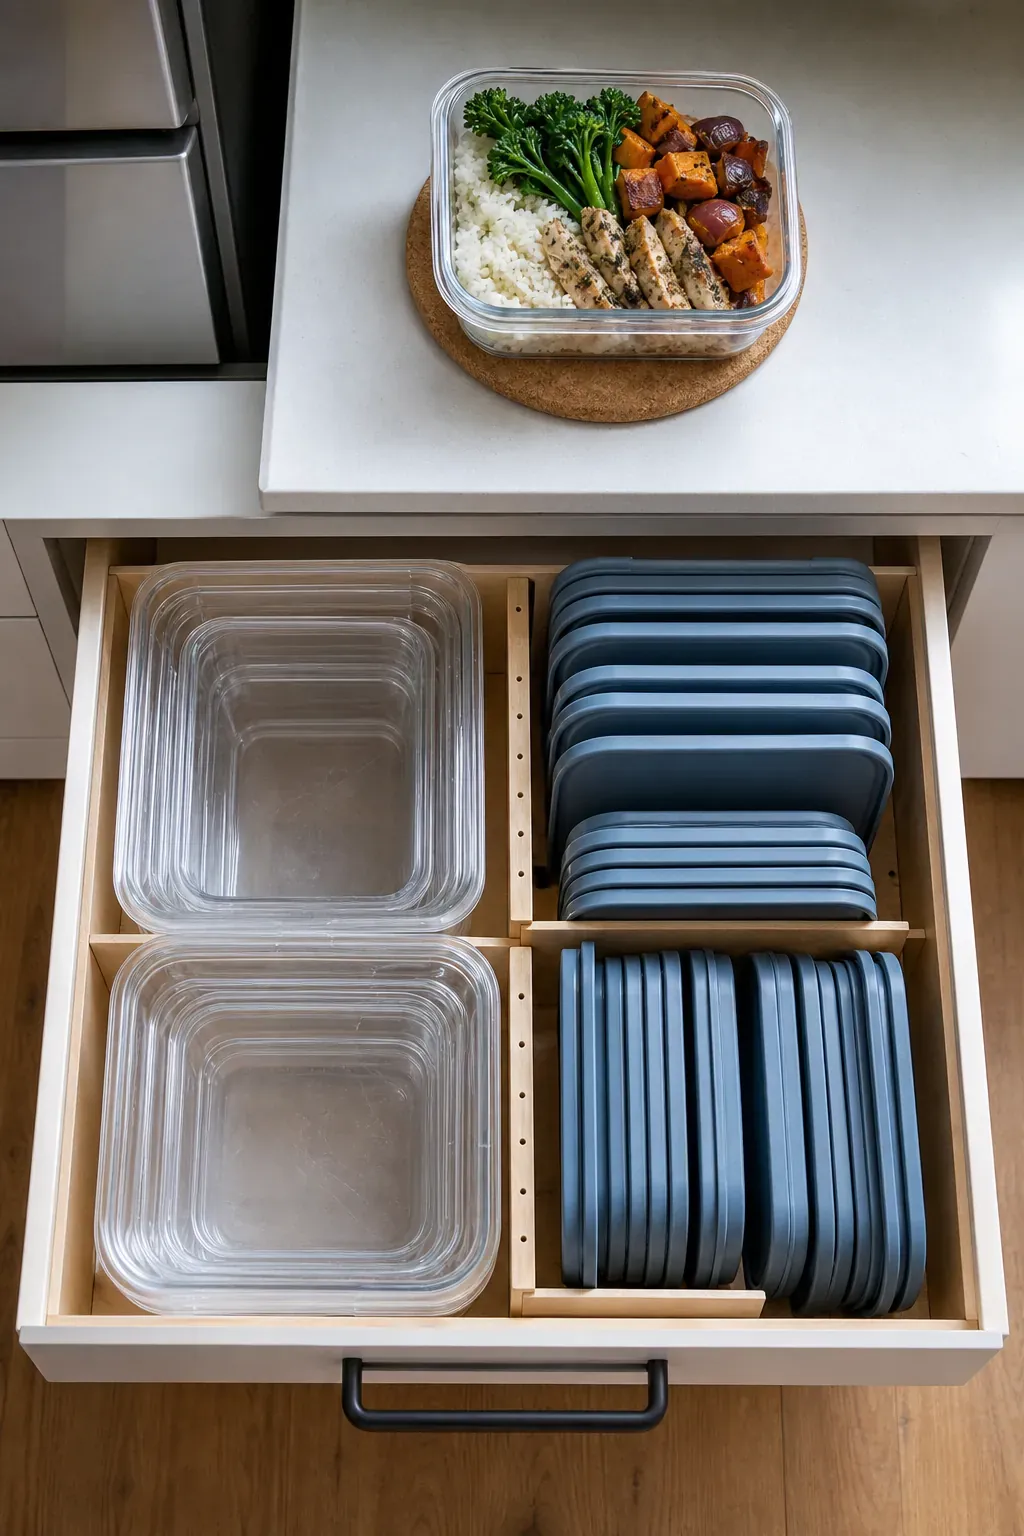
Food containers consume disproportionate space when every shape uses a different lid. Standardize around one or two compatible systems, nest the bases by size, and file lids vertically in a divider. Recycle warped pieces and any orphan whose match never appears.
Set a physical limit: one drawer or one bin. When it closes comfortably, the category is full. Square and rectangular containers usually use cabinet and refrigerator space more efficiently than round ones, but the best system is the one you can match and put away without thinking.
Make the under-sink zone leak-aware
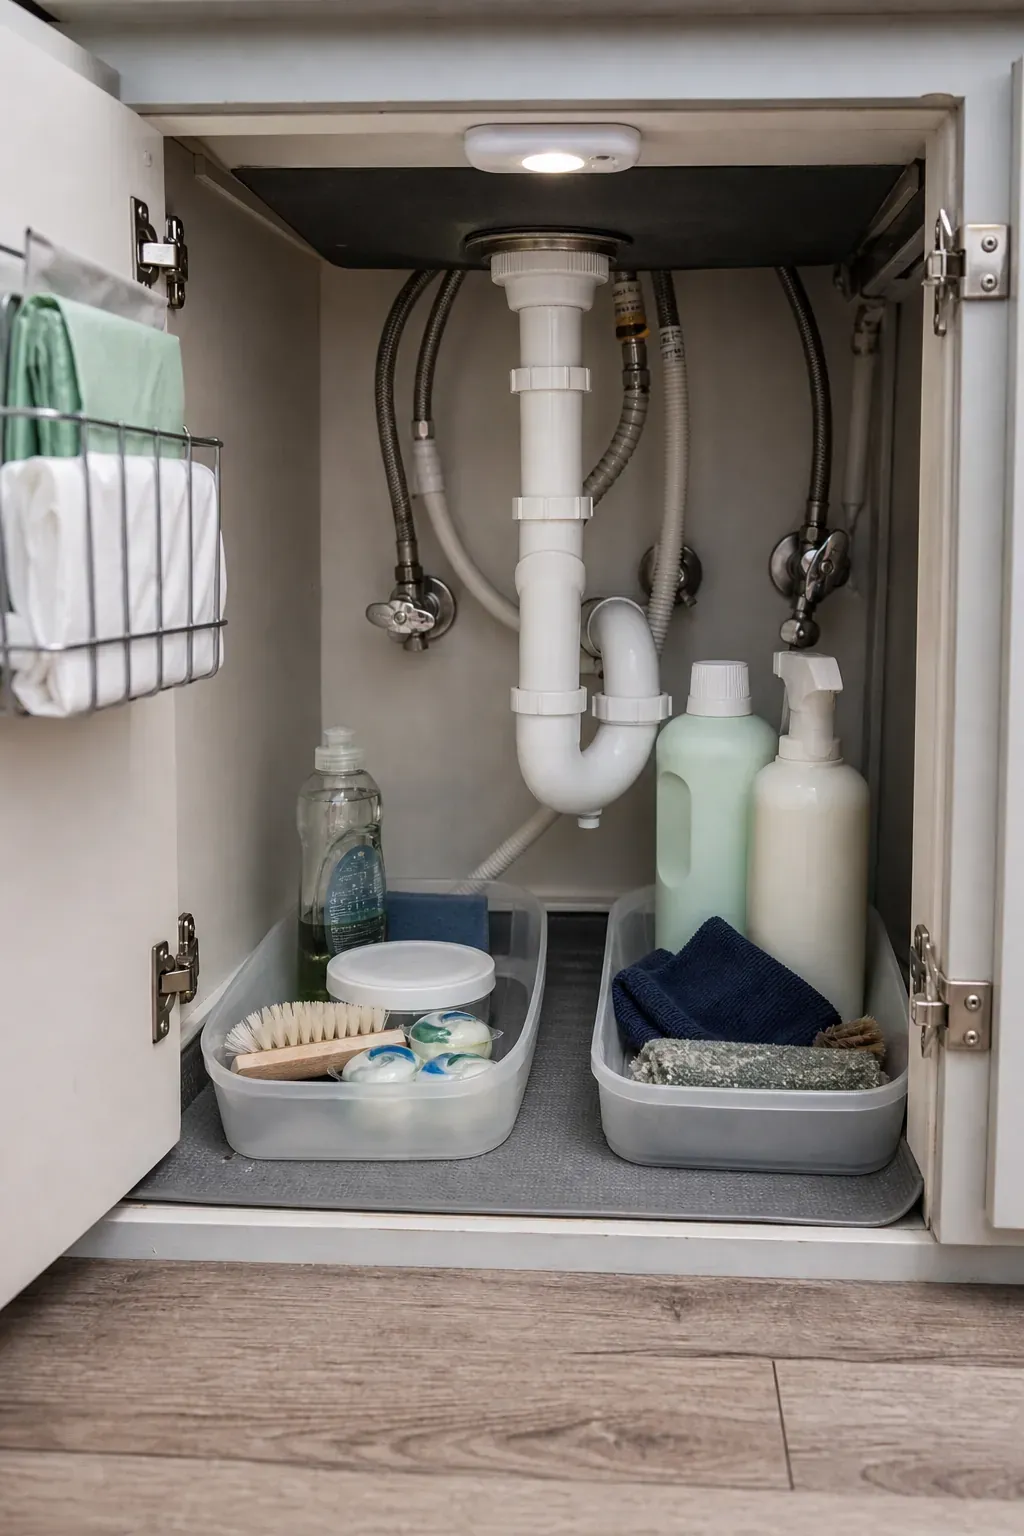
Under the sink is best for a compact cleanup zone, not overflow pantry storage. Put dish soap, dishwasher supplies, cloths, bin liners, and a small cleaning caddy in removable trays. Keep paper products and anything damaged by moisture elsewhere.
Leave plumbing connections visible and place a washable liner below them so a drip is noticed early. Door-mounted storage can hold light items, but check clearance around the trap and shutoff valves before adding it. The smartest small kitchen storage preserves access to the things that keep the kitchen working.
Give waste and recycling a measured footprint
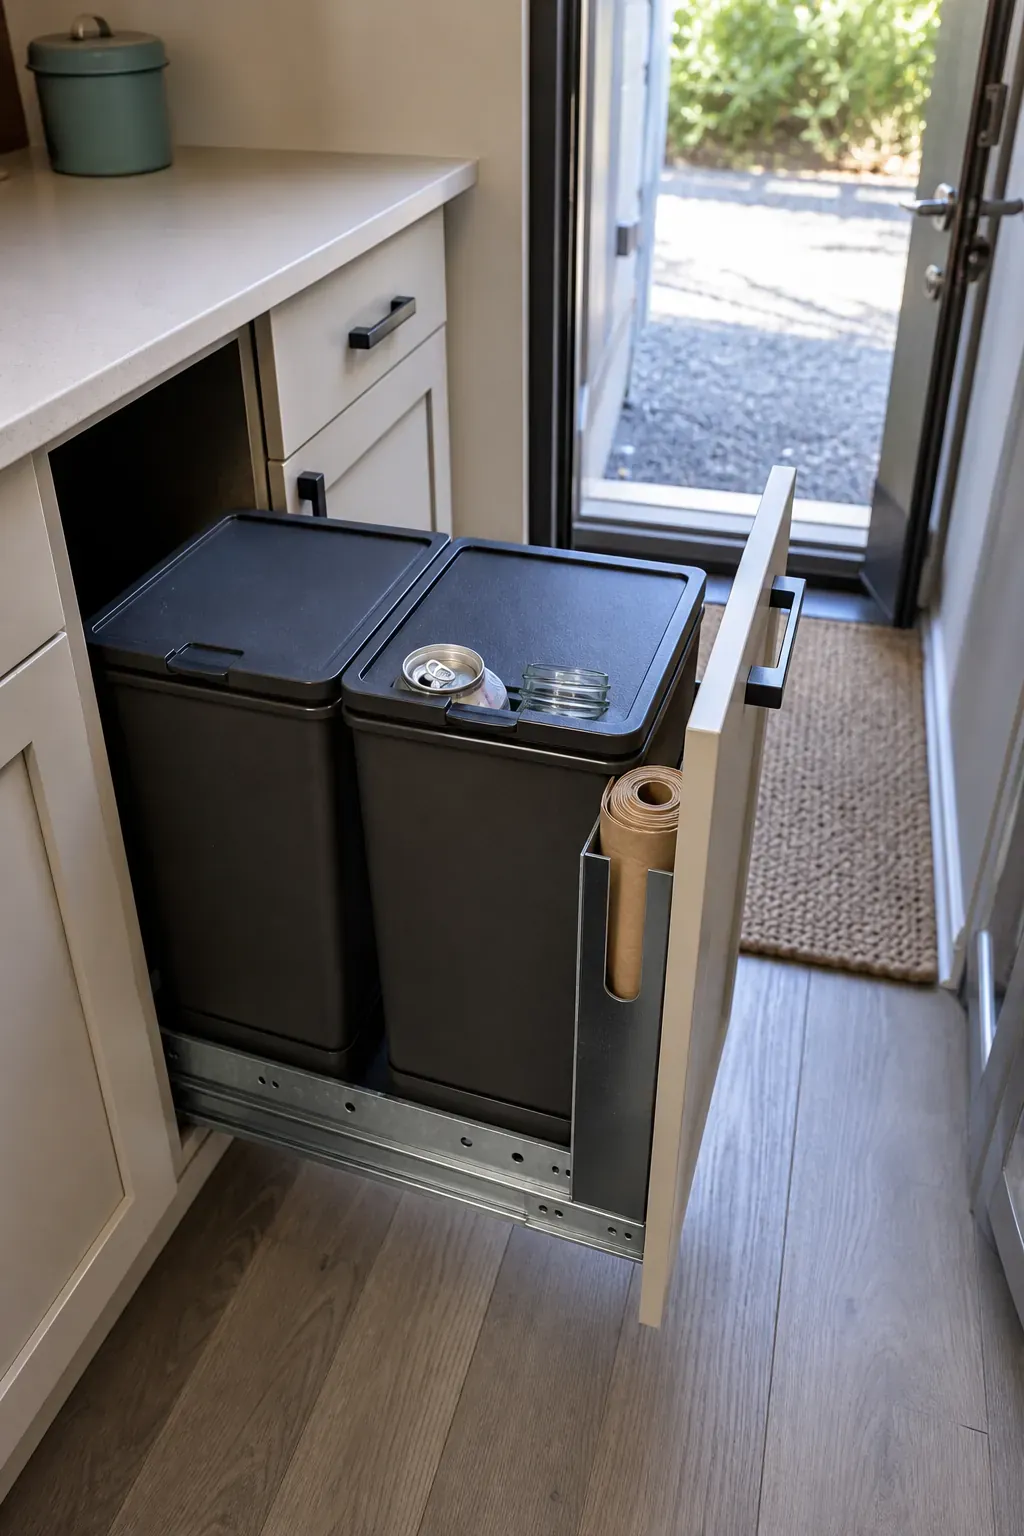
A huge trash can wastes cabinet volume; a tiny one that overflows every day wastes attention. Measure a pull-out or freestanding footprint based on how often you can realistically empty it. Two modest bins for trash and recycling often fit better than an elaborate sorting station.
Store liners in the same cabinet and keep the route to the door clear. If composting is part of your routine, choose a sealed countertop or freezer container that matches your actual collection schedule. A waste zone succeeds when it is easy to maintain, not when it accommodates every theoretical category.
Store small appliances by frequency and function
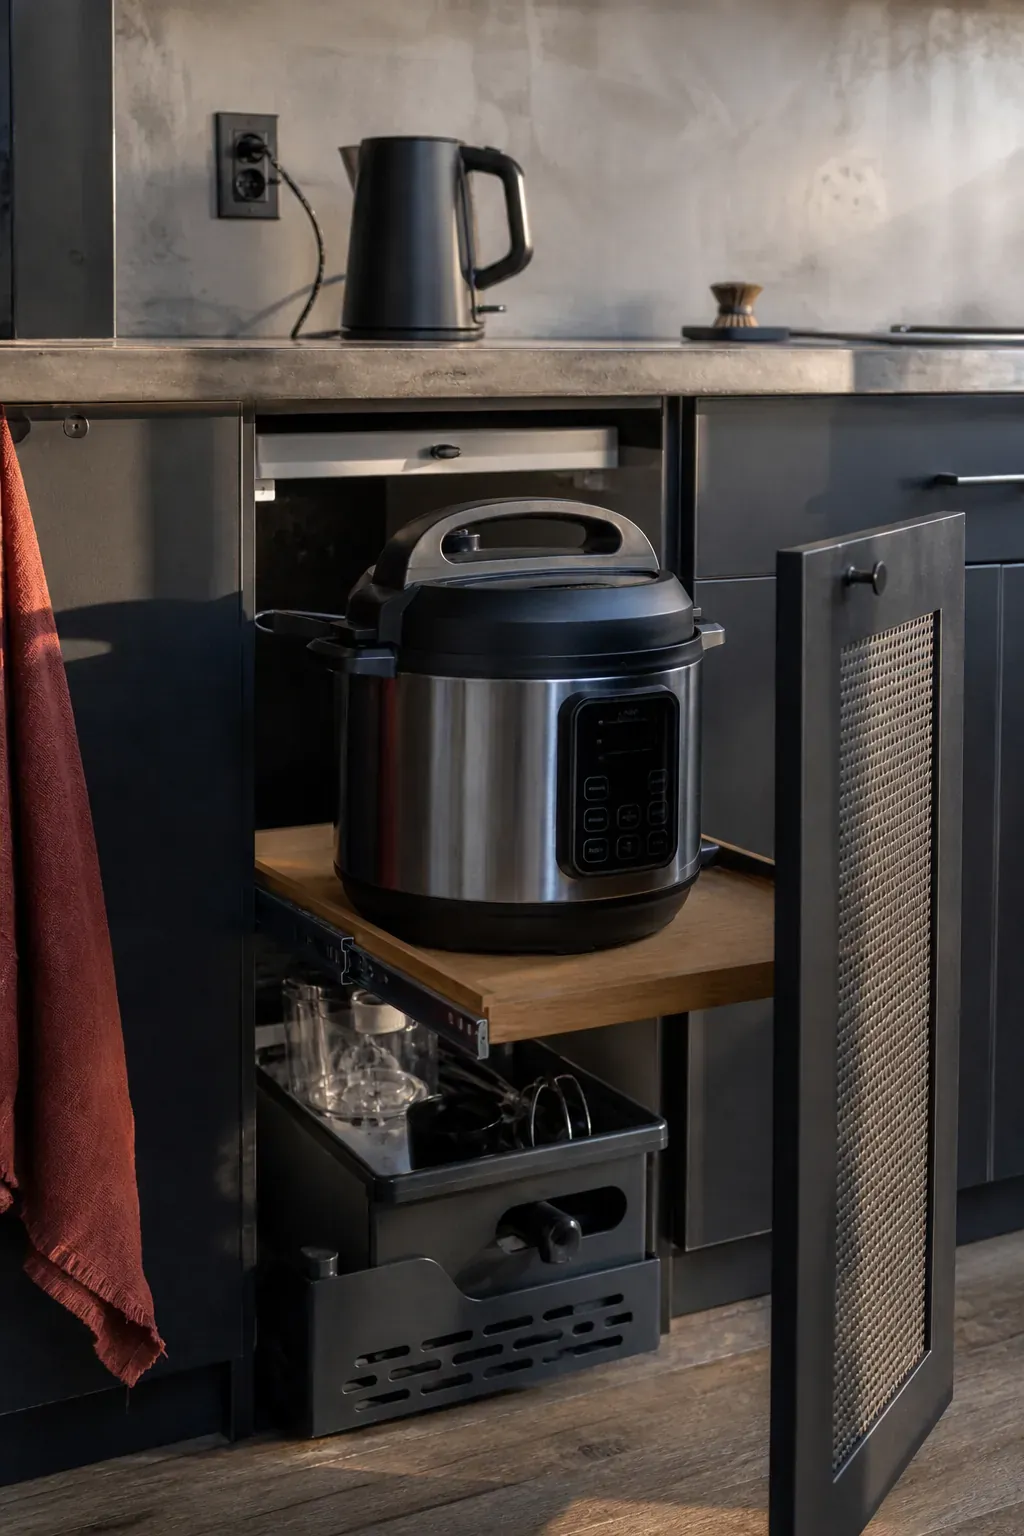
Counter space should go to appliances used most days. Weekly appliances belong in an easy lower cabinet, while rarely used machines should justify the difficult shelf they occupy. Where possible, choose tools that perform several real jobs rather than buying a separate appliance for each task.
Do not bury a heavy cooker behind fragile bowls. A sturdy pull-out shelf can make frequent use safer, but confirm load ratings and ventilation requirements. Route cords so they cannot fall behind drawers or cross a wet area. The cooking zone should feel ready, not permanently plugged in.
Use the cabinet doors for shallow storage
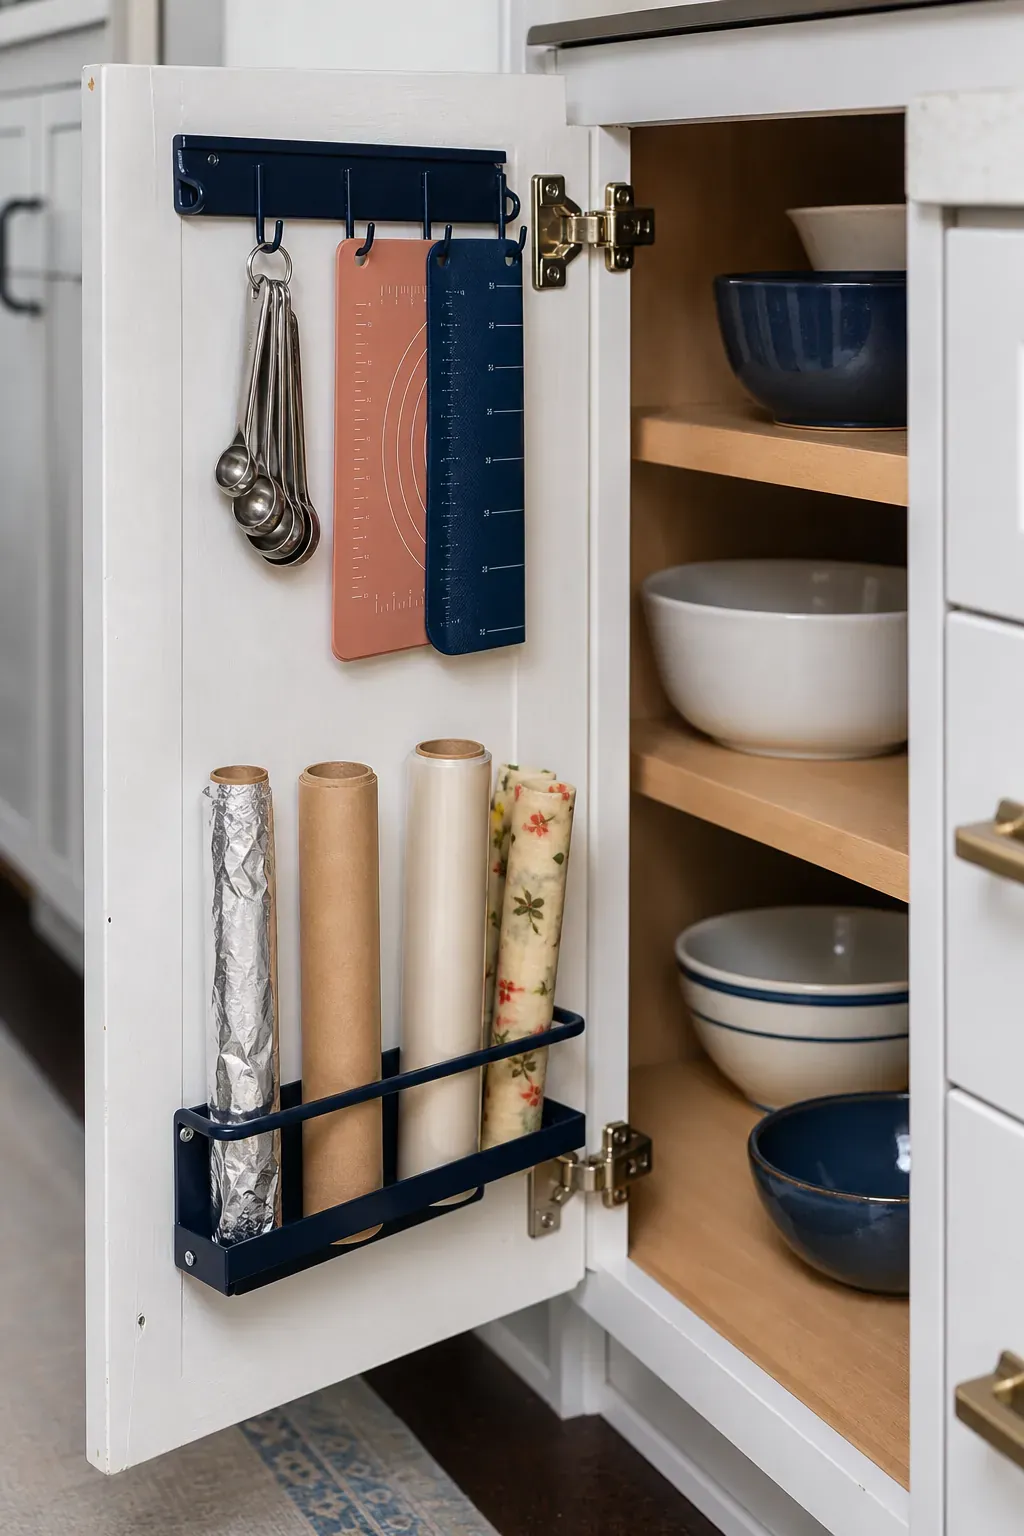
Cabinet doors can hold wraps, slim cutting mats, measuring spoons, pot lids, or cleaning cloths when the organizer is shallow and securely fixed. This turns unused depth into access without covering the room in open storage.
Close the door slowly before committing. The rack must clear shelves, hinges, and everything already inside. Avoid loading solid-wood boards or glass lids onto a lightweight door. Door storage is a precision move, not permission to add more possessions.
Add a flexible overflow zone outside the cabinet run
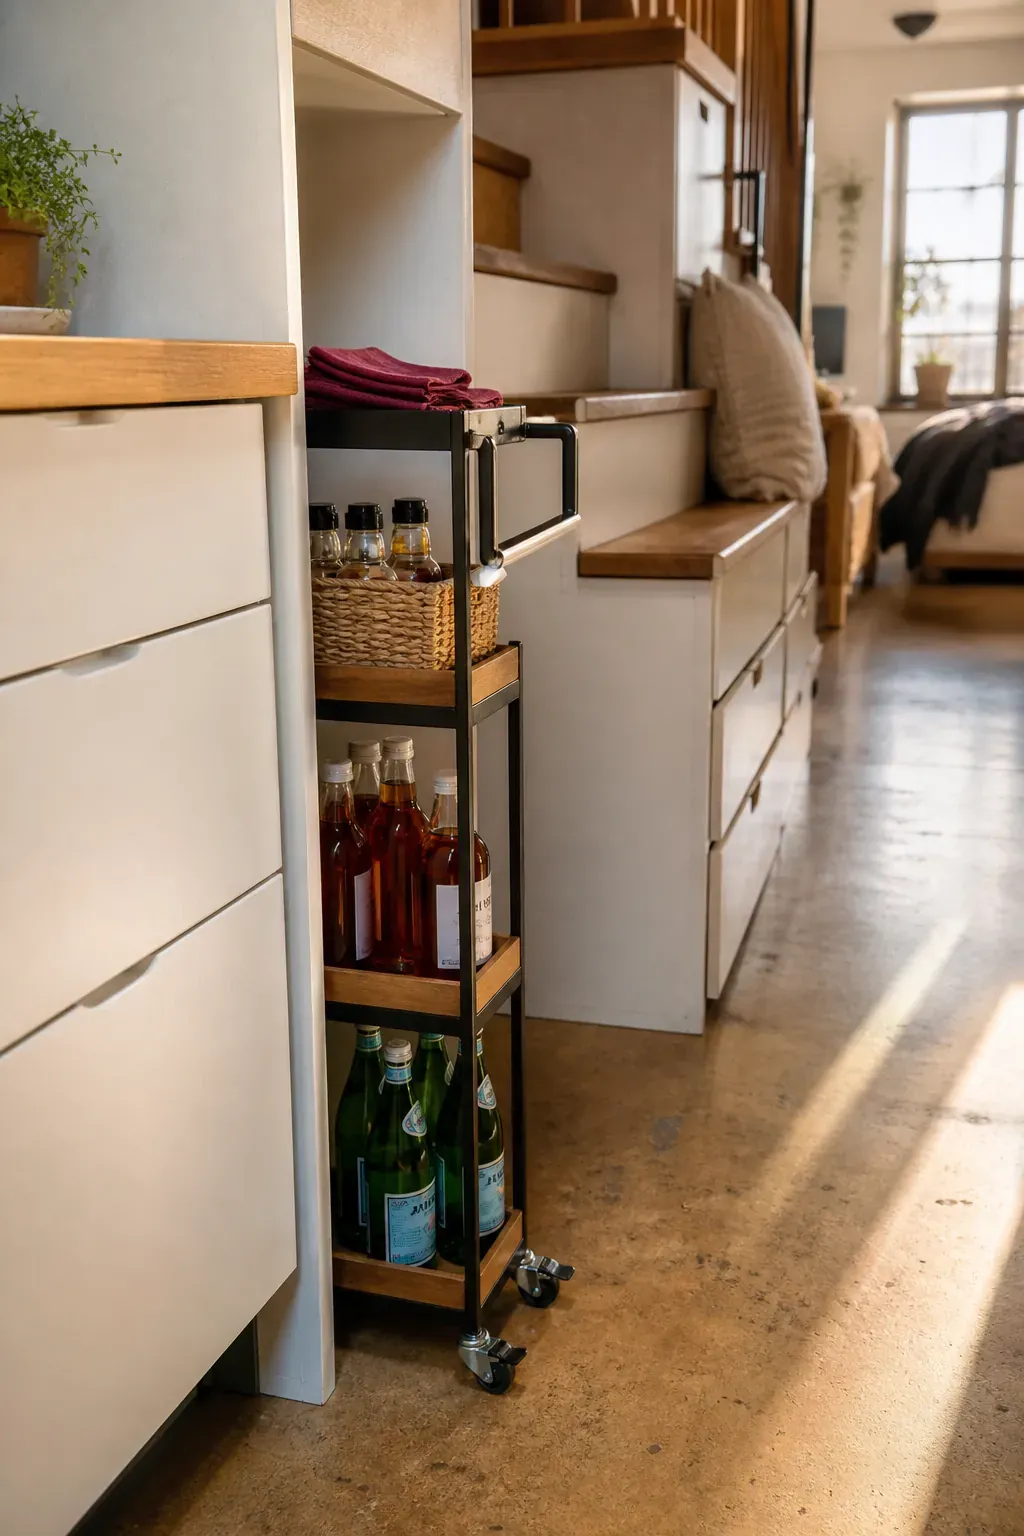
A narrow rolling cart, stair drawer, or built-in bench compartment can absorb a category that does not fit the main cabinet run. The best candidate is cohesive and movable: beverages, bulk dry goods, pet feeding supplies, or serving pieces. Avoid turning it into a landing strip for random objects.
Keep circulation sacred. A cart must park fully out of the aisle and should not block an exit, heater, or cabinet door. Locking casters matter in a mobile tiny house. Treat this as planned overflow with a label and capacity, not as proof that the kitchen can keep expanding.
Leave one cabinet zone intentionally adjustable
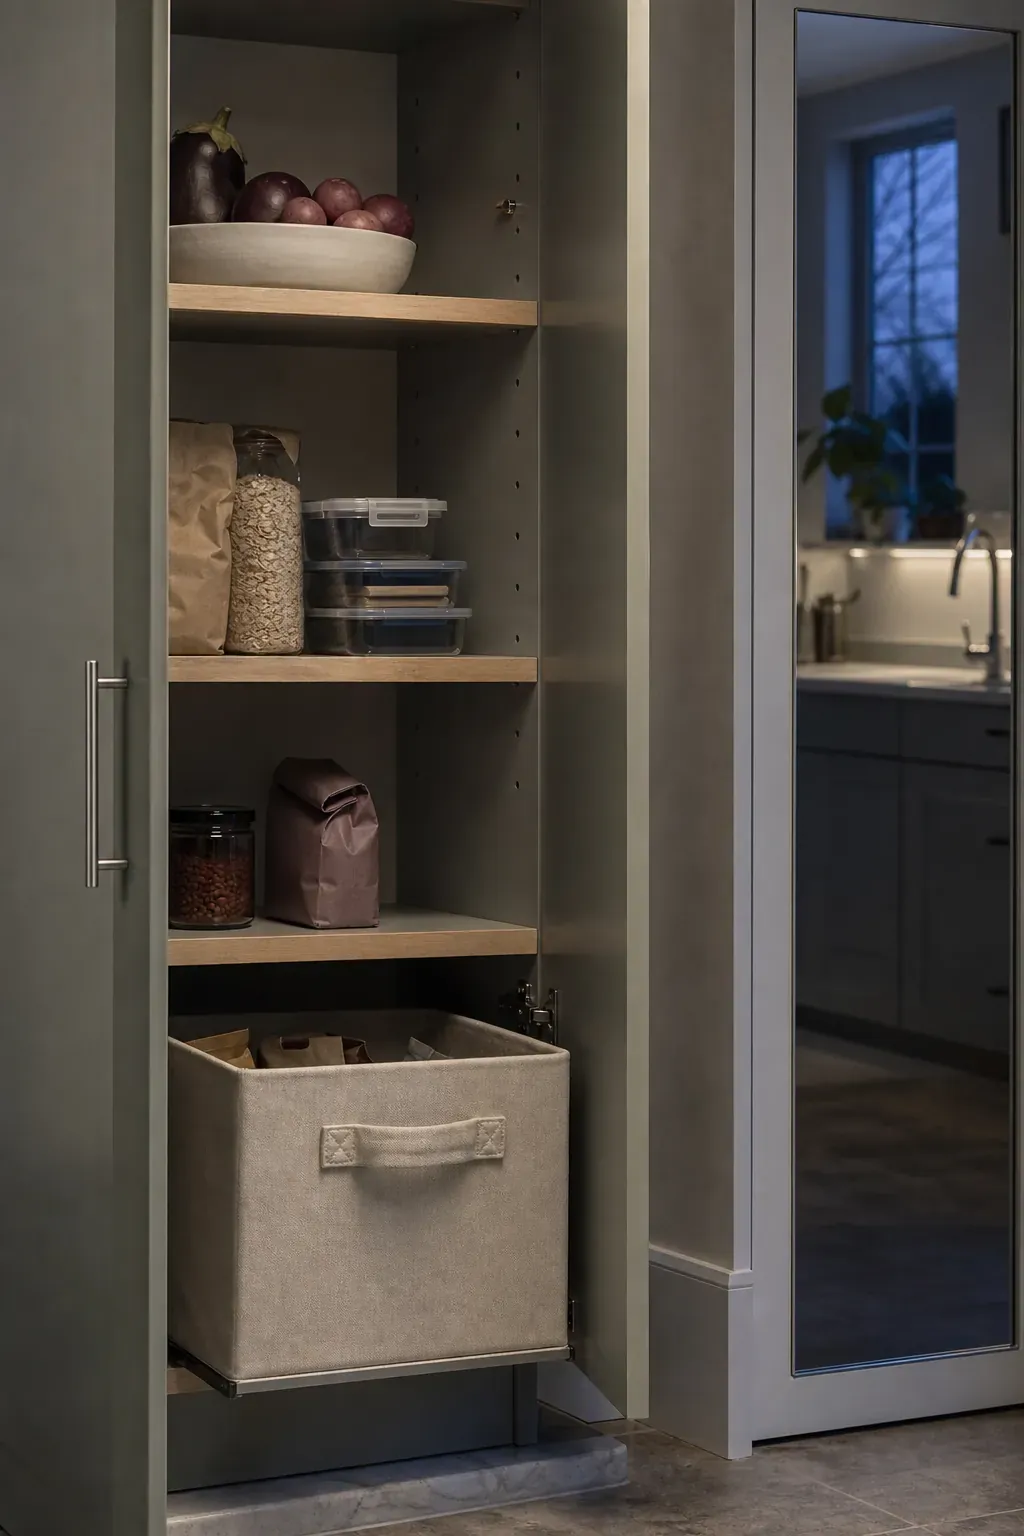
No kitchen organization plan survives unchanged. Groceries vary, a new appliance may replace an old one, and routines shift with work schedules or seasons. One adjustable shelf or partially open bin gives the system room to absorb those changes without contaminating every other zone.
Review it when putting away groceries becomes awkward. Move shelf pins, retire an unused tool, or change the category boundary before buying another organizer. A designed tiny house kitchen is not packed to maximum capacity; it is easy to understand and easy to reset. When every cabinet supports a real action, the room gains something more valuable than storage: a dependable flow from prep to cooking to cleanup.