
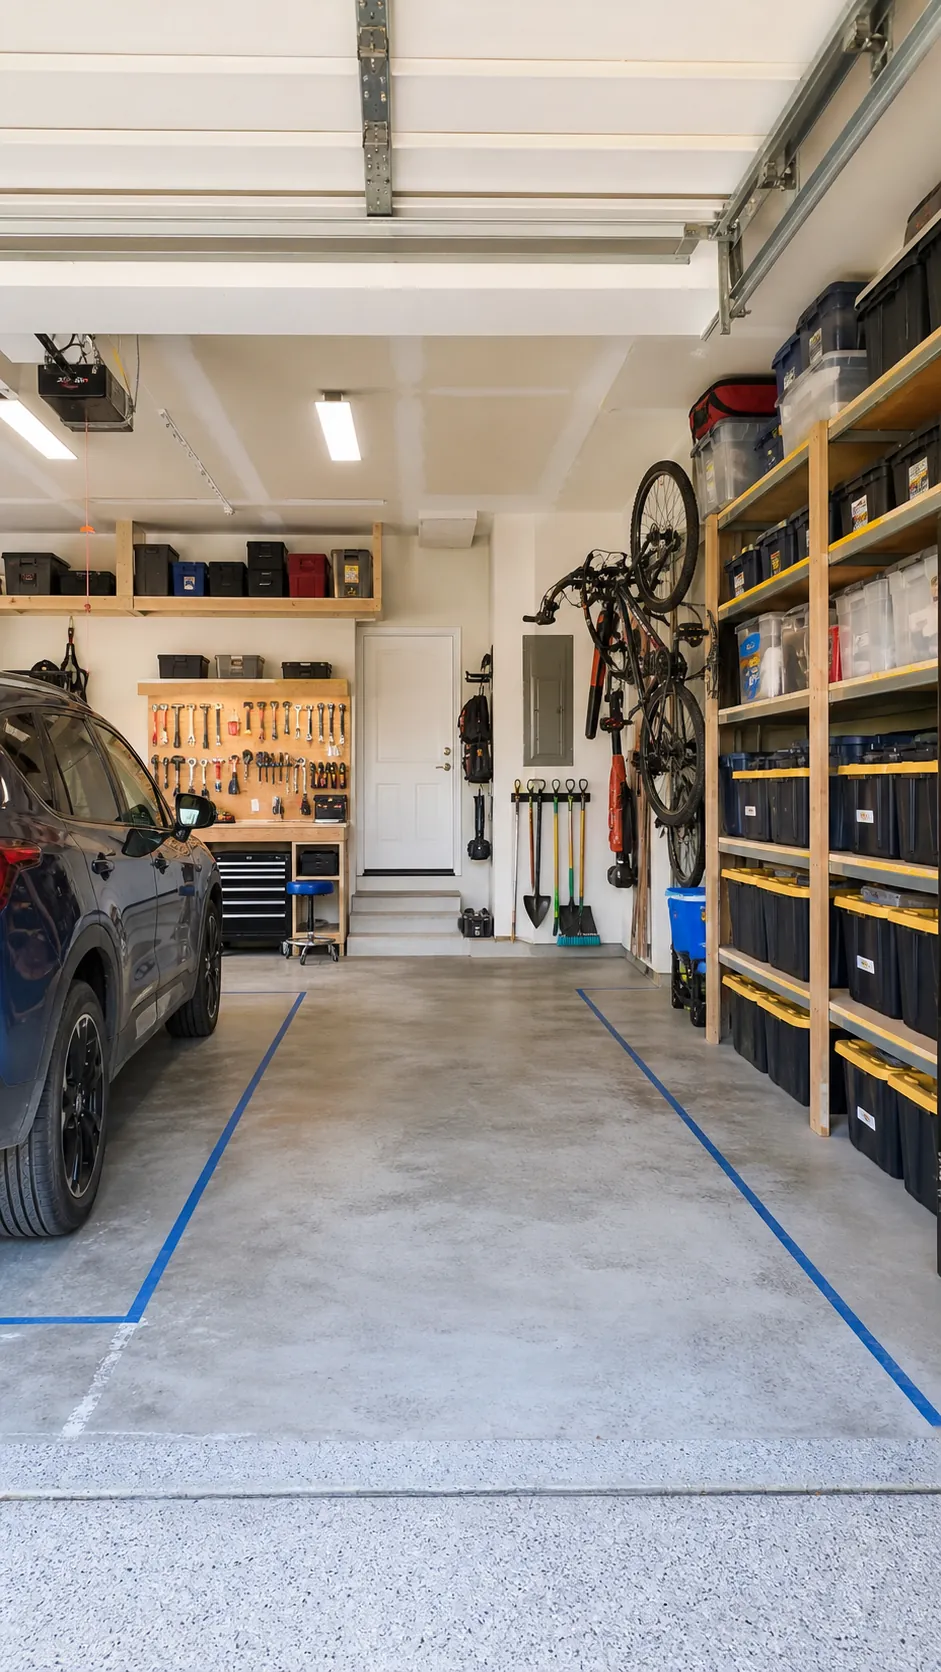
A garage gets organized when every storage decision protects parking, work, and access—not when every wall is simply covered with shelves. Start by removing trash and donations, group what remains, measure the cars and utilities, then build only for categories you actually own. These 30 garage organization ideas DIY projects range from nearly free to weekend builds.
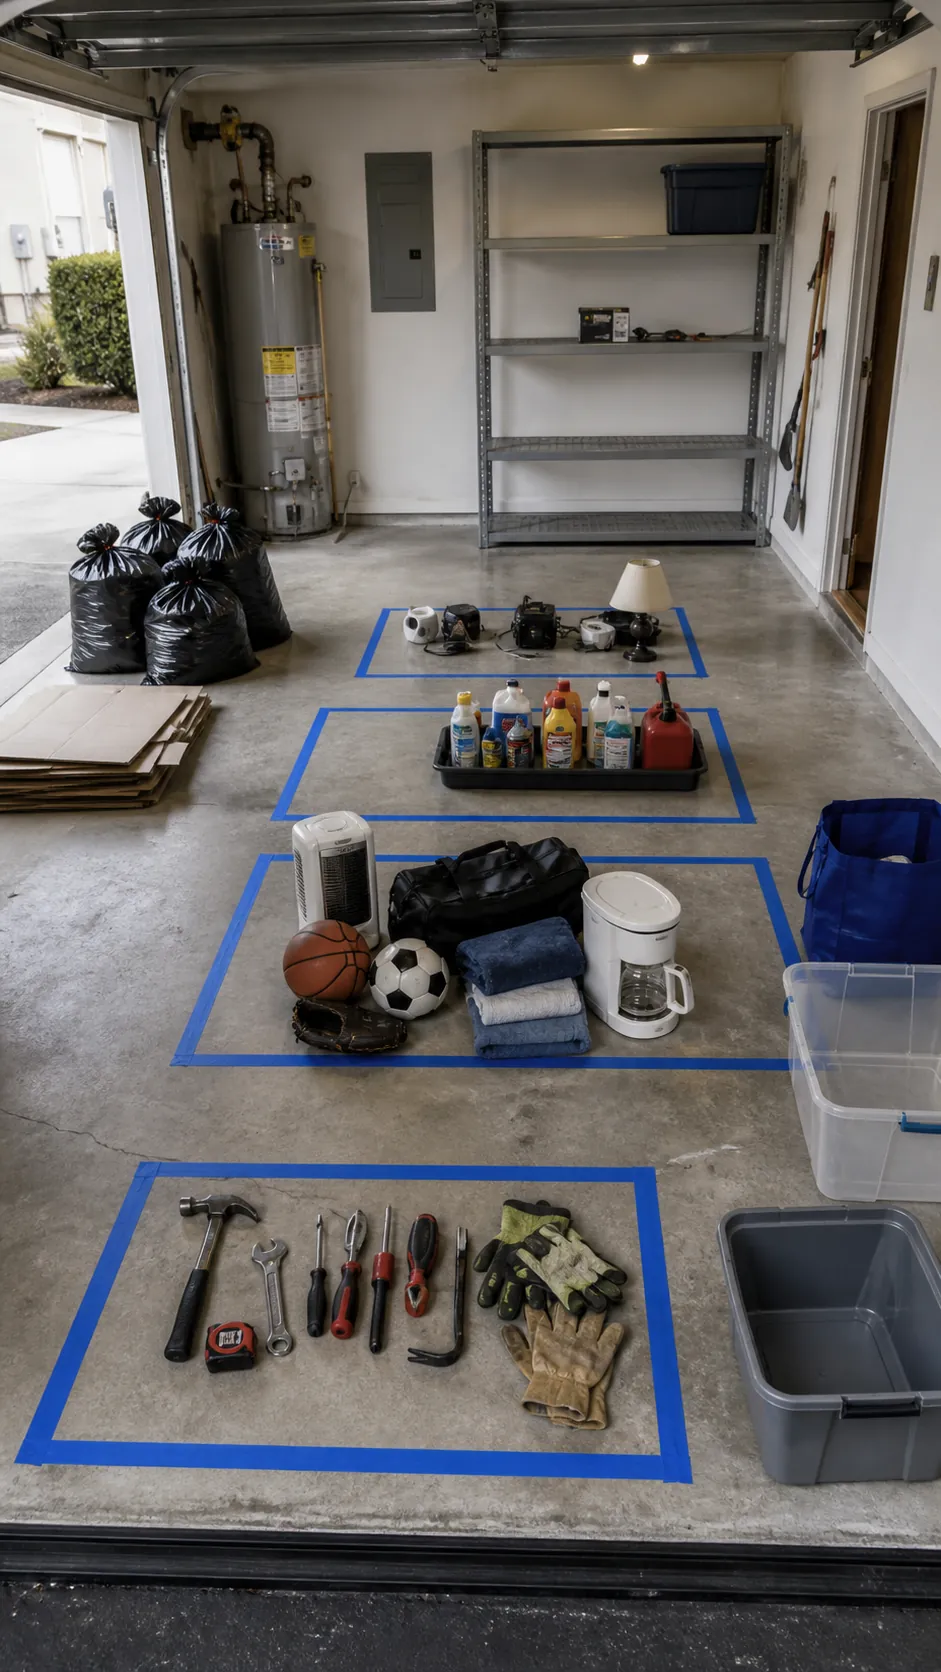
Sort on a taped floor grid
Mark keep, donate, hazardous waste, and undecided zones with painter’s tape. Work one shelf or box at a time so the driveway never becomes an unmanageable pile. In a shared garage, let each owner decide on personal tools.
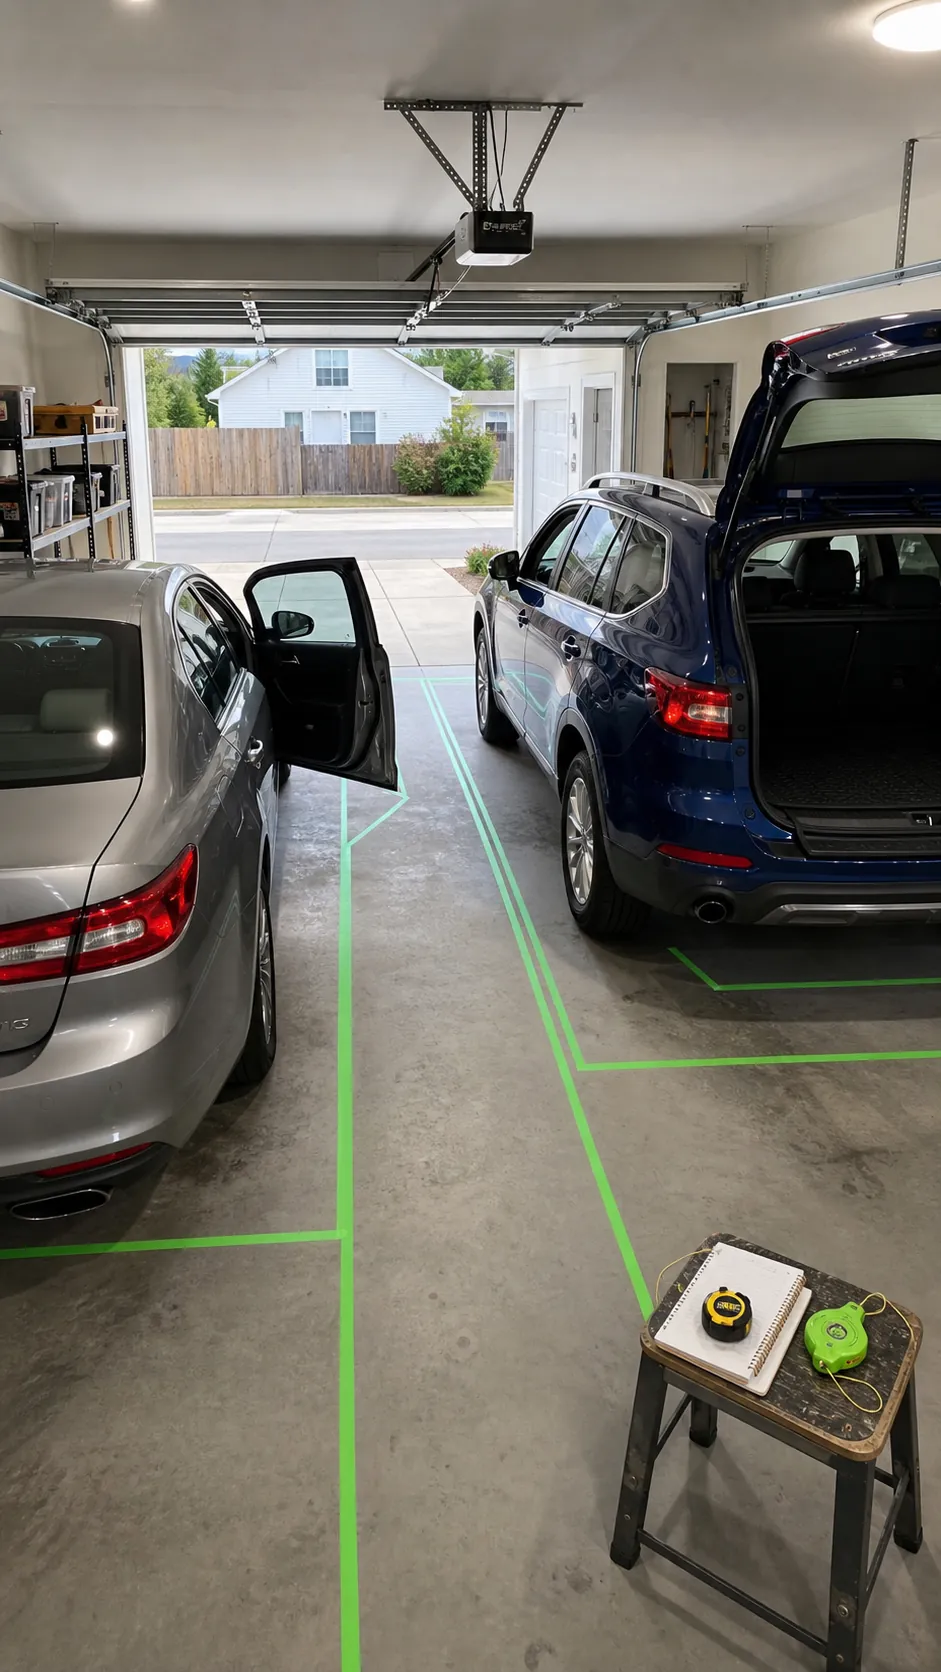
Trace the parked-car clearance
Park both vehicles, open every door and hatch, then tape the required envelope on the floor and walls. Storage belongs outside this working space. This prevents deep shelves from becoming an expensive obstacle.
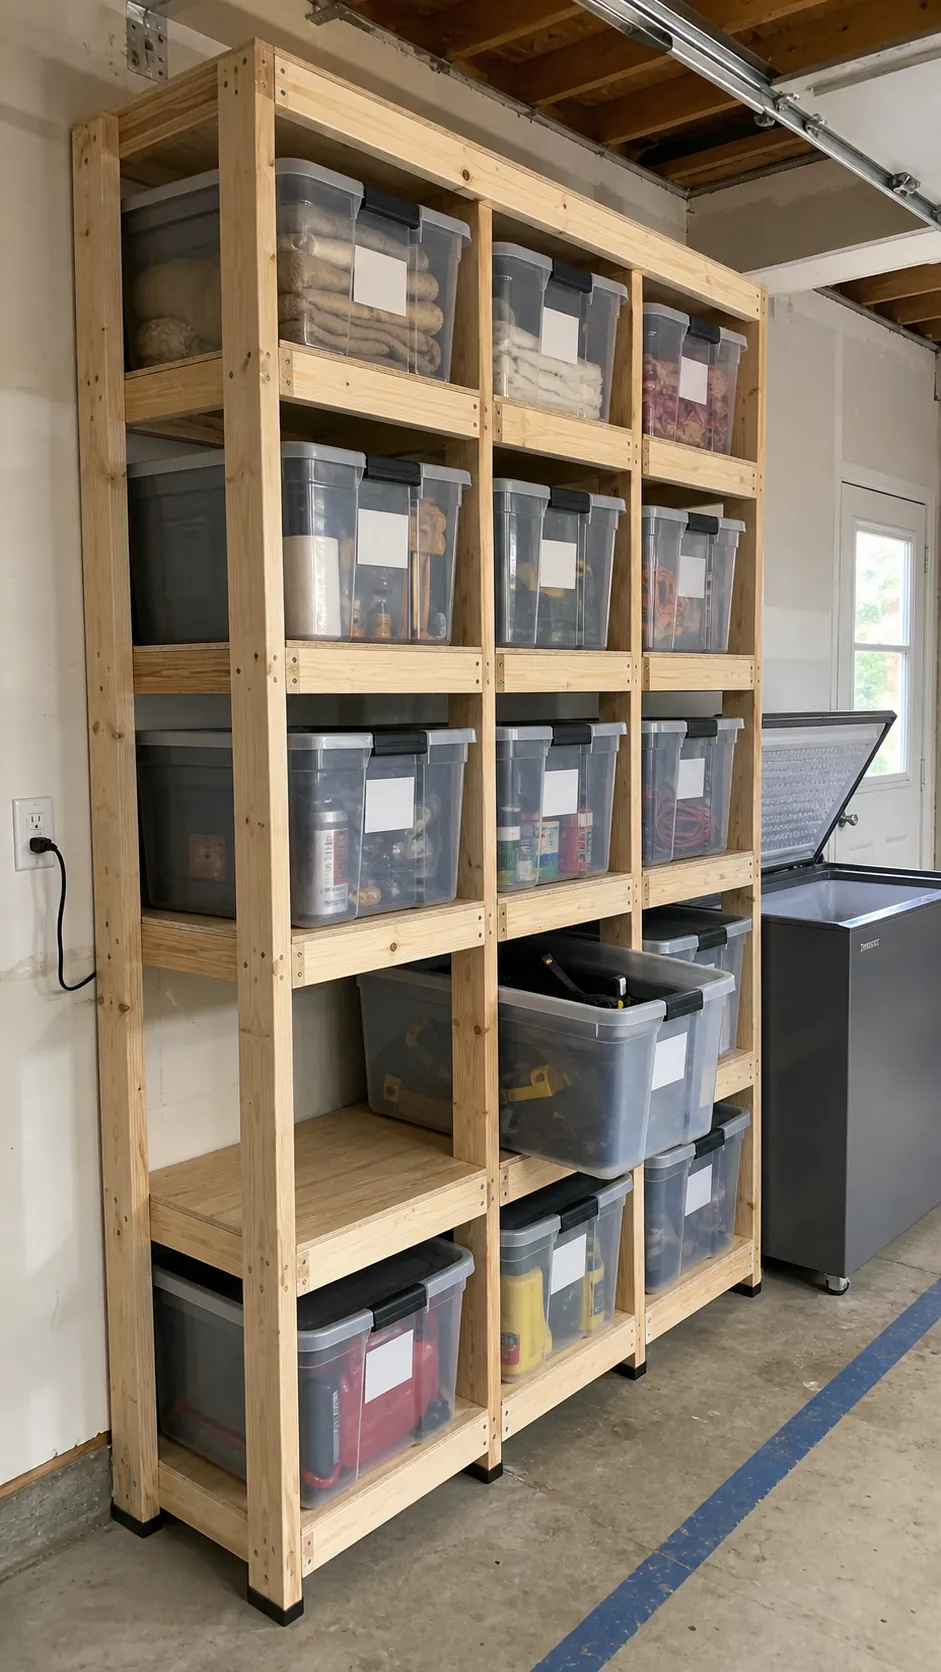
Build shelves around your bins
Choose durable lidded totes first, then set shelf width, depth, and spacing around them. A made-to-fit 2×4 rack wastes less air and lets each bin slide out without unstacking the row above.
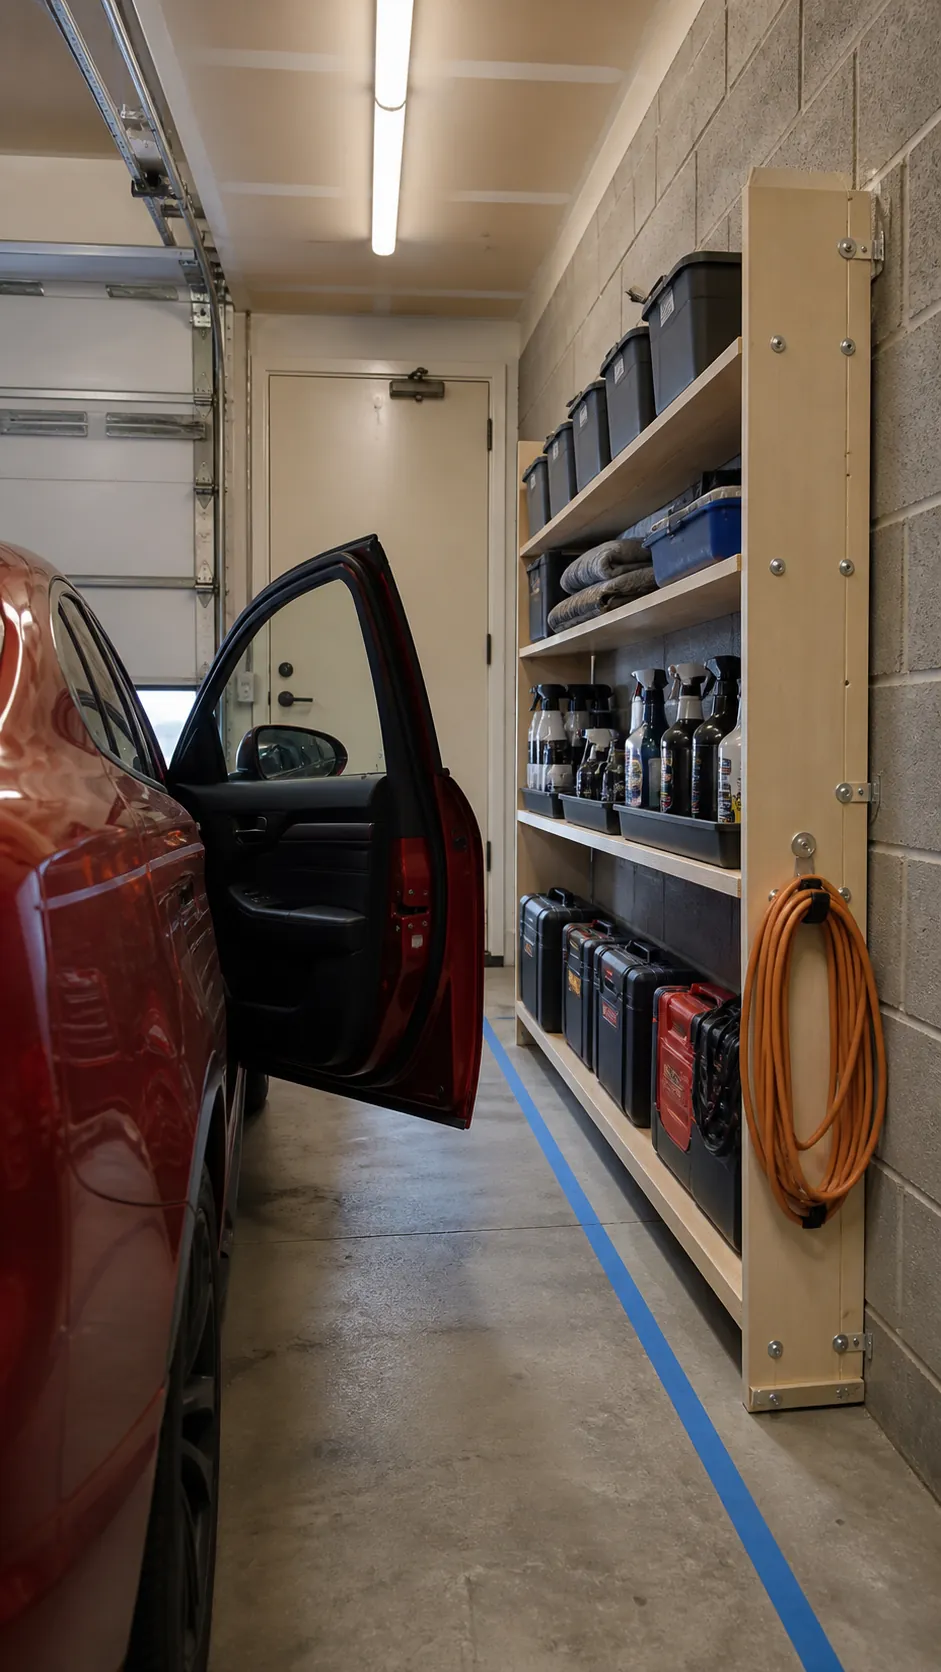
Anchor a shallow wall rack
When cars leave little side clearance, build a rack only as deep as the narrowest useful tote. Fasten it to studs, add a raised toe, and keep heavy containers between knee and shoulder height.
Create a French-cleat tool wall
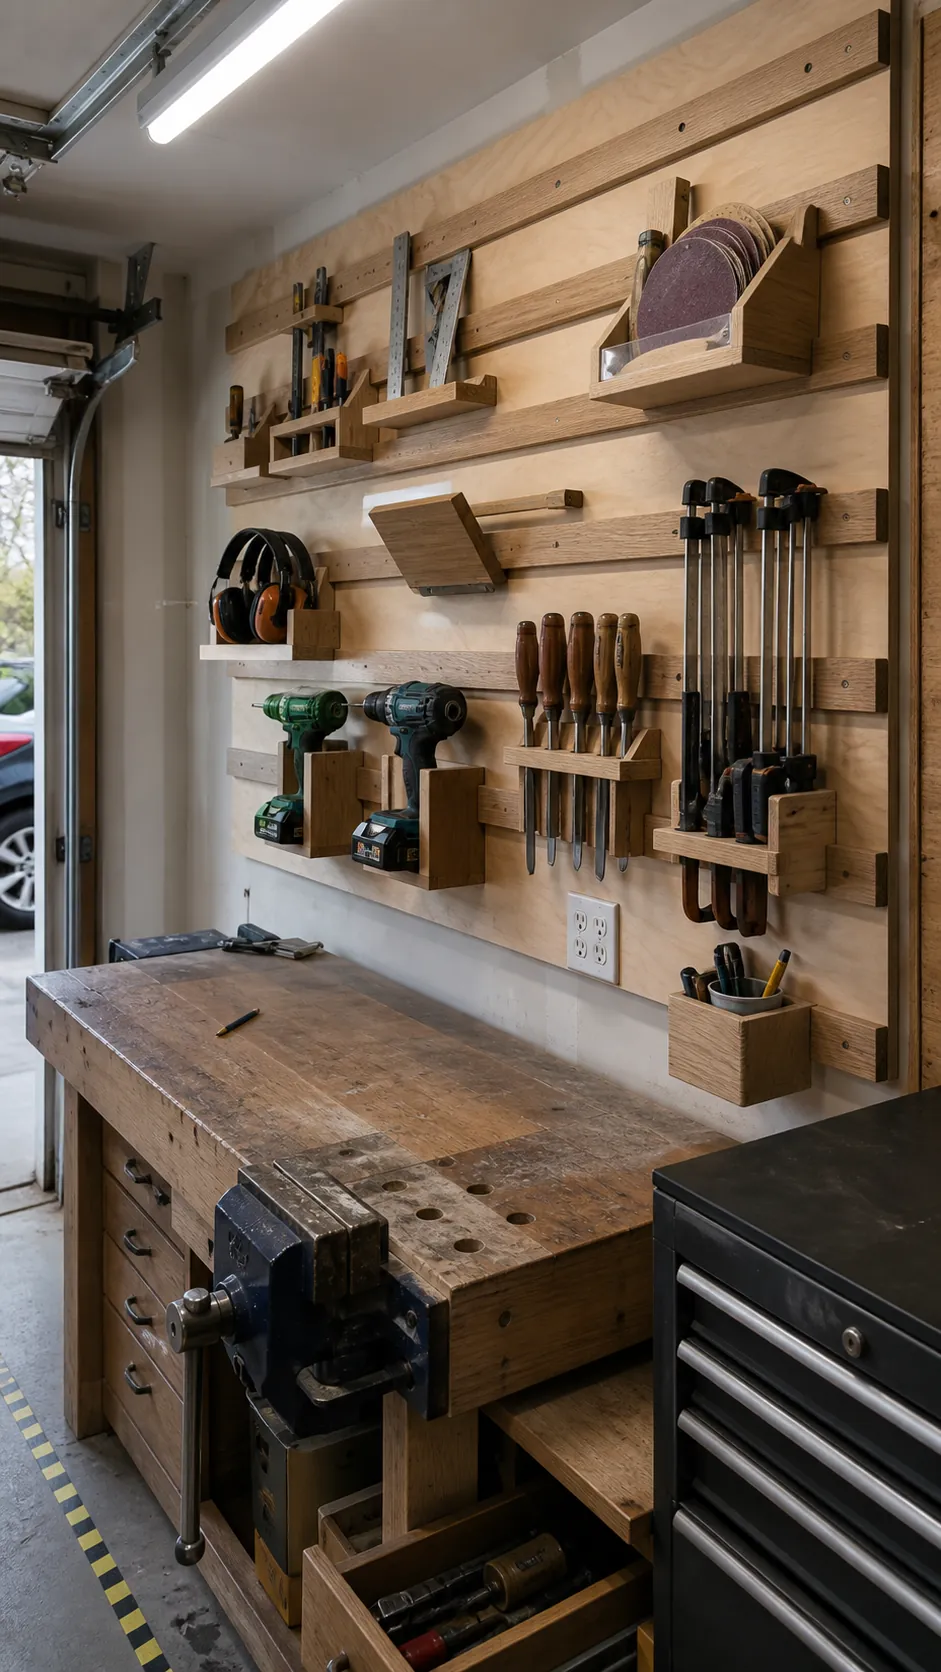
Rip plywood strips with matching bevels, secure the wall cleats to studs, and hang custom holders for tools you use. The system rearranges without filling the wall with new holes and holds odd shapes better than loose pegboard hooks.
Frame pegboard with real spacers
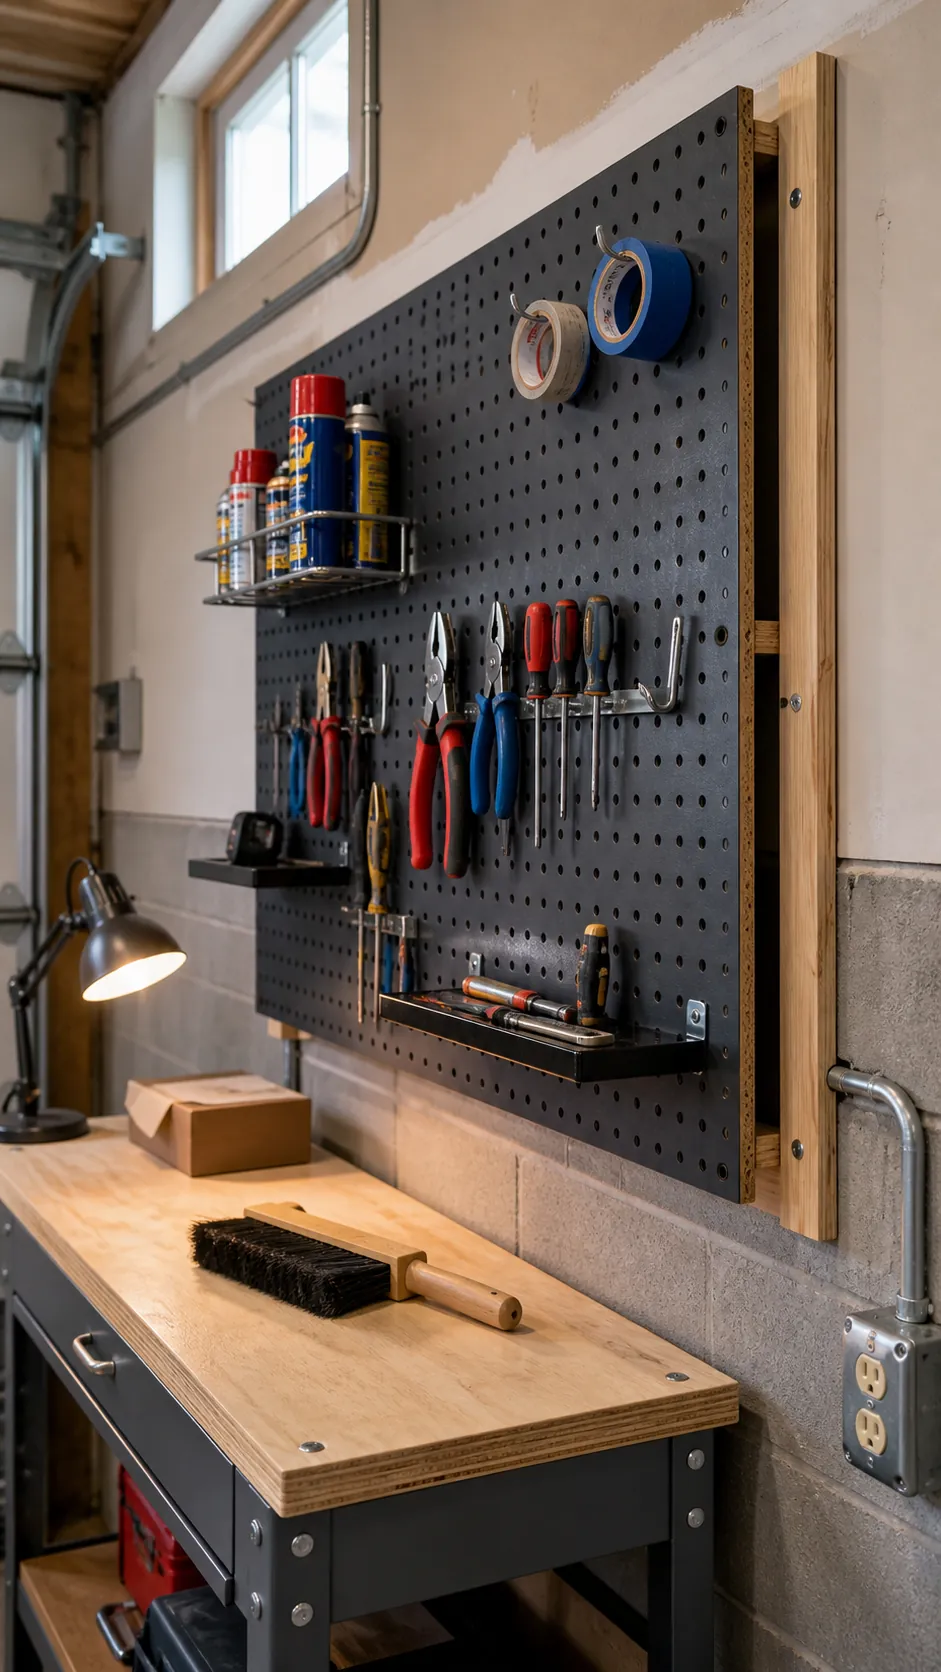
Pegboard needs a gap behind it for hooks. Mount it over 1×2 furring strips secured to studs, then choose locking accessories that fit the board standard. Outline only frequently used tools so resetting the bench stays easy.
Turn scrap PVC into tool sleeves
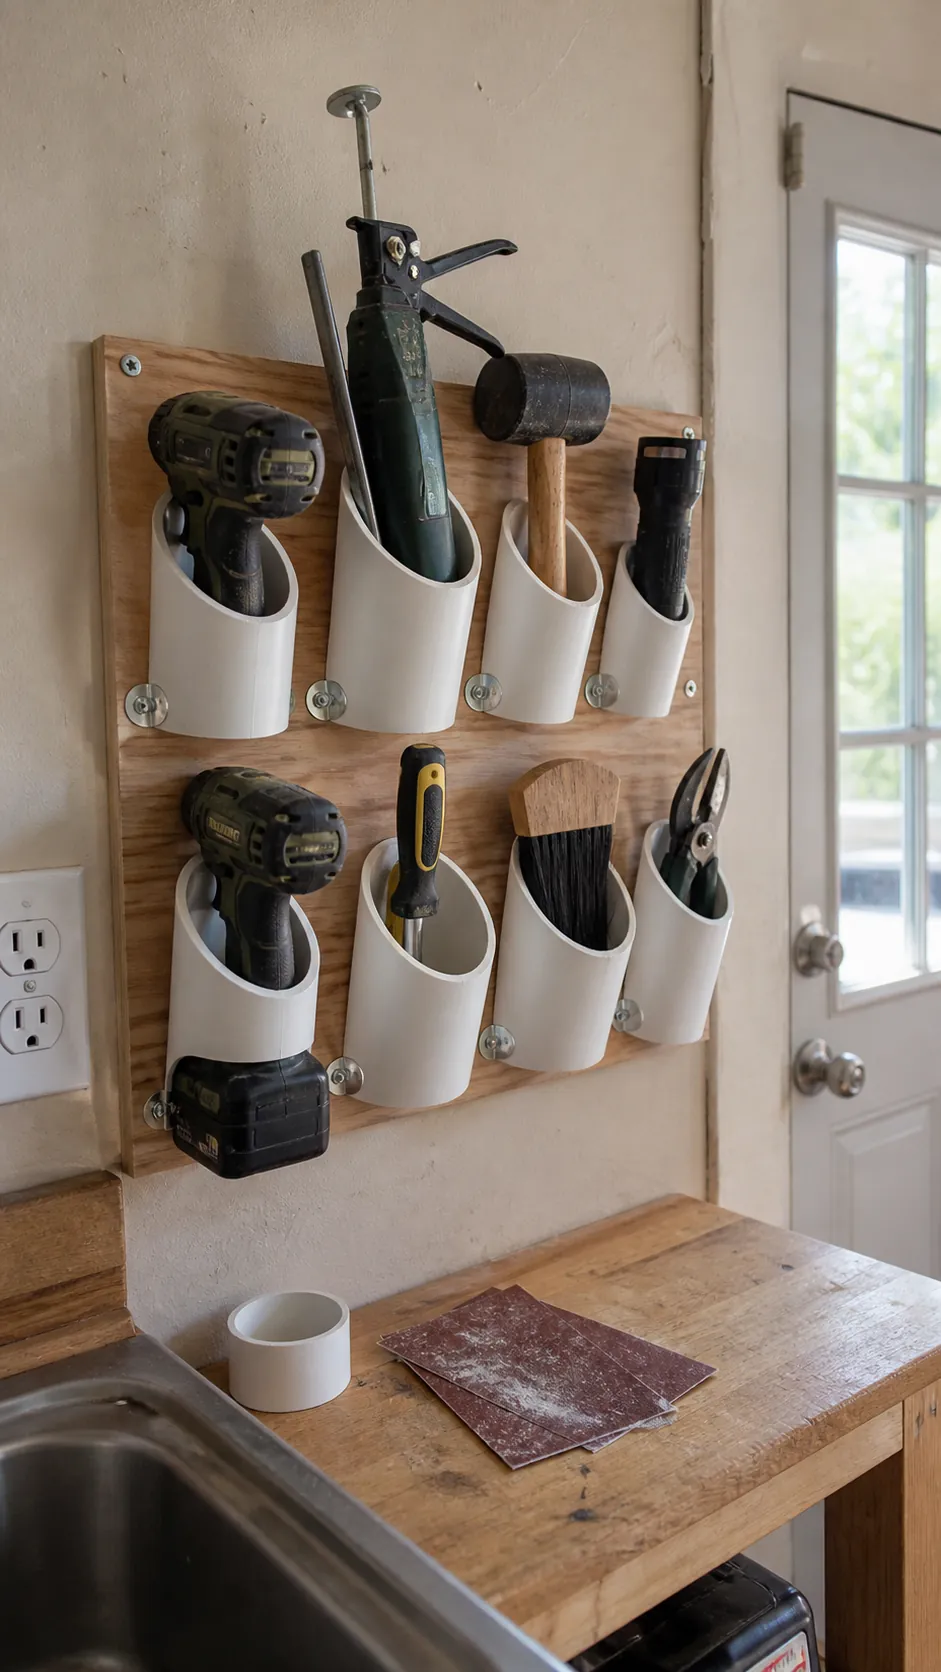
Short angled sections of wide PVC screwed to a backing board hold drills, caulk guns, and long-handled hand tools. Sand every cut edge and match each sleeve diameter to the handle it supports.
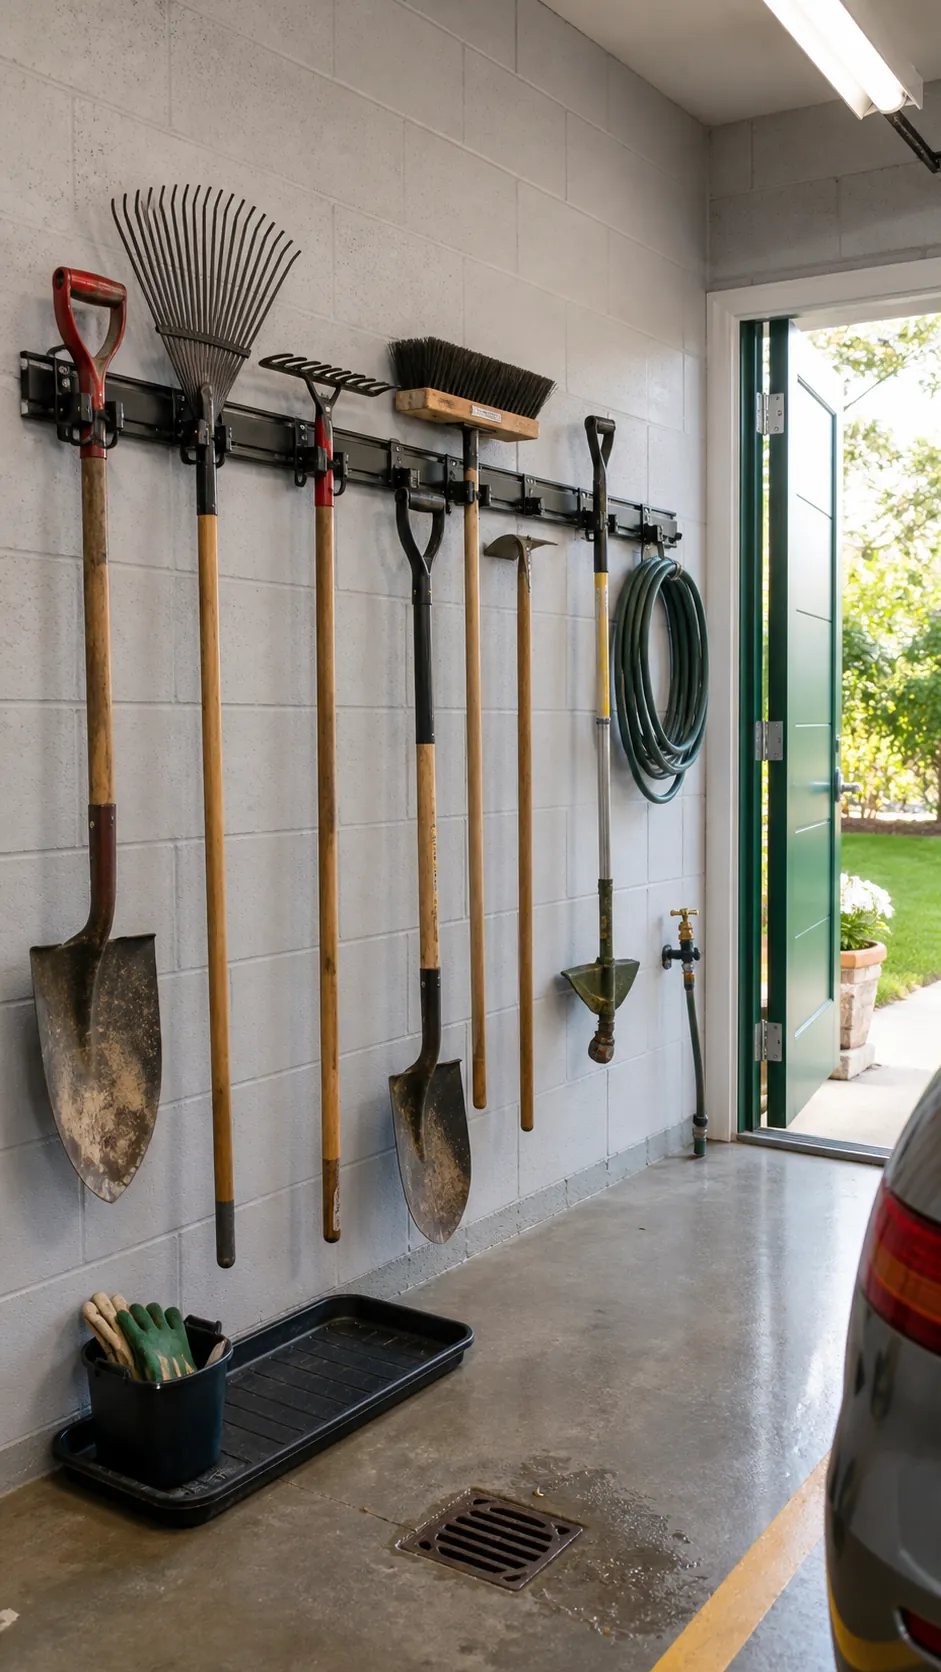
Hang garden tools on a rail
A continuous rail with locking hooks adapts to rakes, shovels, brooms, and trimmers. Put the most-used tool nearest the exterior door and alternate handle heights so bulky heads do not collide.
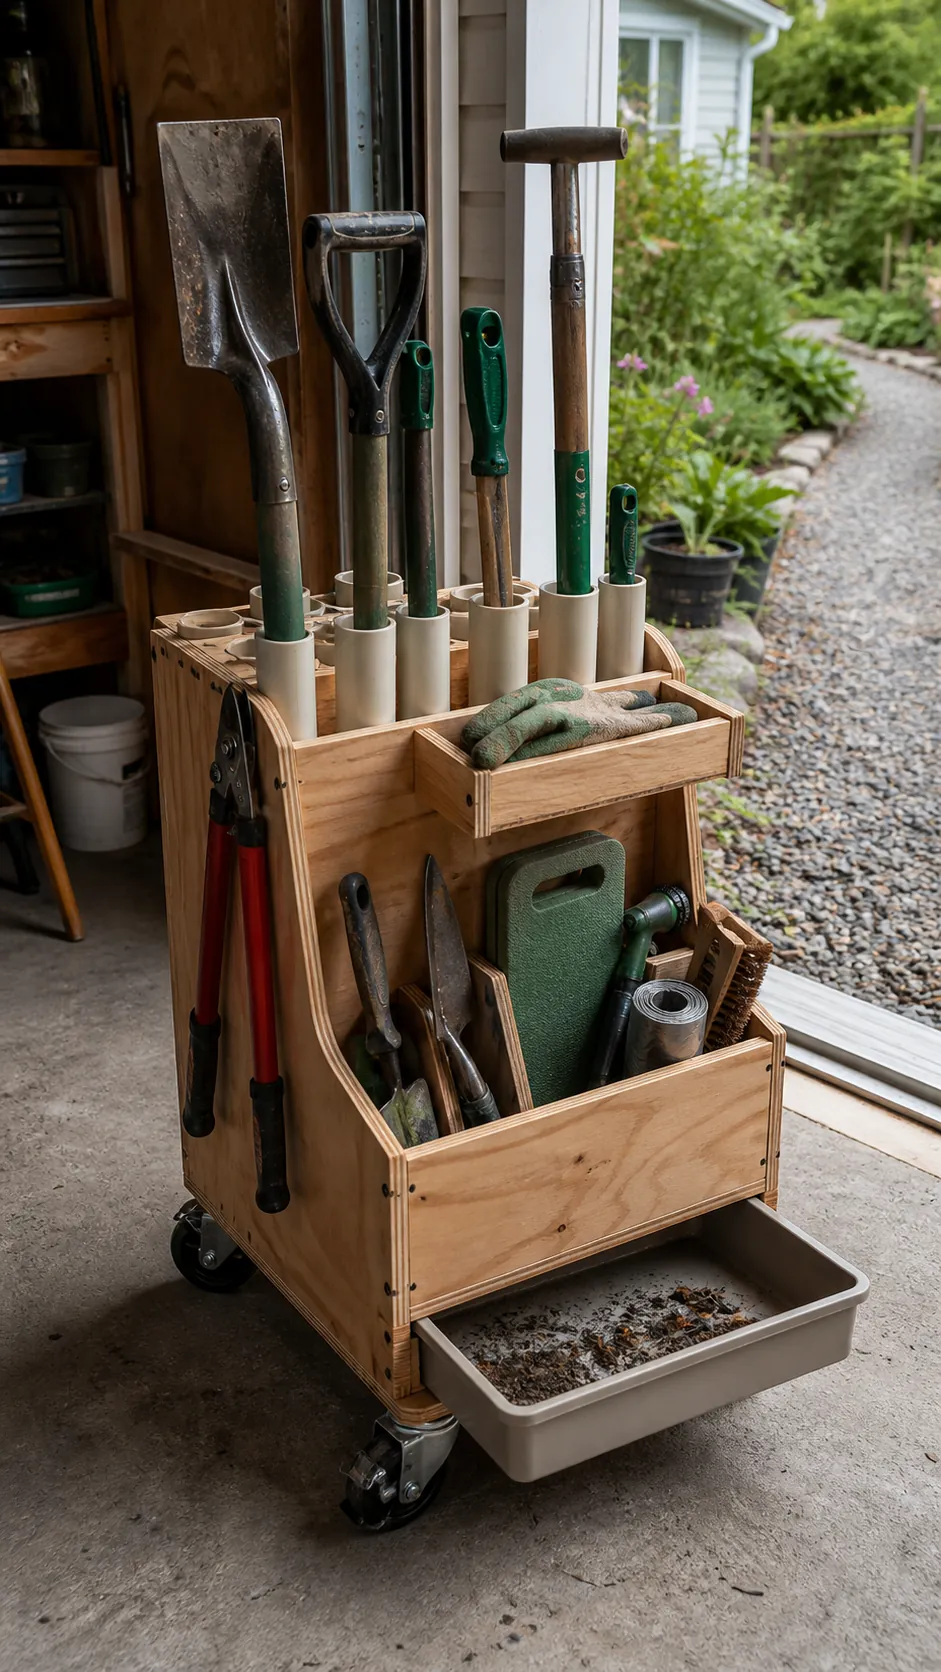
Make a rolling yard-tool cart
If garden work happens at both ends of the property, build a narrow plywood cart with vertical dividers and locking casters. It keeps dirty tools together and rolls outside for cleanup.
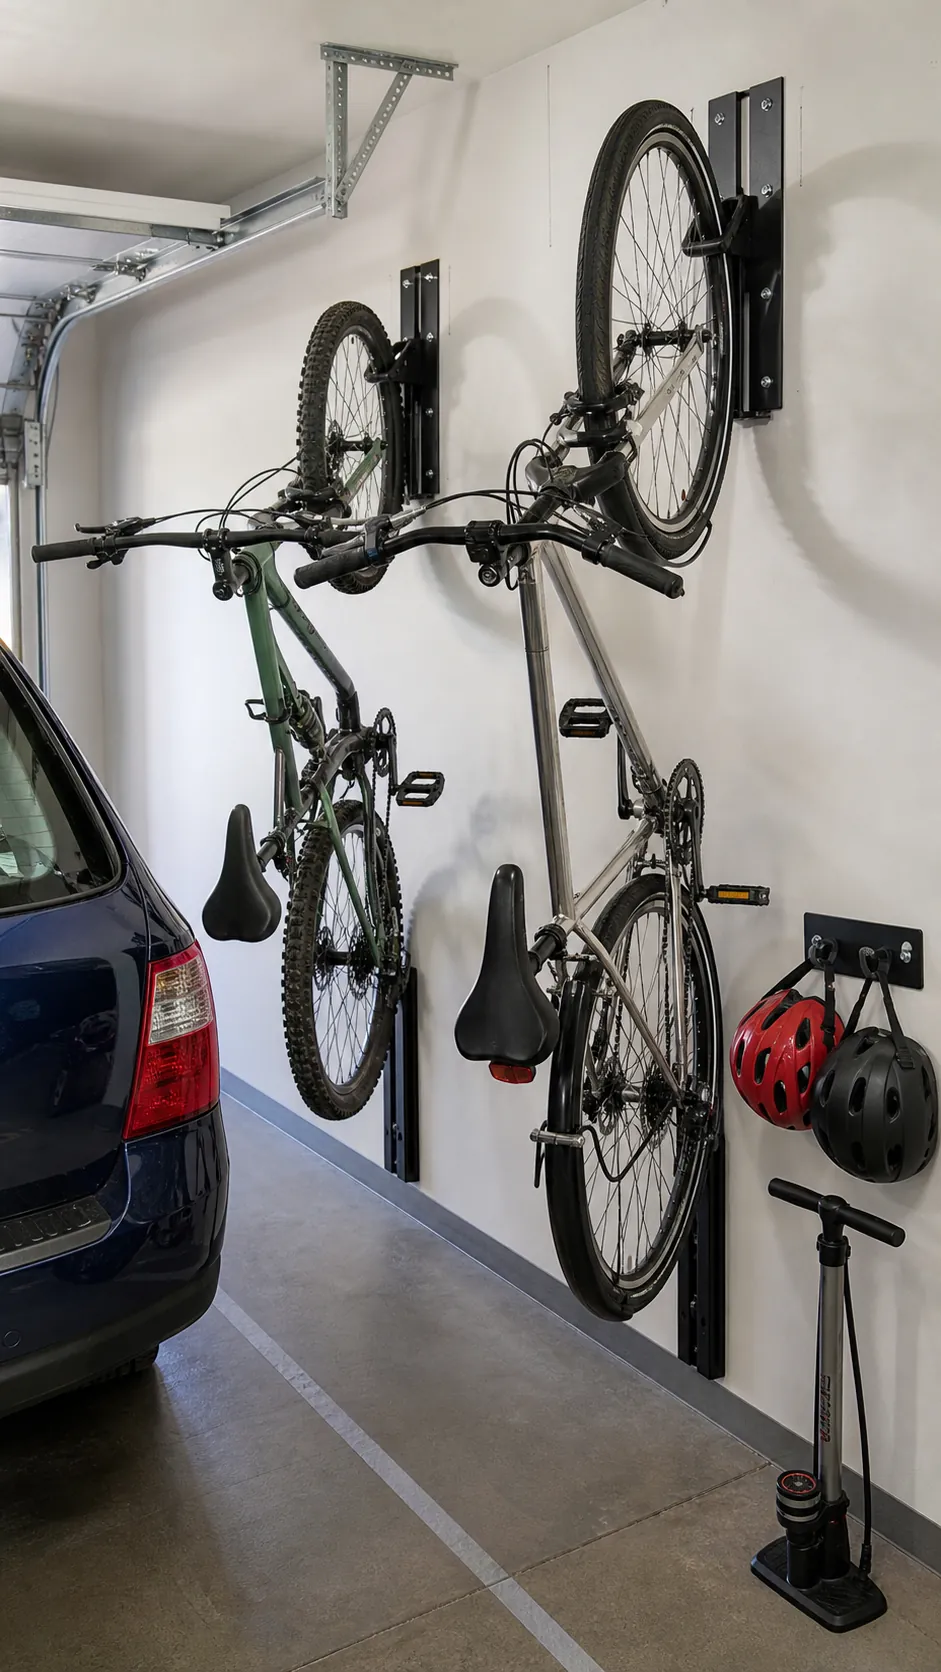
Store bikes on swivel mounts
Wall-mounted swivel hooks let bikes fold closer to the wall after loading. Locate mounts into framing, stagger heights for handlebars, and verify that pedals stay outside the car-door zone.
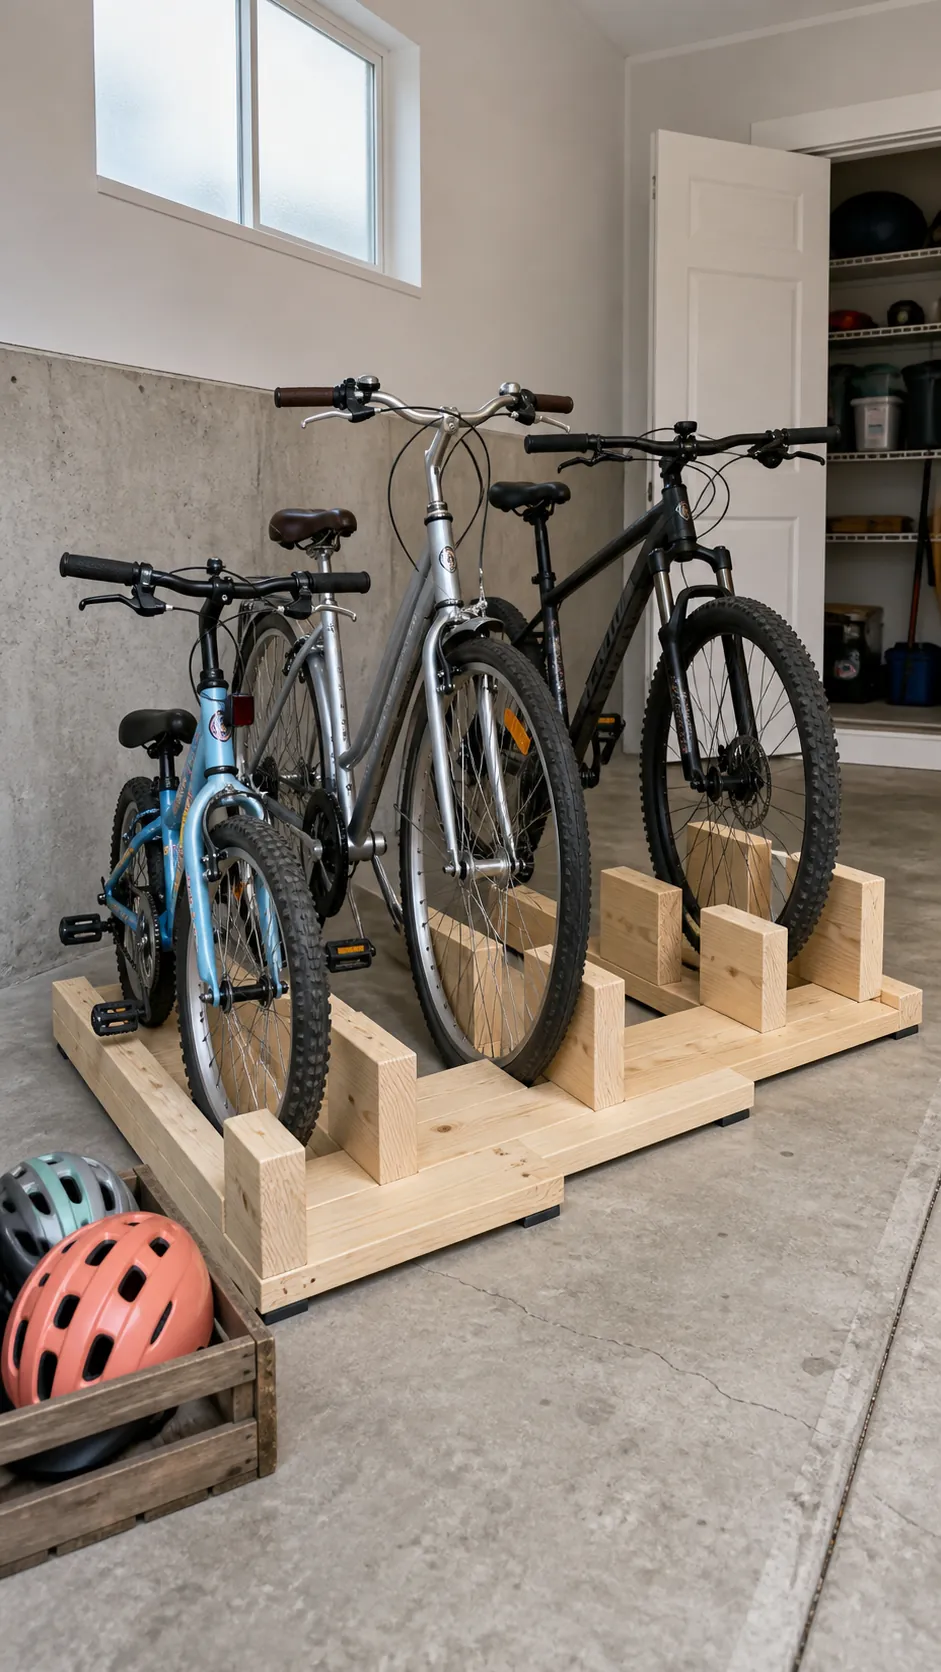
Build a freestanding bike corral
Renters can make a weighted 2×4 rack with alternating wheel slots. Space the uprights for real tire widths and add felt beneath the base so the unit can move without damaging the floor.
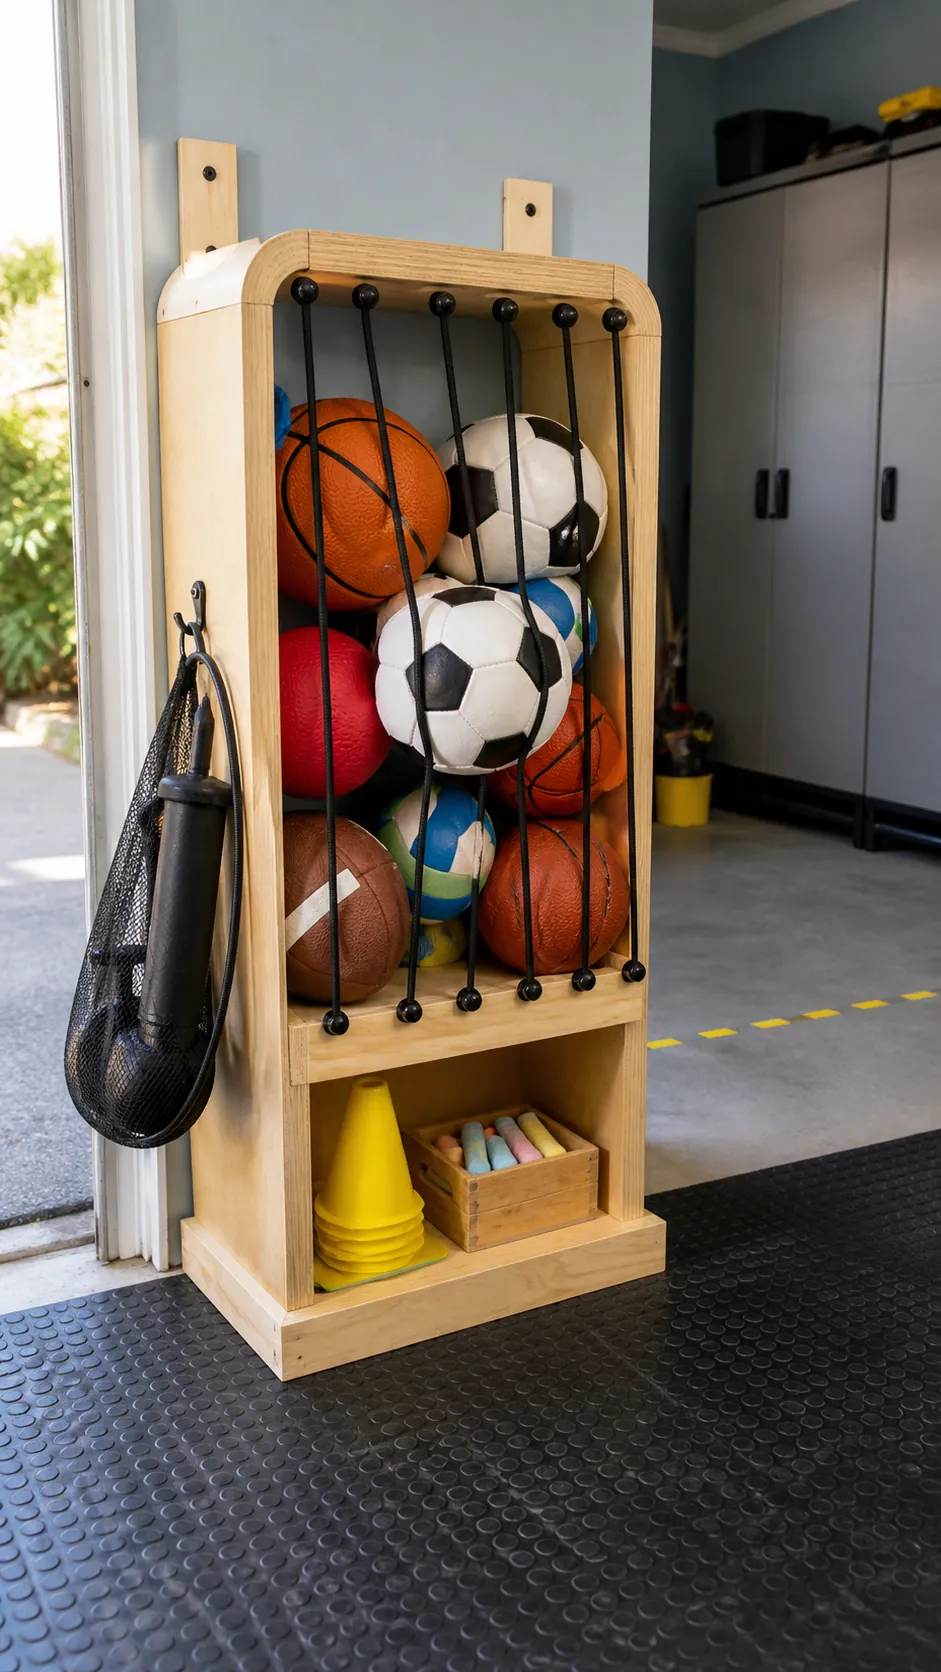
Give sports balls elastic bays
Stretch vertical bungee cords across a shallow frame so balls stay contained but pull out from the middle. Mount the bay low enough for children and away from sharp tools or vehicle paths.
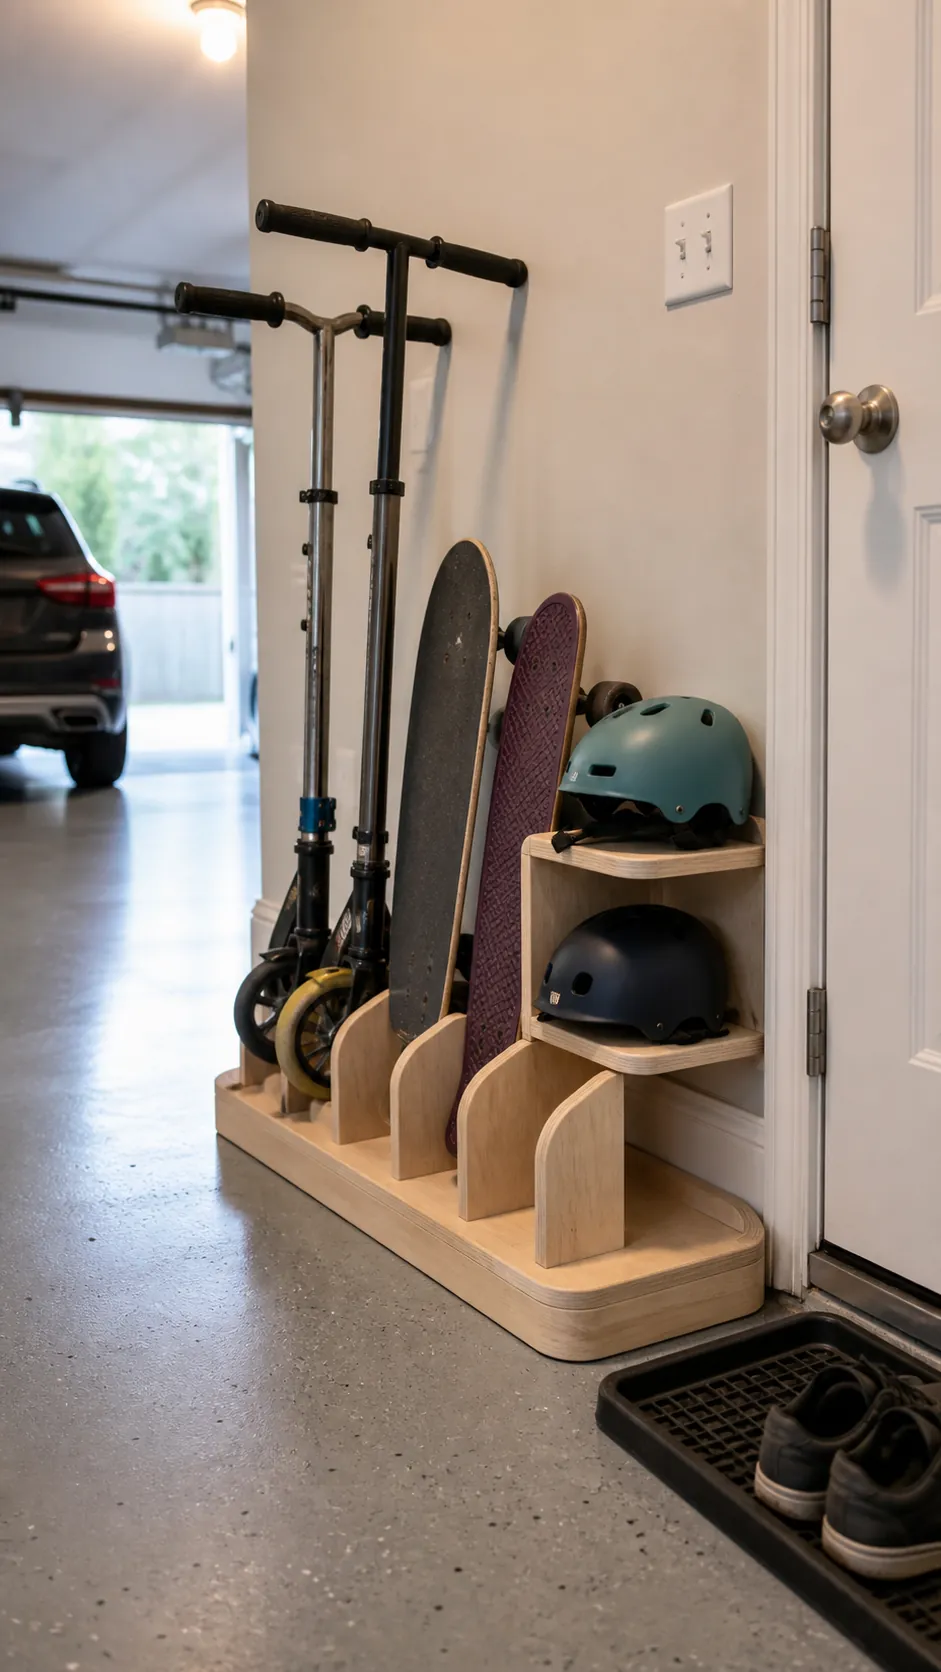
Park scooters in a floor dock
A scrap-plywood base with spaced vertical slots keeps scooters and skateboards upright. Round the edges, widen each slot for its wheel, and position the dock beside the household exit for grab-and-go use.
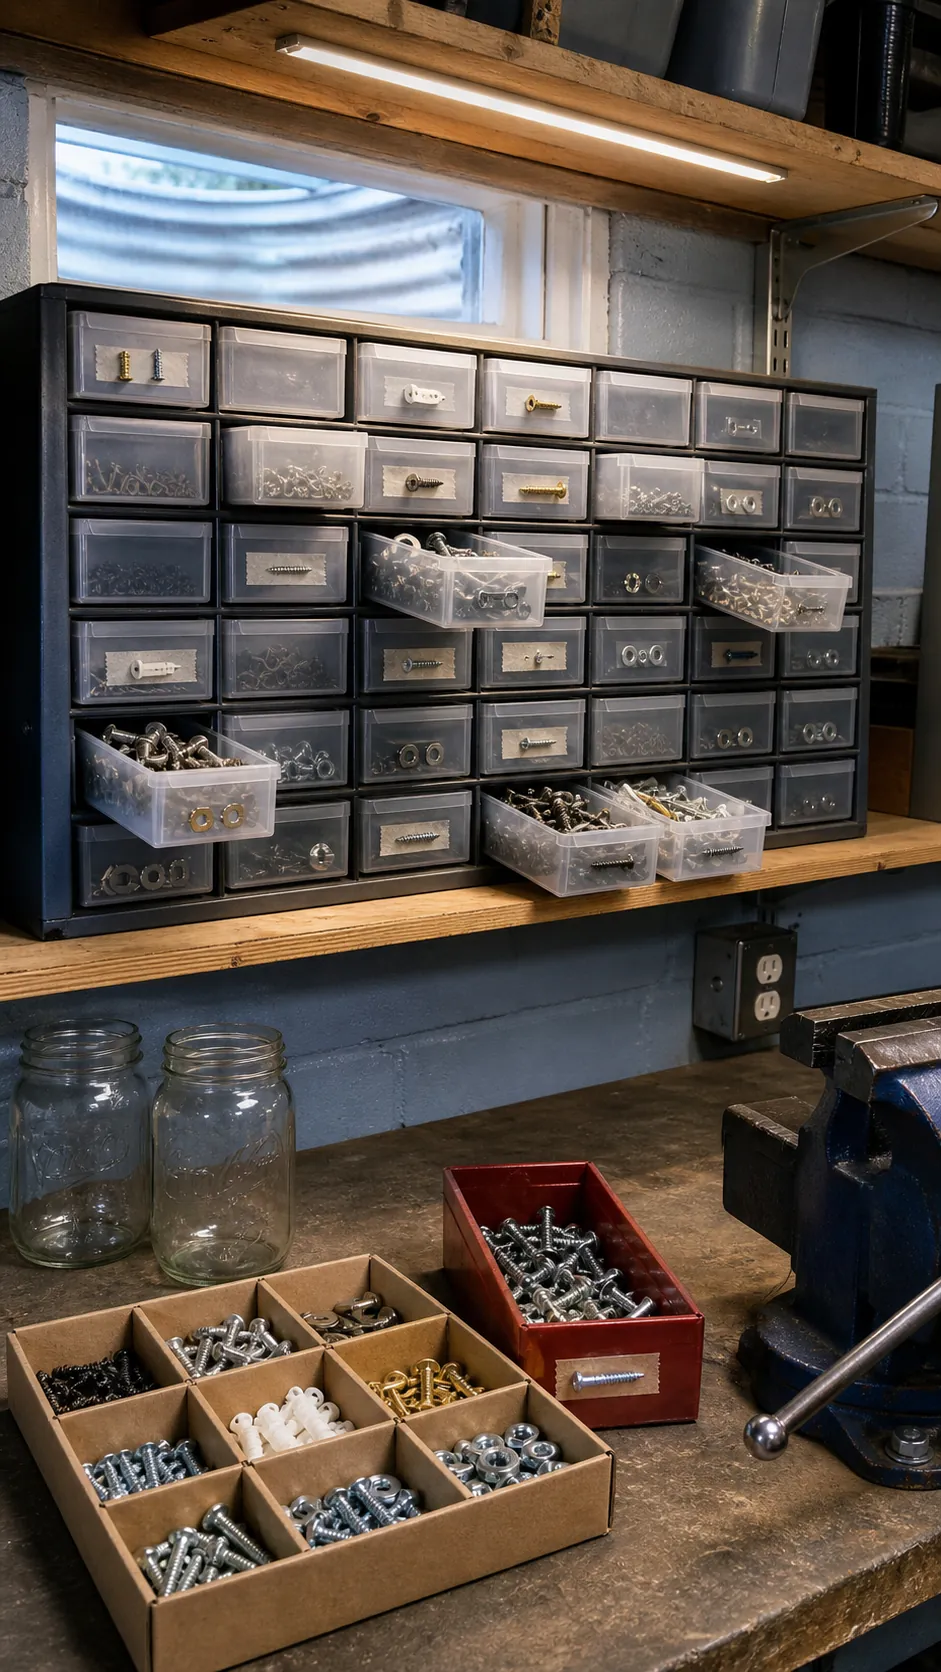
Sort fasteners into shallow drawers
Small parts disappear in deep jars. Use a multi-drawer cabinet with one fastener family per drawer, label the front, and tape a sample inside so mixed hardware returns to the right place.
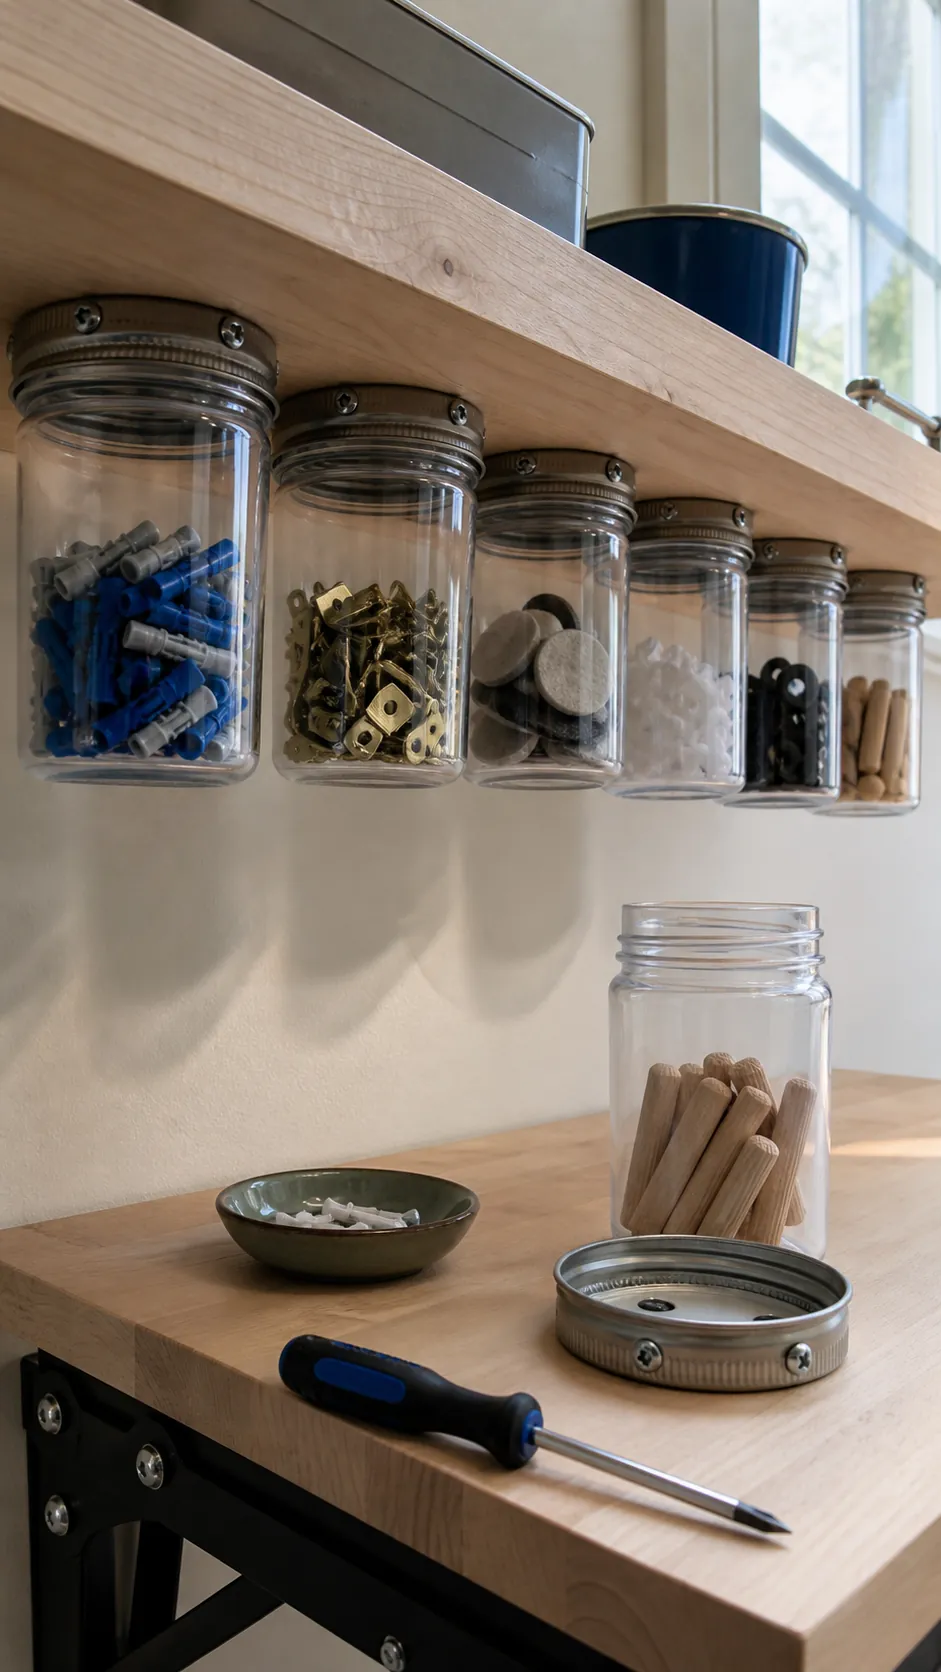
Mount clear jars under a shelf
For a very small hardware collection, screw metal jar lids beneath a solid shelf and twist clear jars into them. Use lightweight contents only, keep lids corrosion-free, and never mount glass above a vehicle.
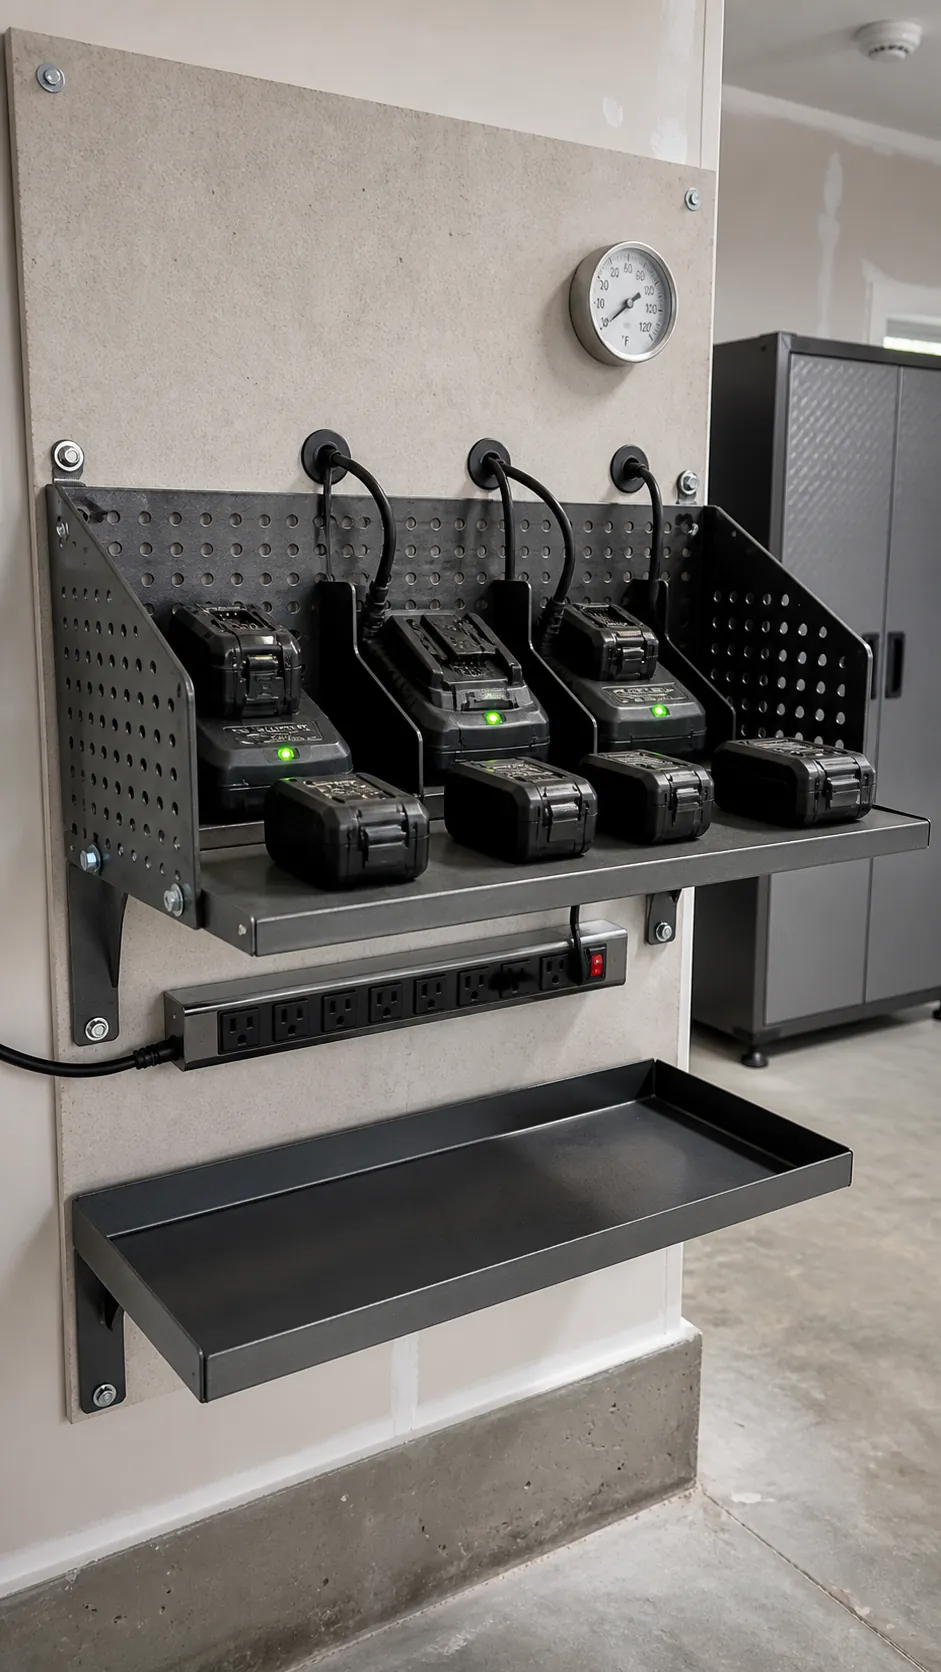
Add a charging shelf for batteries
Build a ventilated shelf near an appropriate outlet with dedicated bays for chargers and batteries. Follow each manufacturer’s temperature and charging guidance, keep cords separated, and do not enclose charging lithium batteries in a sealed cabinet.
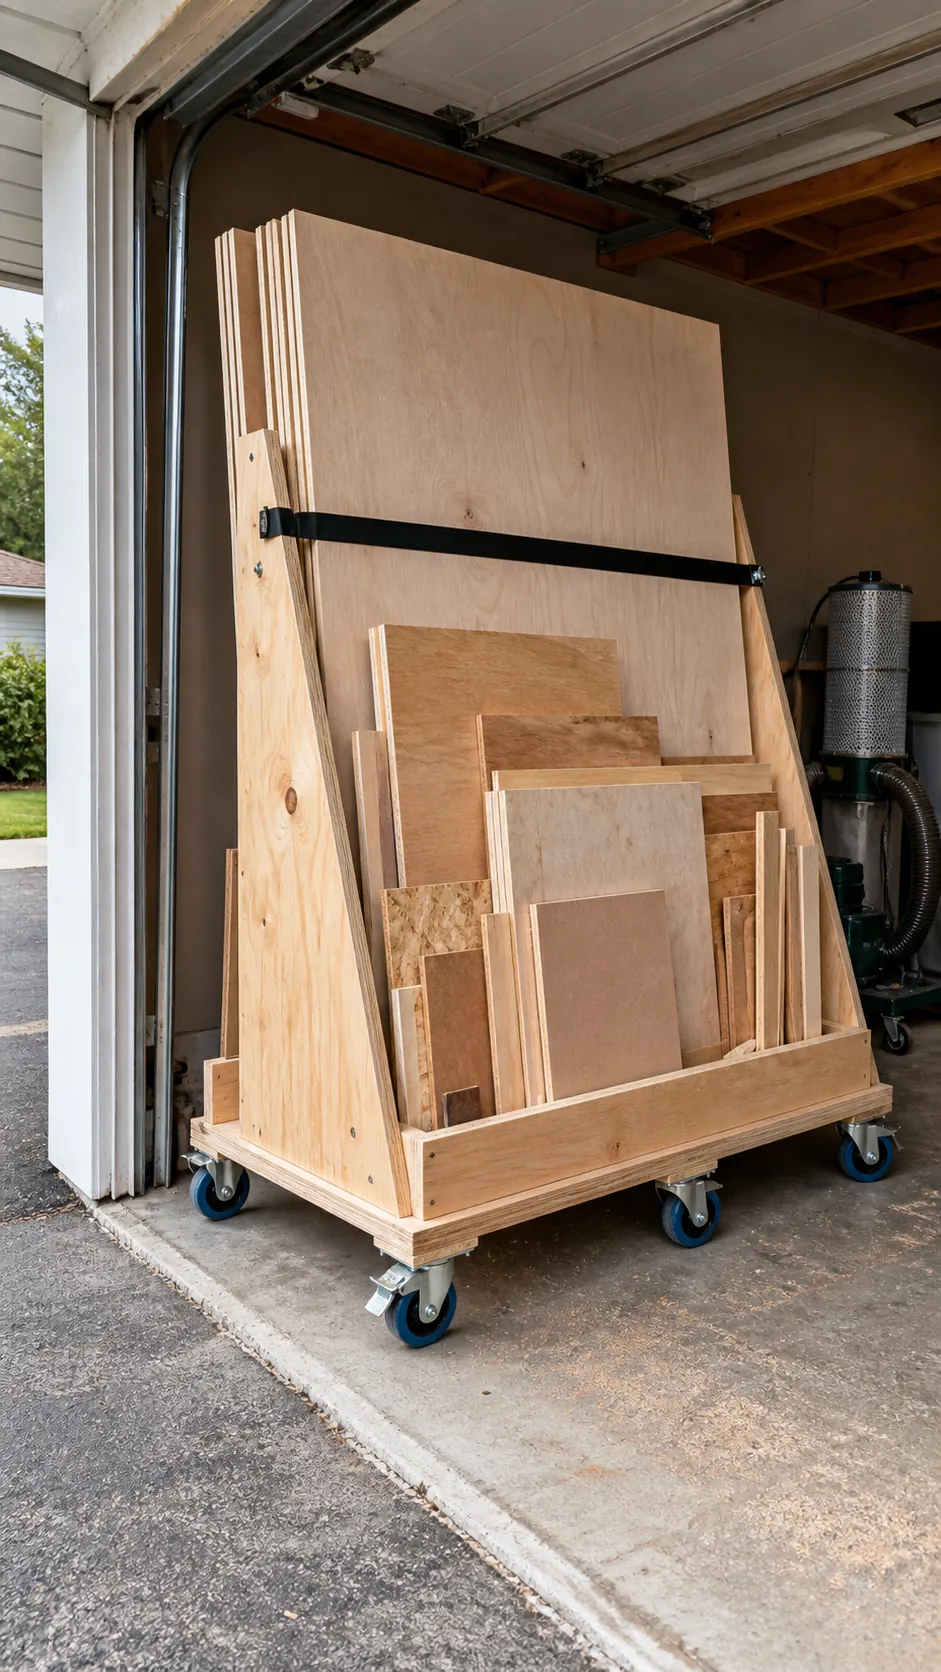
Stand sheet goods in a rolling rack
A low plywood cart with tall side supports corrals offcuts and full sheets while letting you clean behind them. Size it for your door height and floor slope, use load-rated casters, and secure tall stock from tipping.
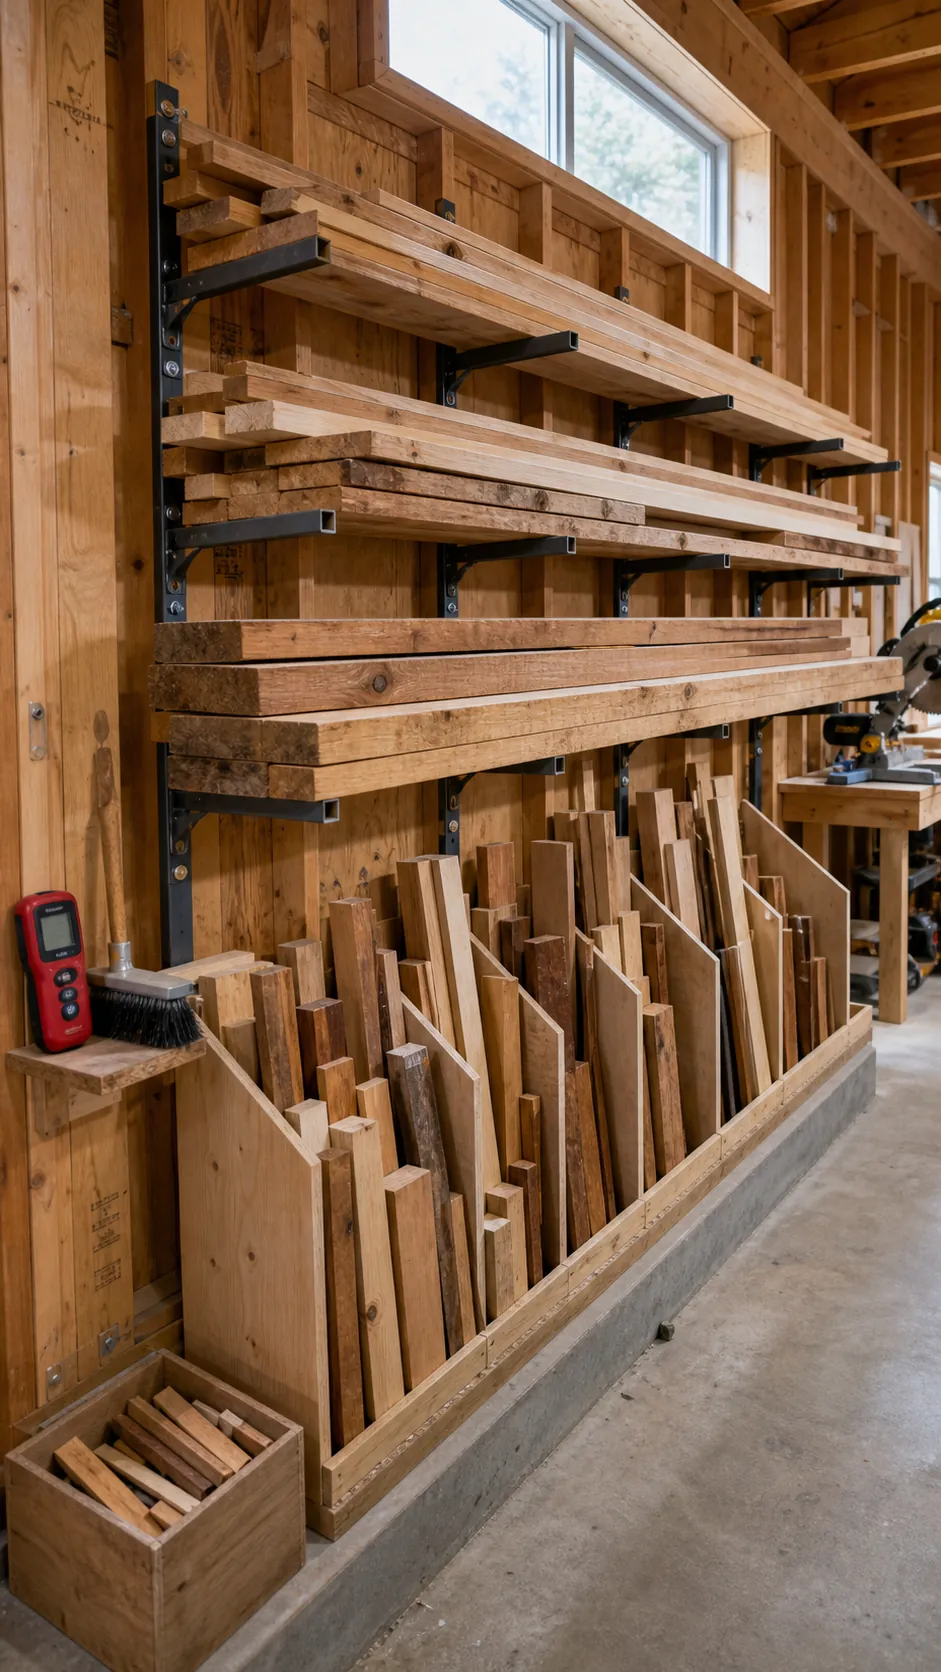
Separate lumber by usable length
Build horizontal supports for long boards and vertical cubbies for shorter offcuts. Mark a minimum length worth keeping; scraps below it become kindling only where local rules and wood treatments make that safe.
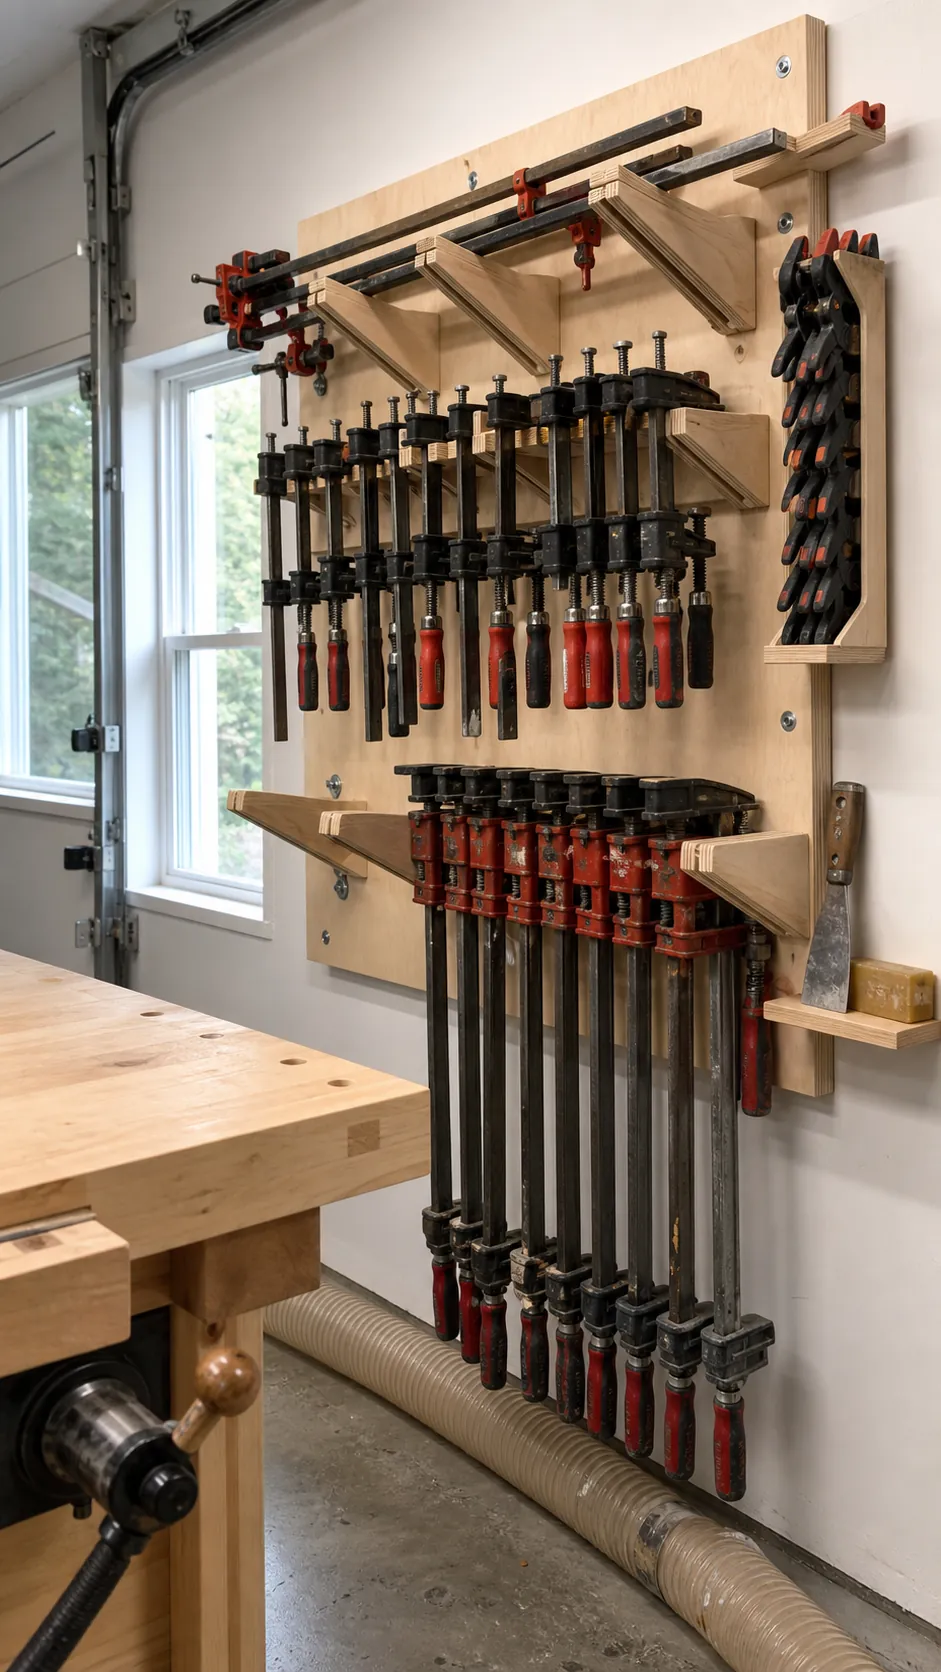
Put clamps on a cantilever rack
Laminate plywood brackets and screw them into a stud-mounted backer to hold bar clamps by type. Leave handle clearance below each row and keep the heaviest clamps out of head-strike zones.
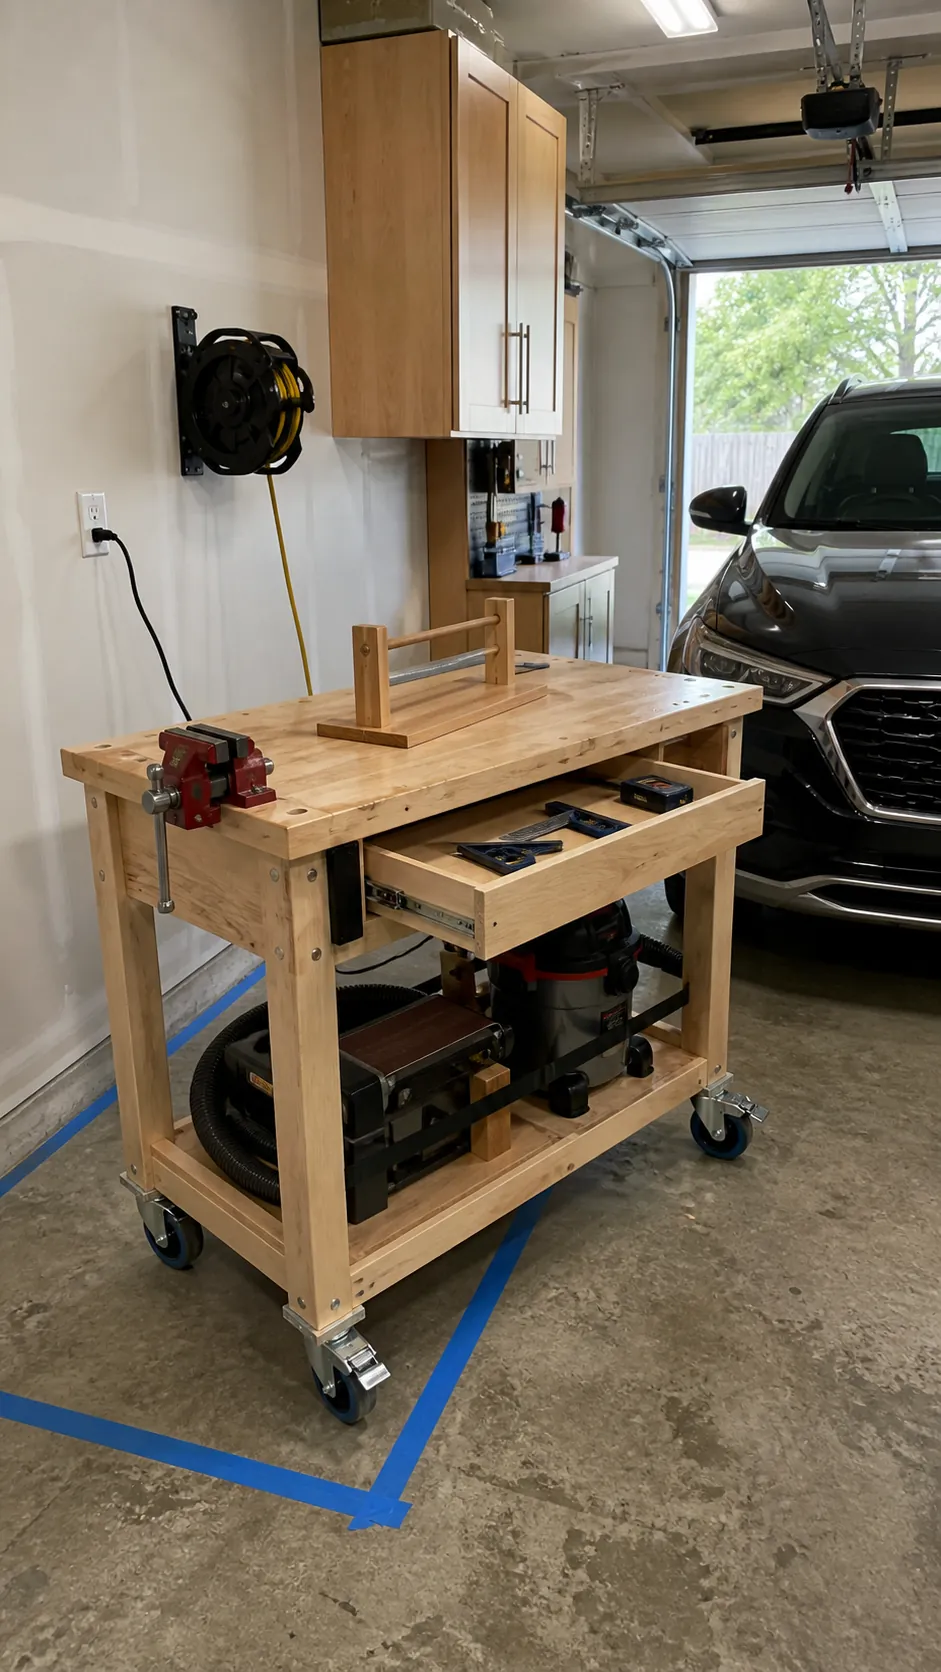
Roll the workbench out of the parking lane
A compact bench on heavy locking casters can face open space during a project and park against the front wall afterward. Add a shallow tool drawer and keep its top clear by giving every machine a separate home.
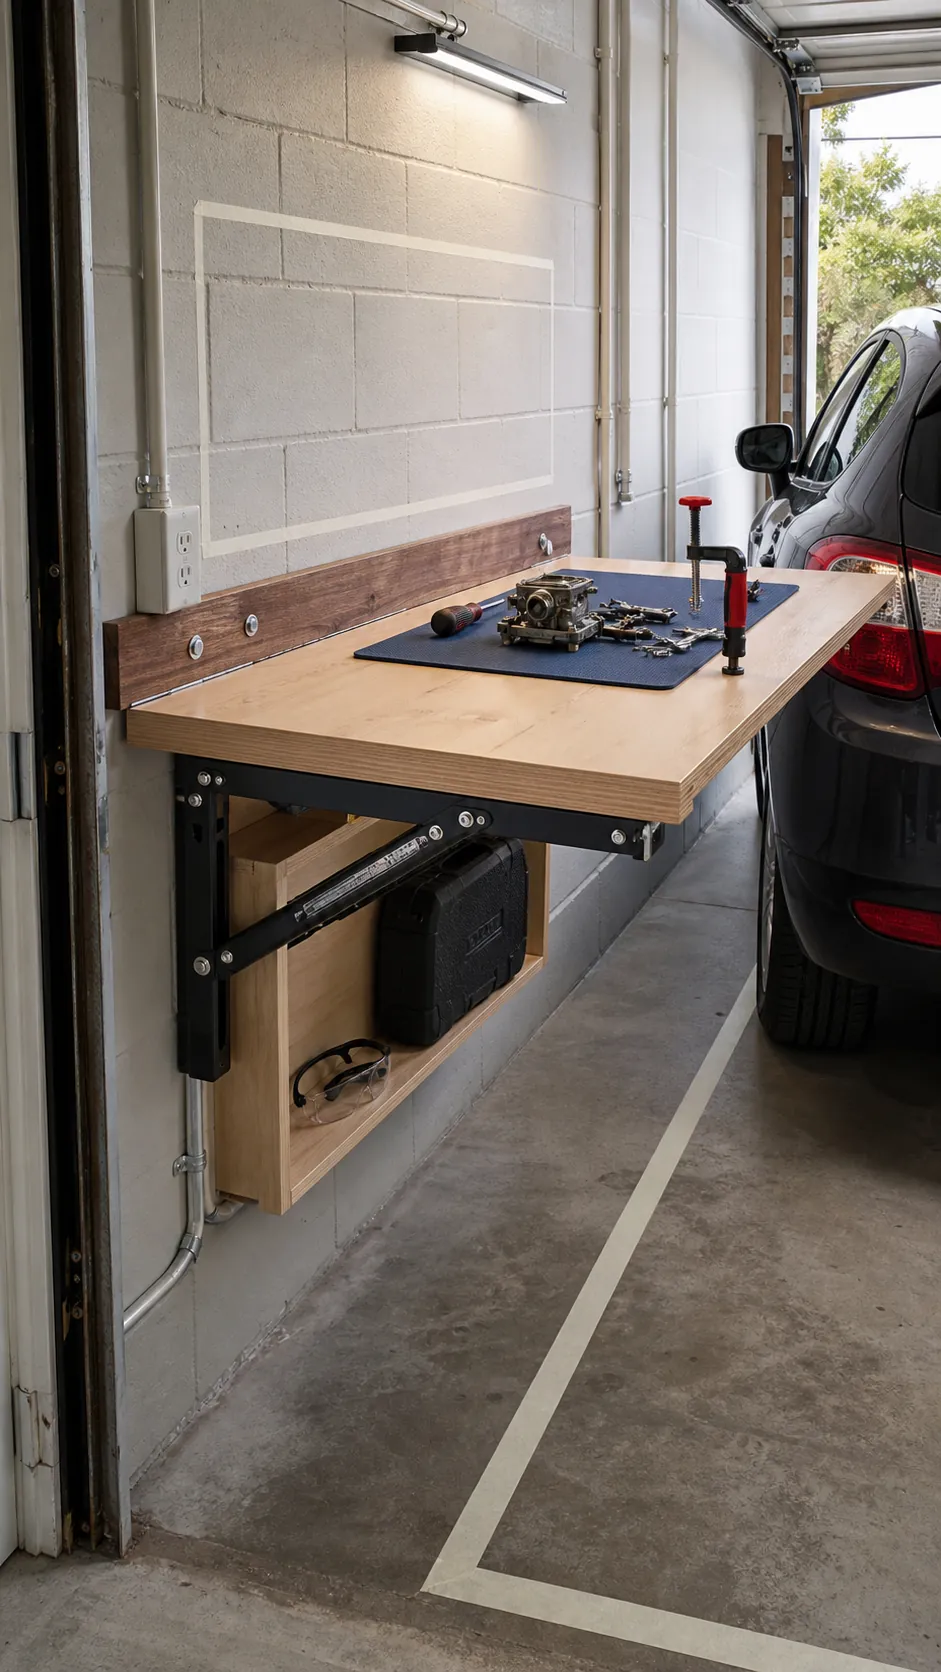
Flip up a wall-mounted work surface
In a single-car garage, hinge a sturdy worktop to a ledger and support it with locking folding brackets rated for the intended load. Store only slim items beneath so the top can close completely.
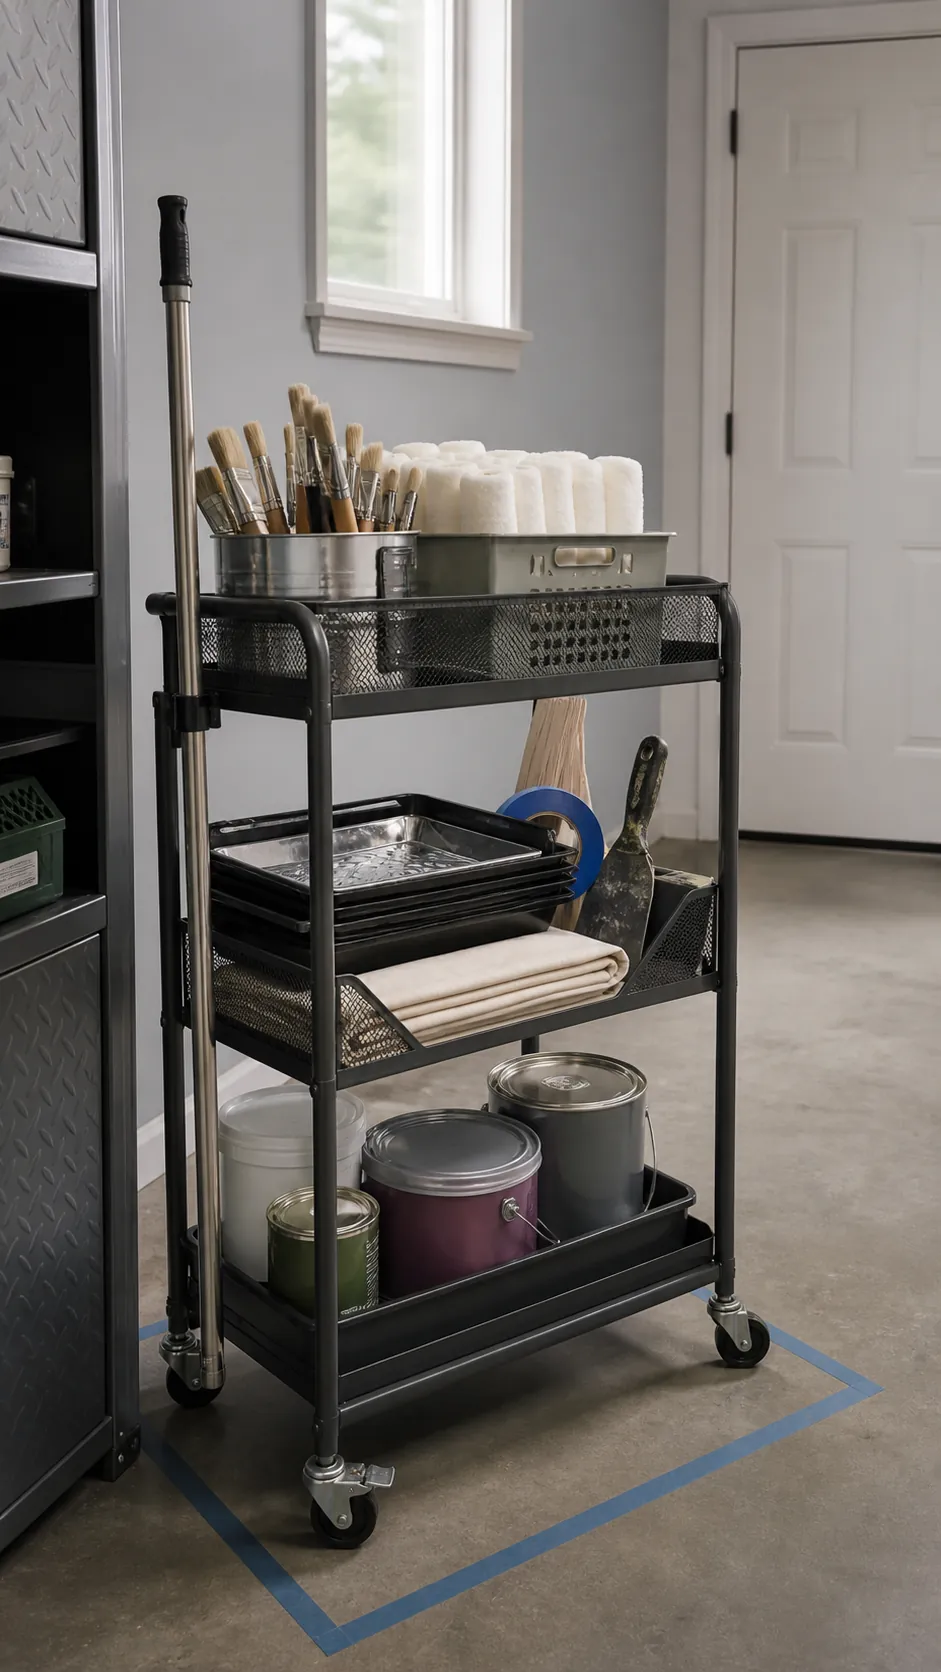
Make a mobile paint station
Group brushes, rollers, trays, stir sticks, and unopened compatible supplies on a narrow cart. Follow label temperature limits, keep products away from ignition sources, and use local hazardous-waste rules for old coatings.
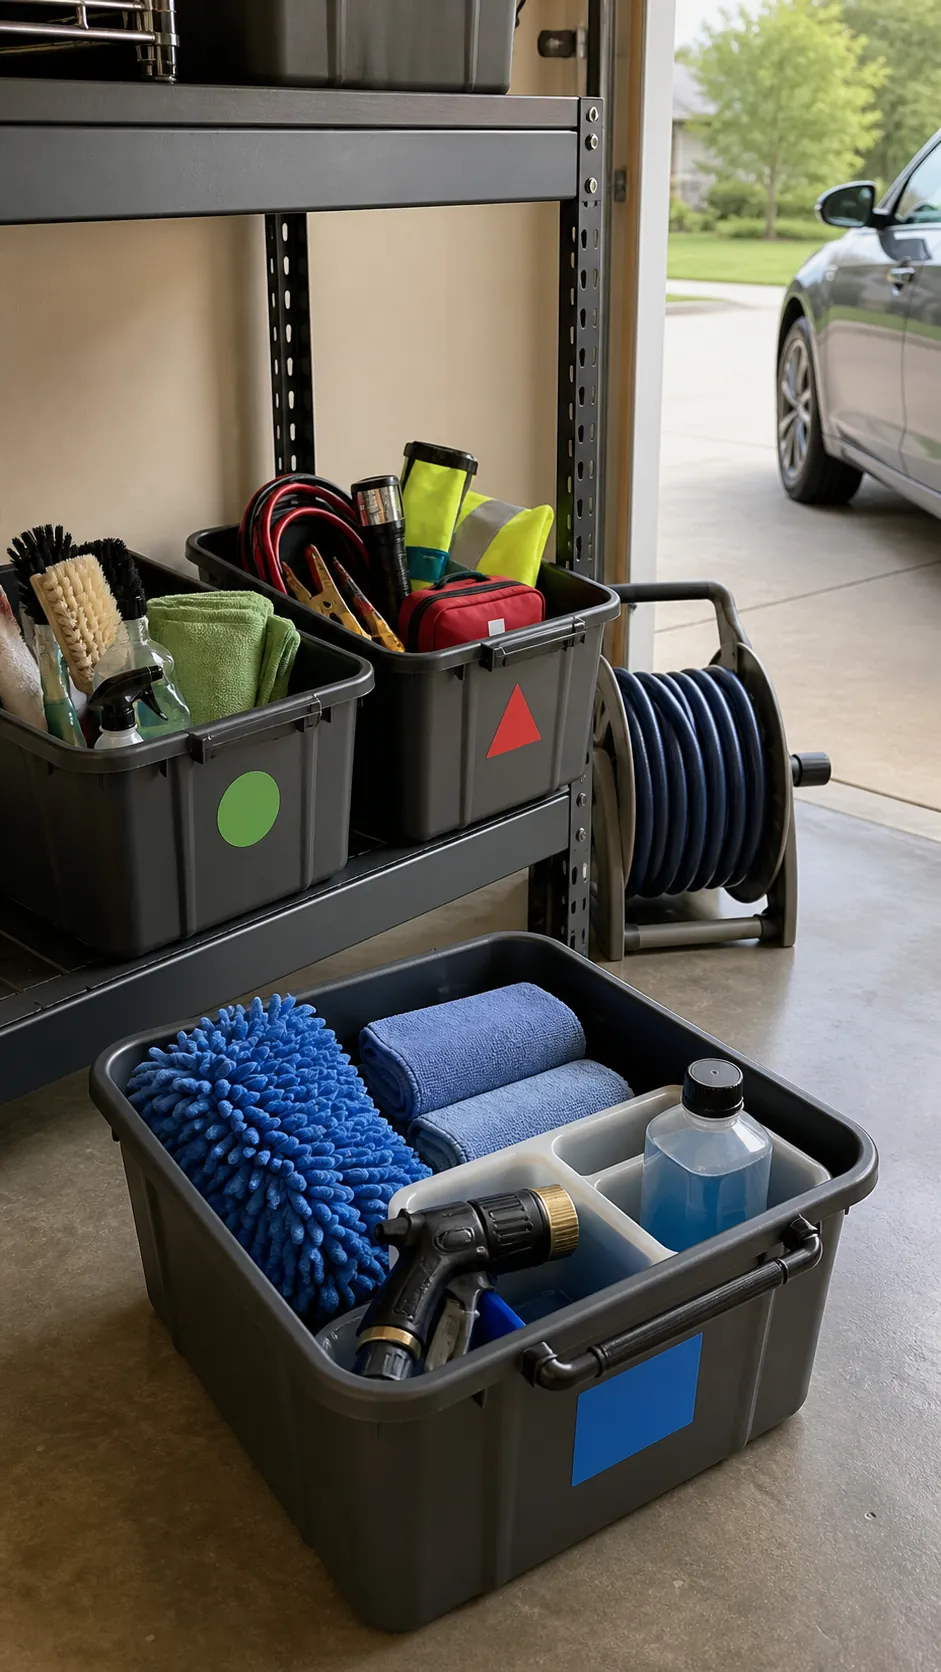
Corral car-care supplies by task
Use handled bins for washing, interior cleaning, and emergency supplies instead of one deep tub. Store chemicals upright according to their labels and carry the whole task kit to the driveway when needed.
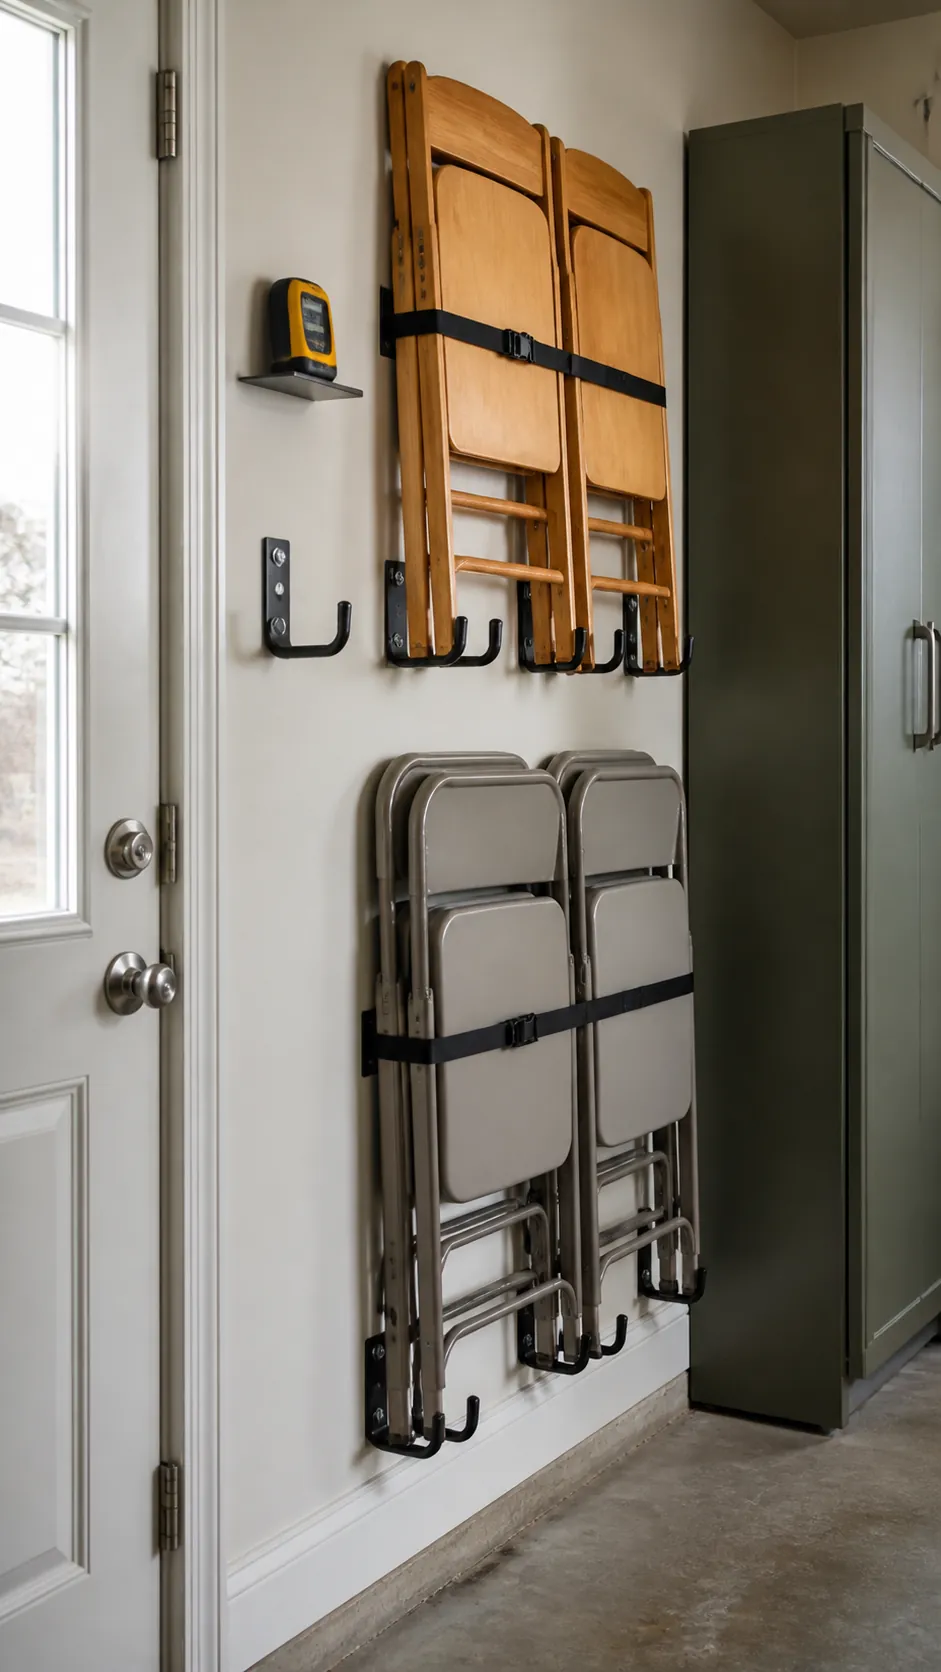
Hang folding chairs in pairs
Two heavy wall hooks and a retaining strap can store folding chairs flat against a wall. Locate the hooks into studs and below head height, leaving enough clearance to lift chairs off safely.
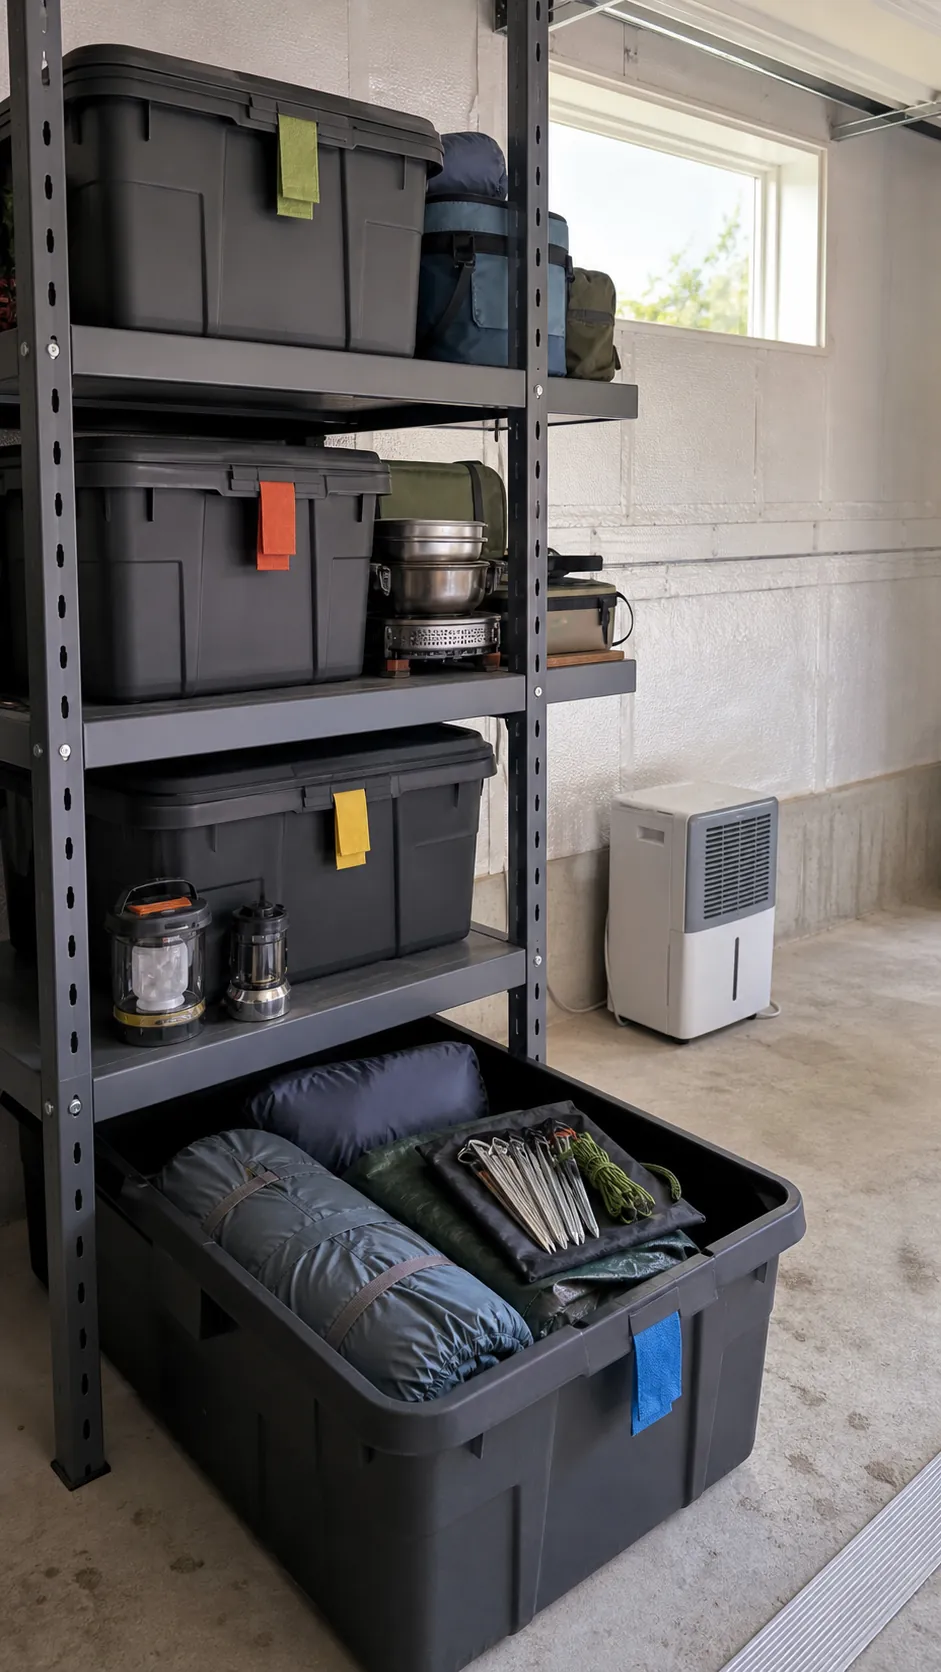
Slide camping gear into labeled totes
Pack cooking, sleeping, shelter, and lighting gear separately so one trip does not empty every bin. Dry tents before storage and place frequently used camping totes low enough to retrieve without a ladder.
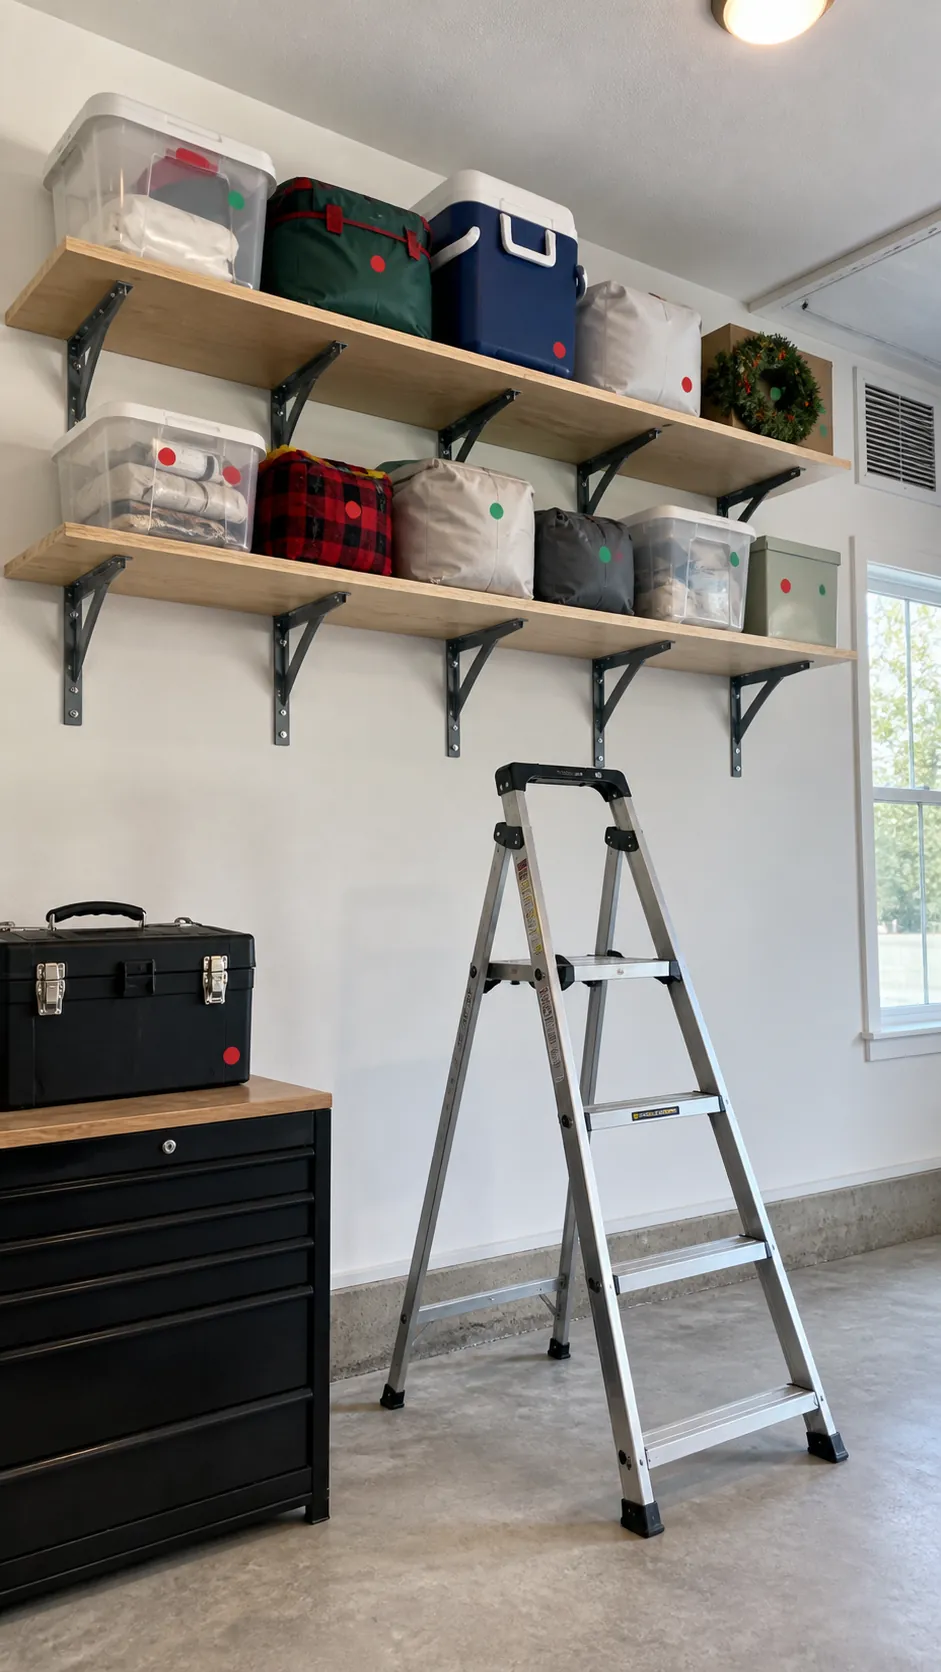
Reserve high shelves for light seasonal items
Holiday decor and empty coolers can occupy upper shelves if the rack is anchored and loads stay within rating. Put weight labels on bins and use a stable step ladder; heavy items belong lower.
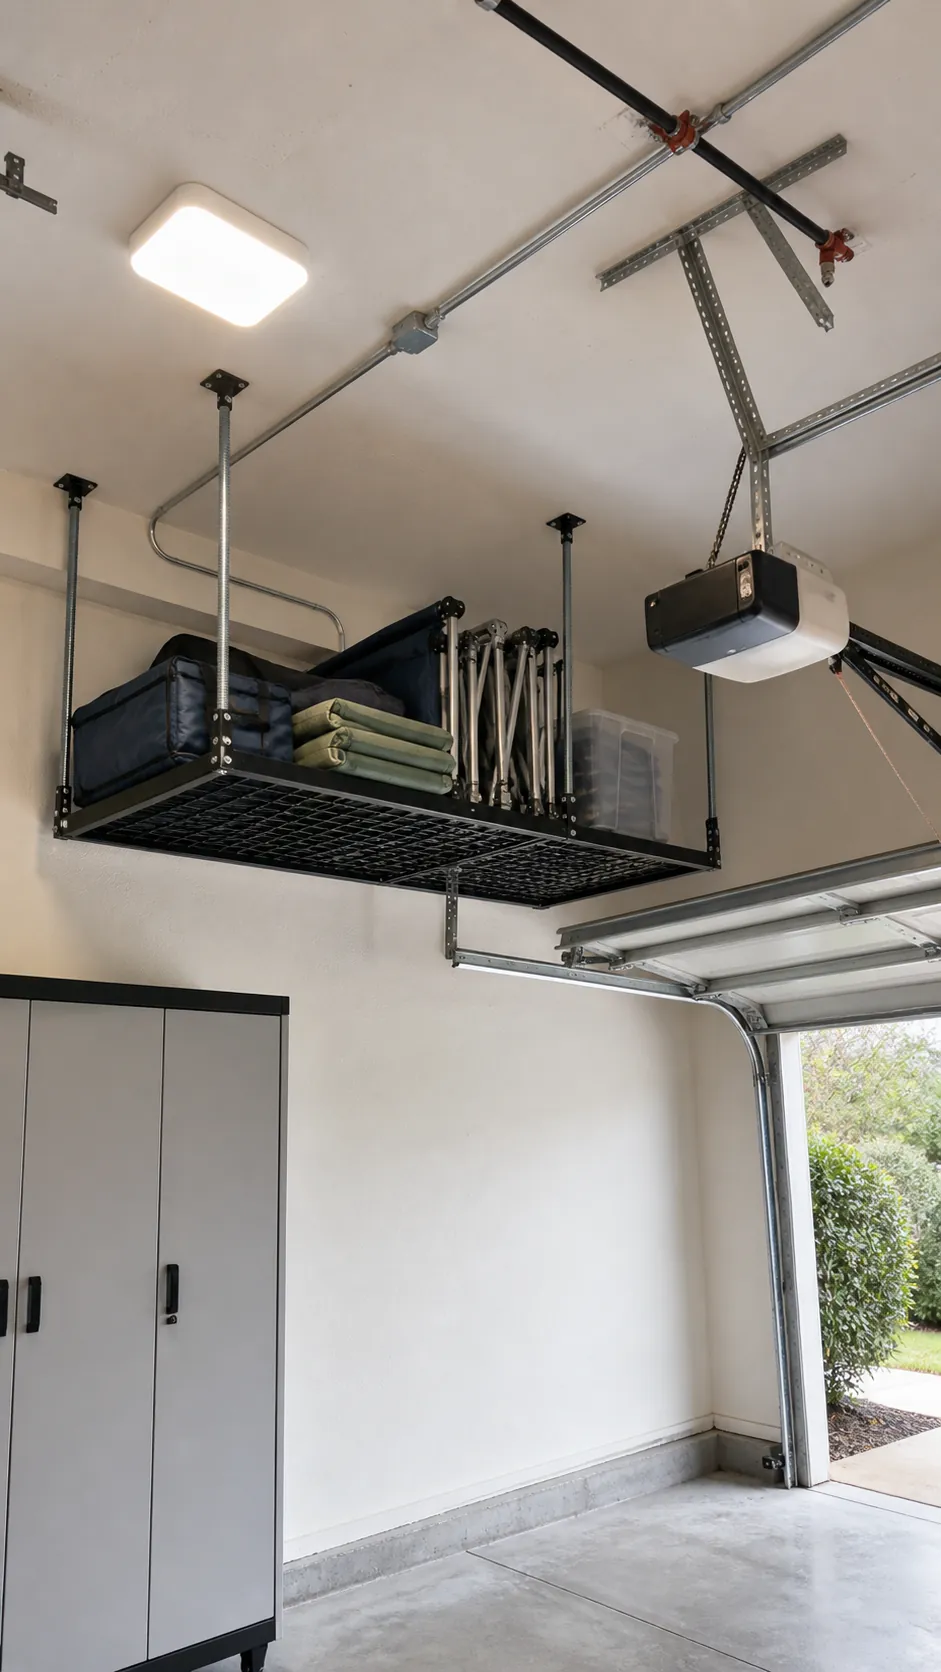
Use the ceiling only in safe zones
Overhead racks can hold lightweight bulky goods, but never interfere with garage-door tracks, openers, fire equipment, utilities, or required headroom. Follow the system’s fastening and load instructions exactly.
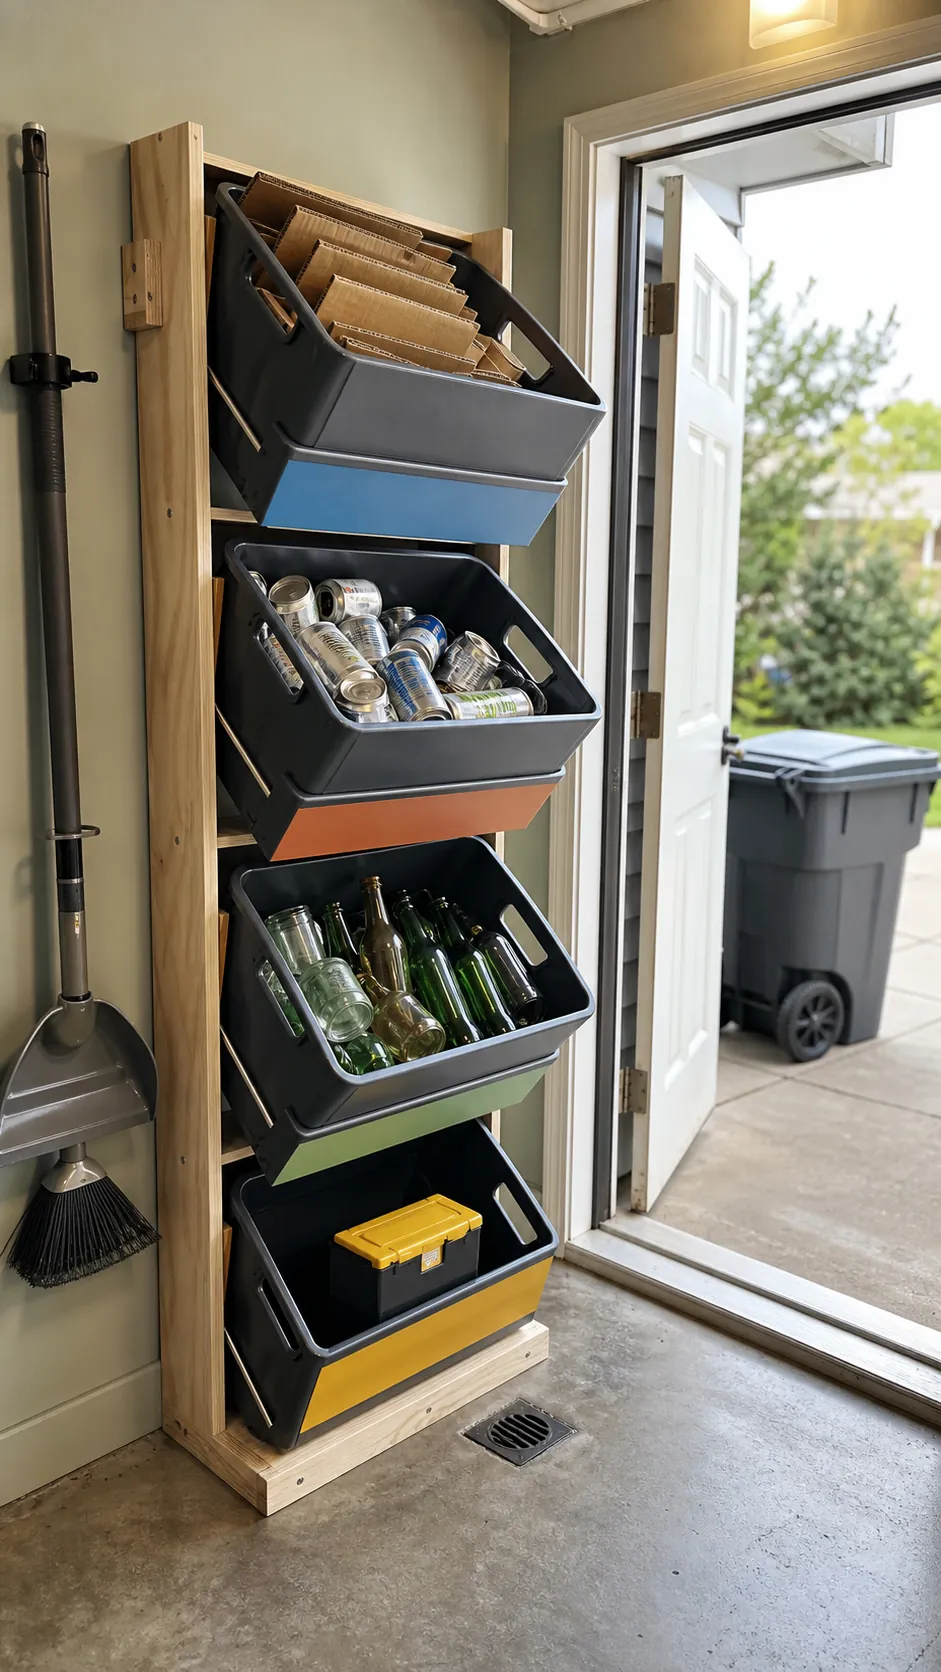
Build a narrow recycling sorter
A vertical plywood frame can hold separate removable bins for cardboard, cans, glass, and special drop-off items. Match categories to local collection rules and keep the sorter near the exit used on pickup day.
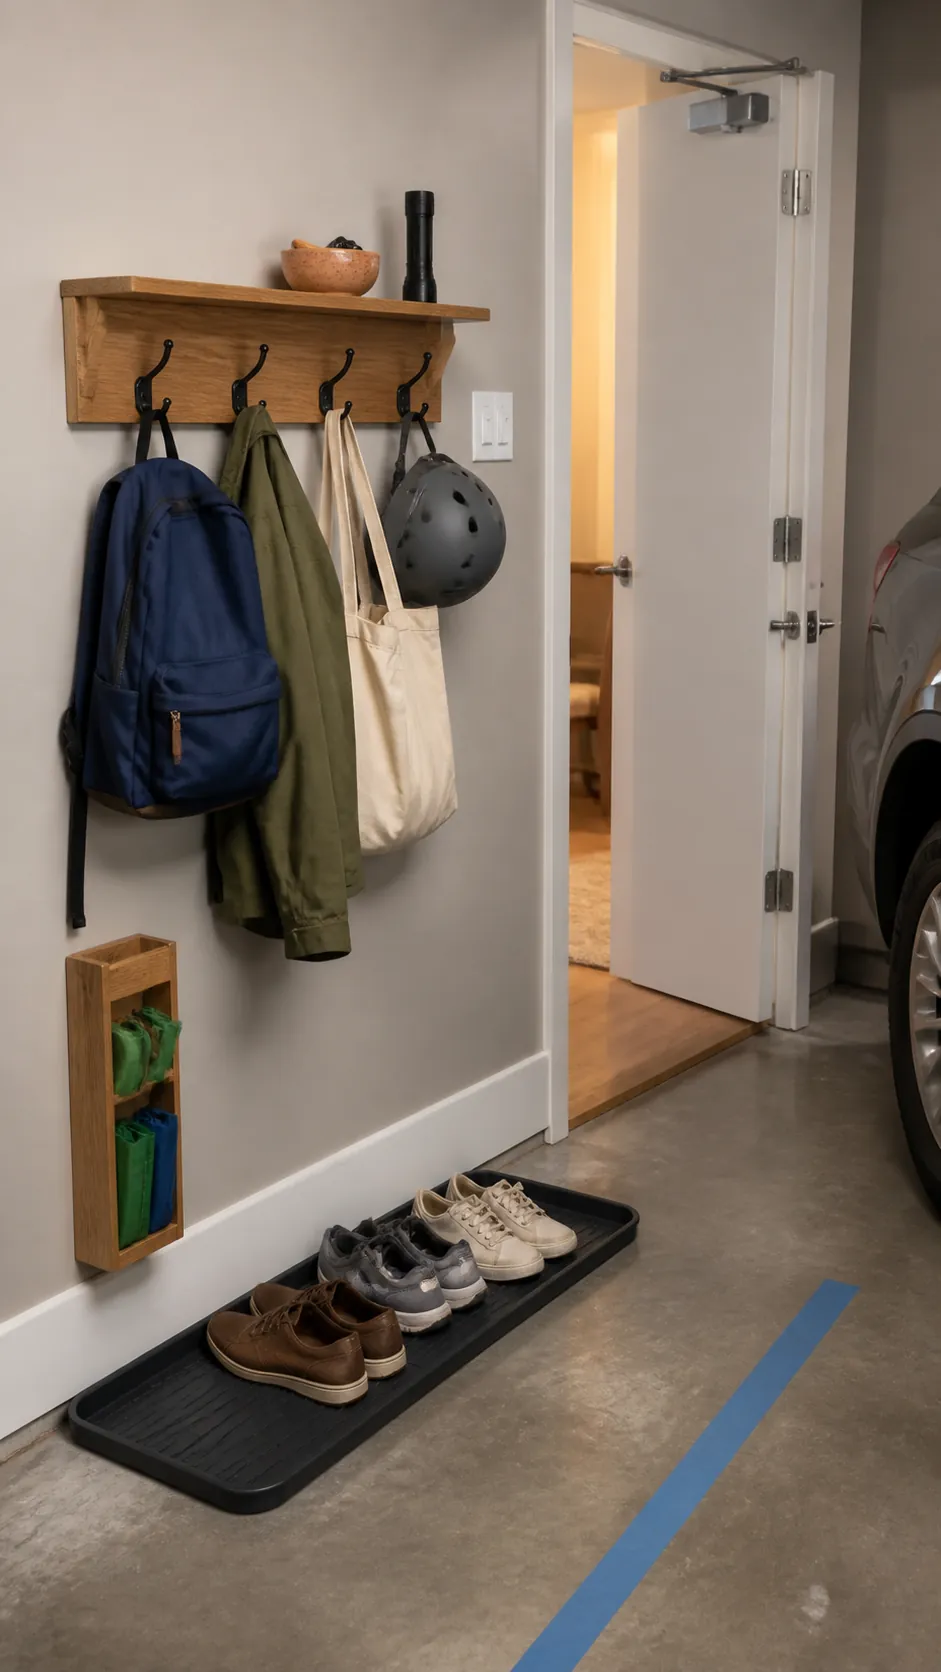
Create a return-home drop zone
A small shelf, shoe tray, bag hooks, and reusable-shopping-bag slot beside the interior door stop daily items from migrating across the garage. Assign each family member one hook and keep the floor route open.
Schedule a five-minute monthly reset
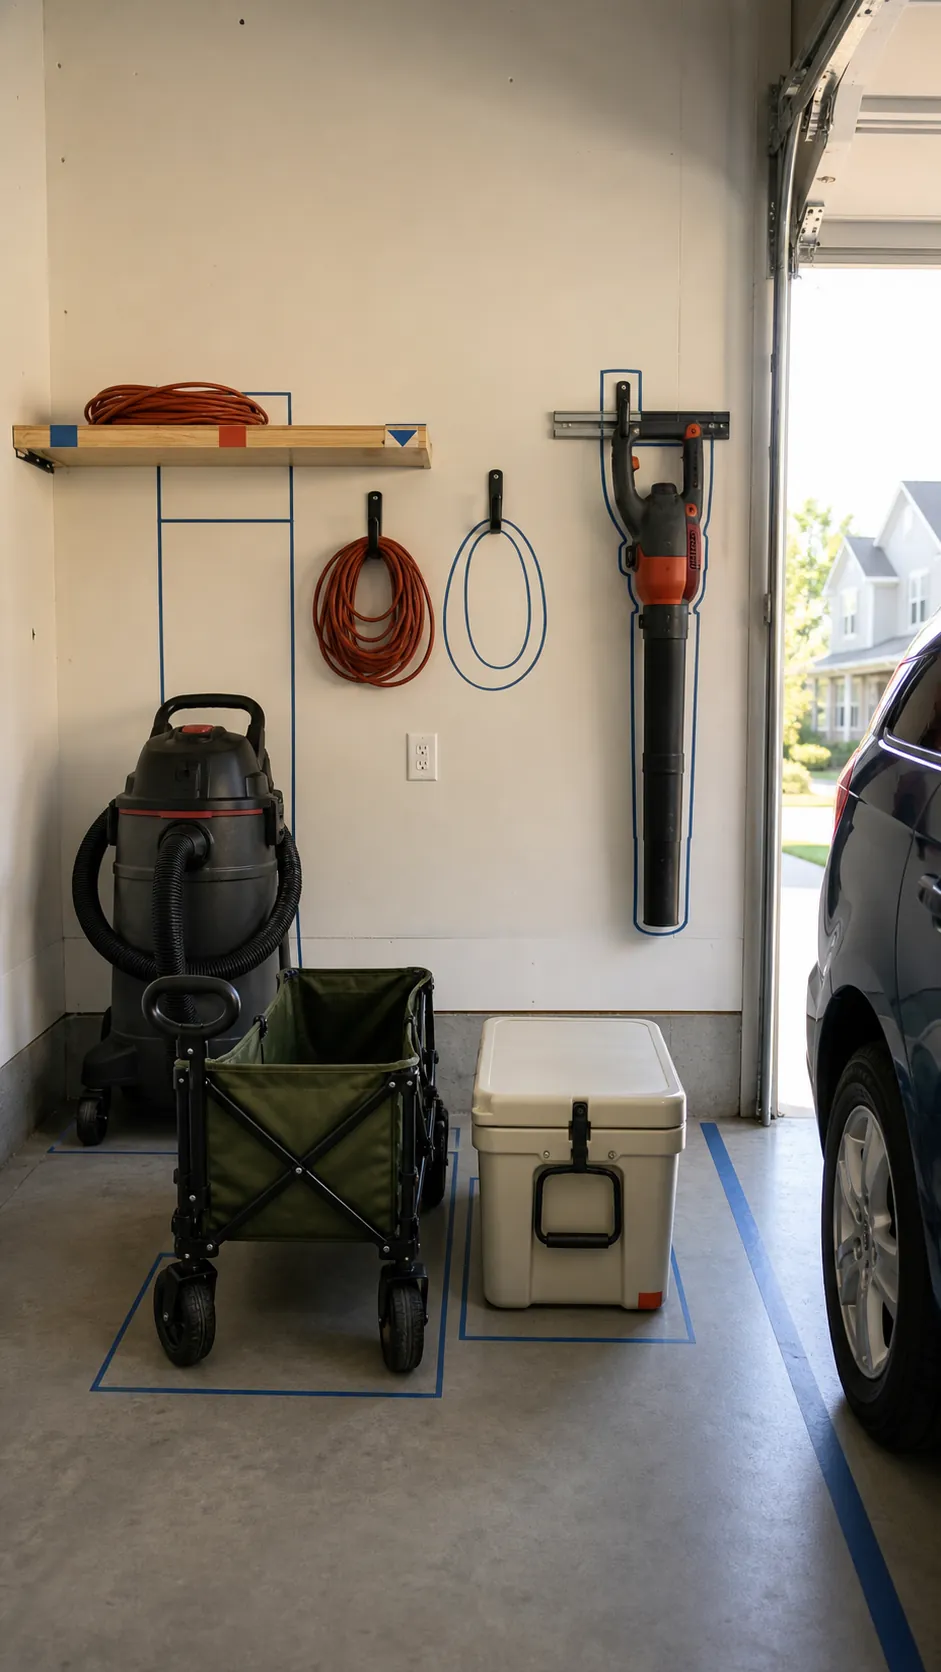
Walk the parking lane, return stray items, remove empty packaging, and check anchors, cords, casters, and overhead storage. A short recurring reset keeps garage storage ideas organizing your life instead of becoming another abandoned makeover.
The most durable garage setup is the one your household can reset without instructions. If a category repeatedly lands on the floor, change its home rather than blaming the people using it.