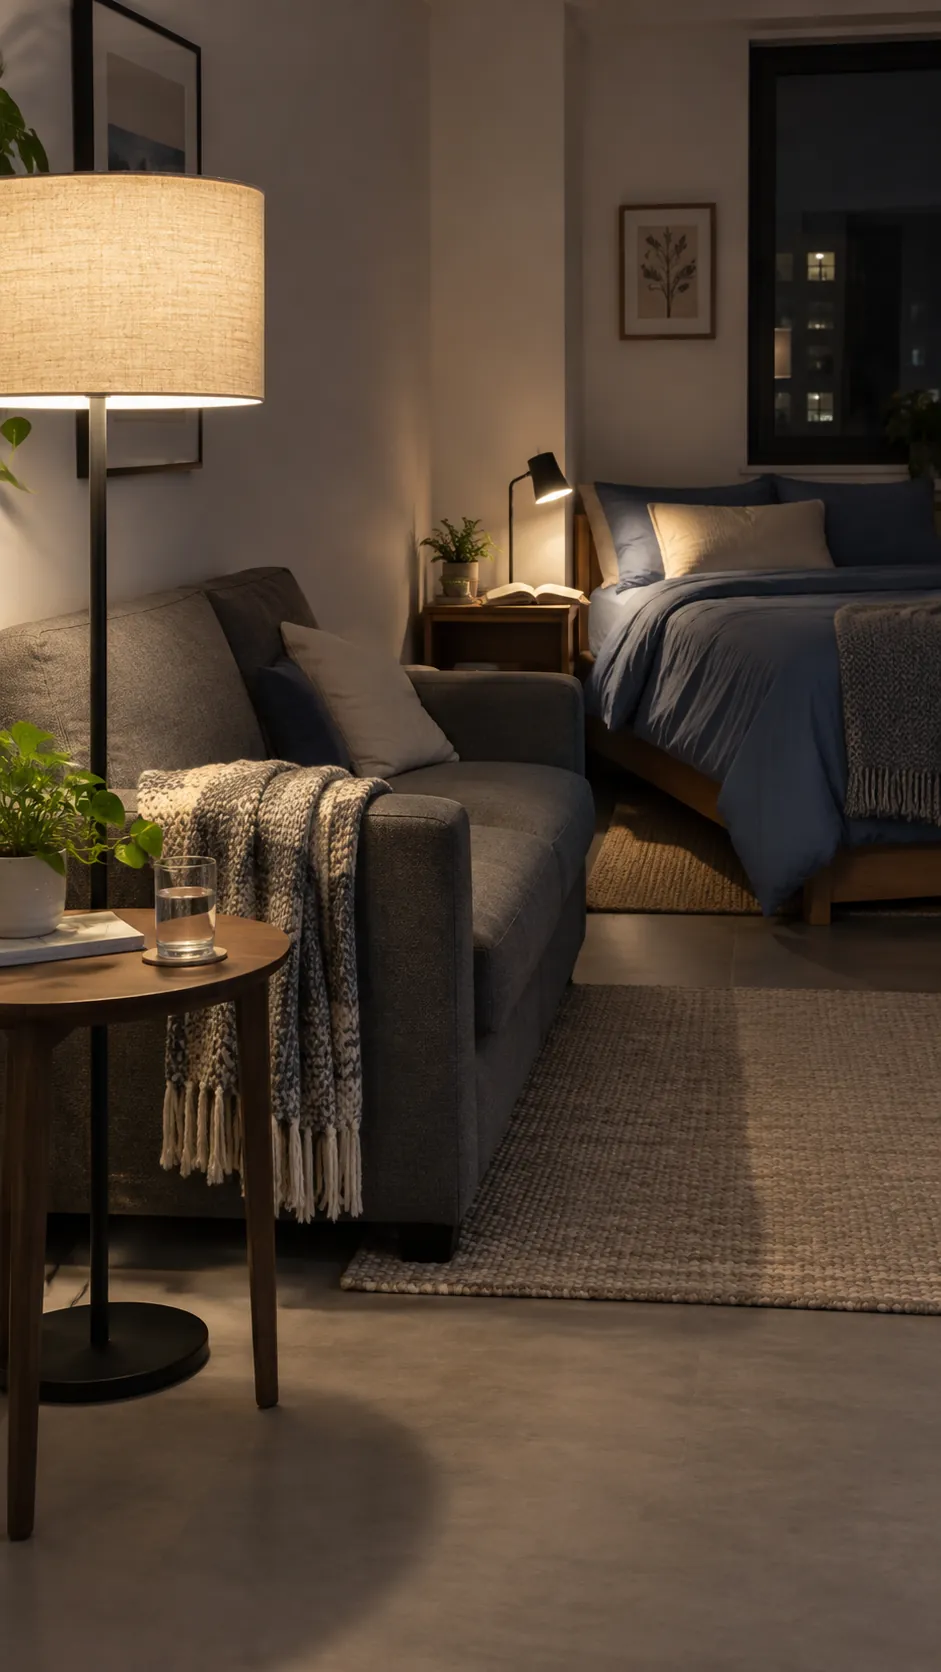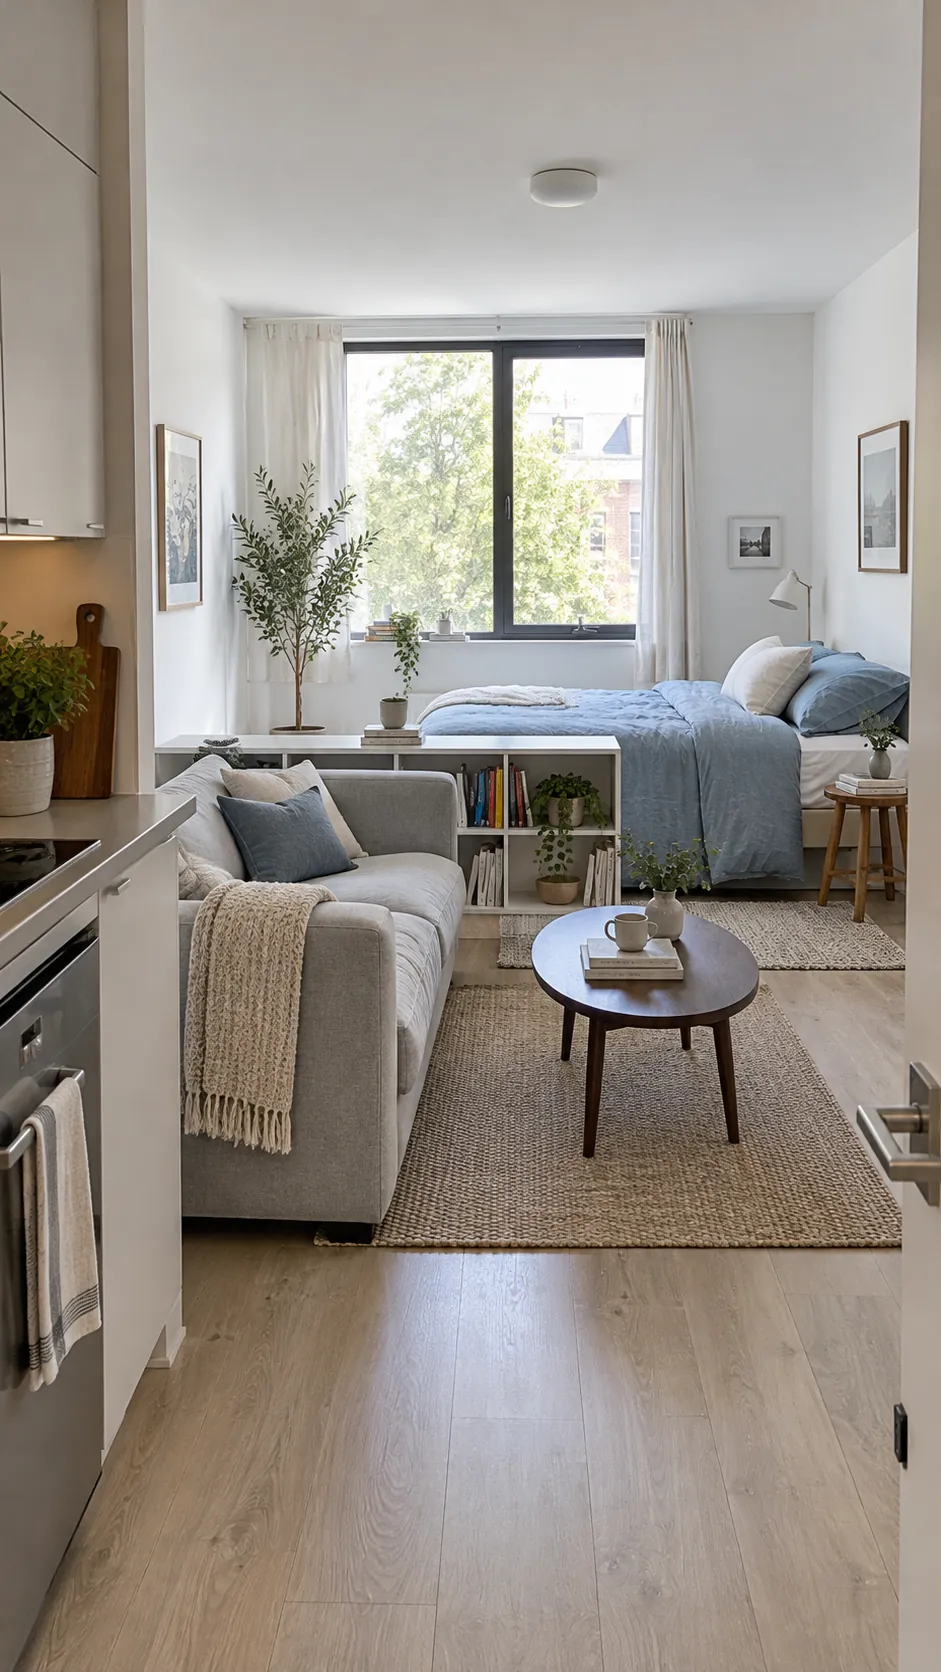
A divider can hide the bed and still make the room harder to live in. Start with the path from the door to the bathroom, then protect the window light before choosing where furniture belongs. A boundary that preserves those two things is usually more useful than one that looks like a miniature bedroom.
Measure your furniture with drawers, doors, and chairs in use, and test proposed positions with tape on the floor. The layouts below offer different degrees of visual separation; shelves, screens, and curtains do not create acoustic privacy. Keep required exits, ventilation, heating equipment, and fire safety devices clear, and confirm lease permission for anything that needs fixing to the building.
Sofa Back Facing the Bed
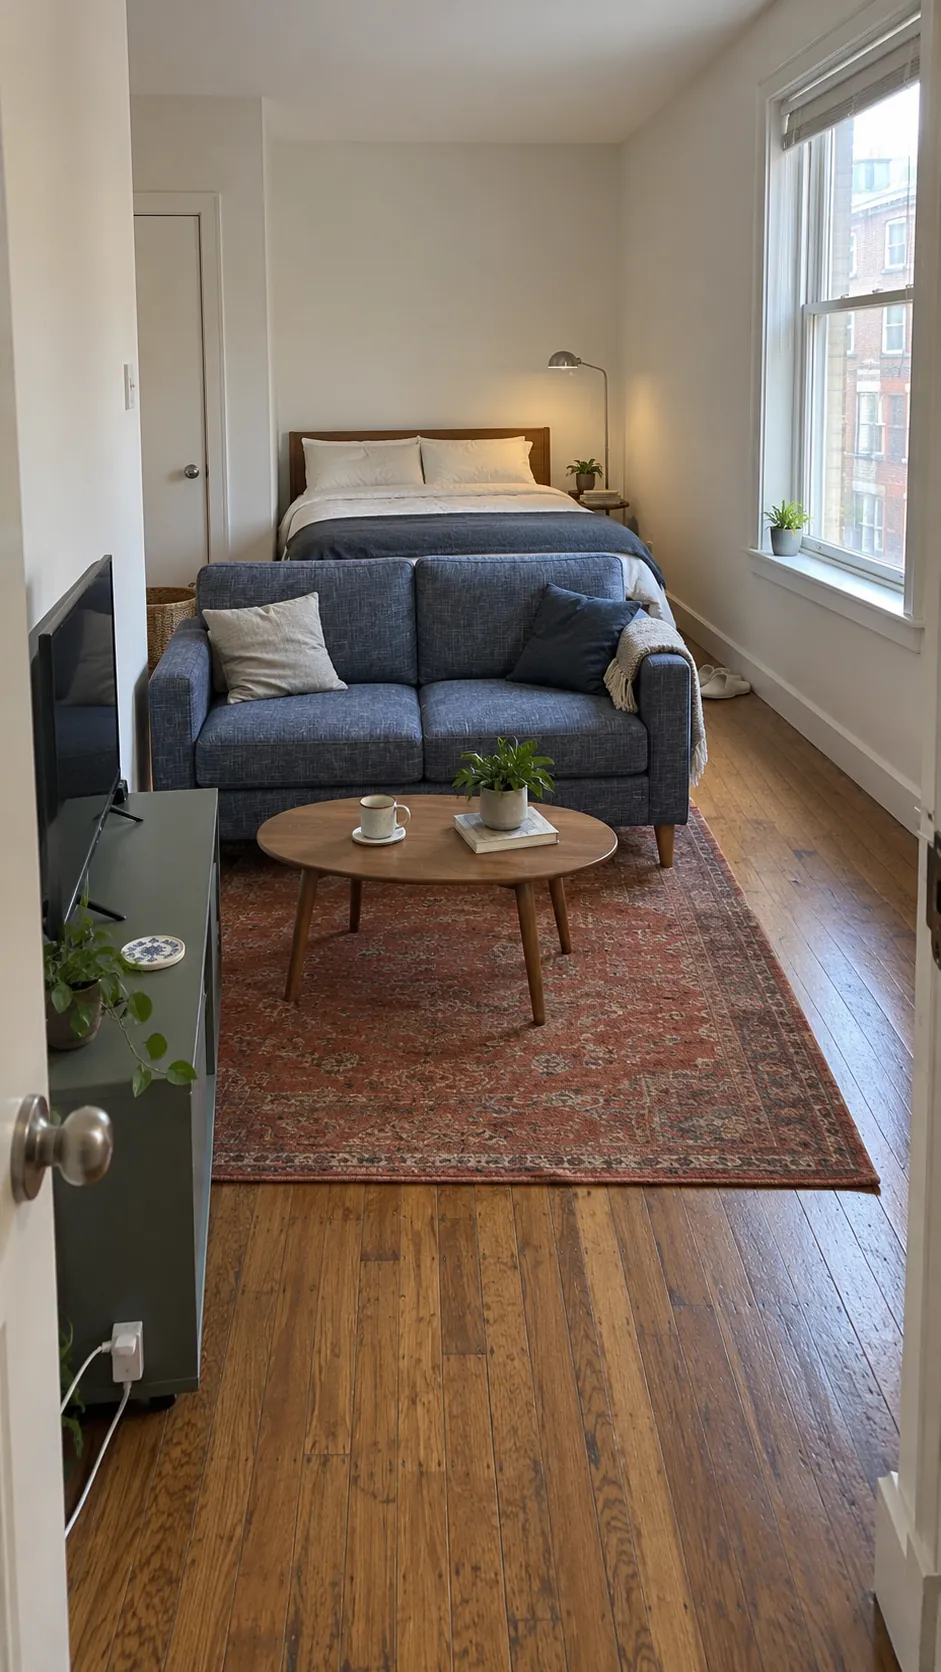
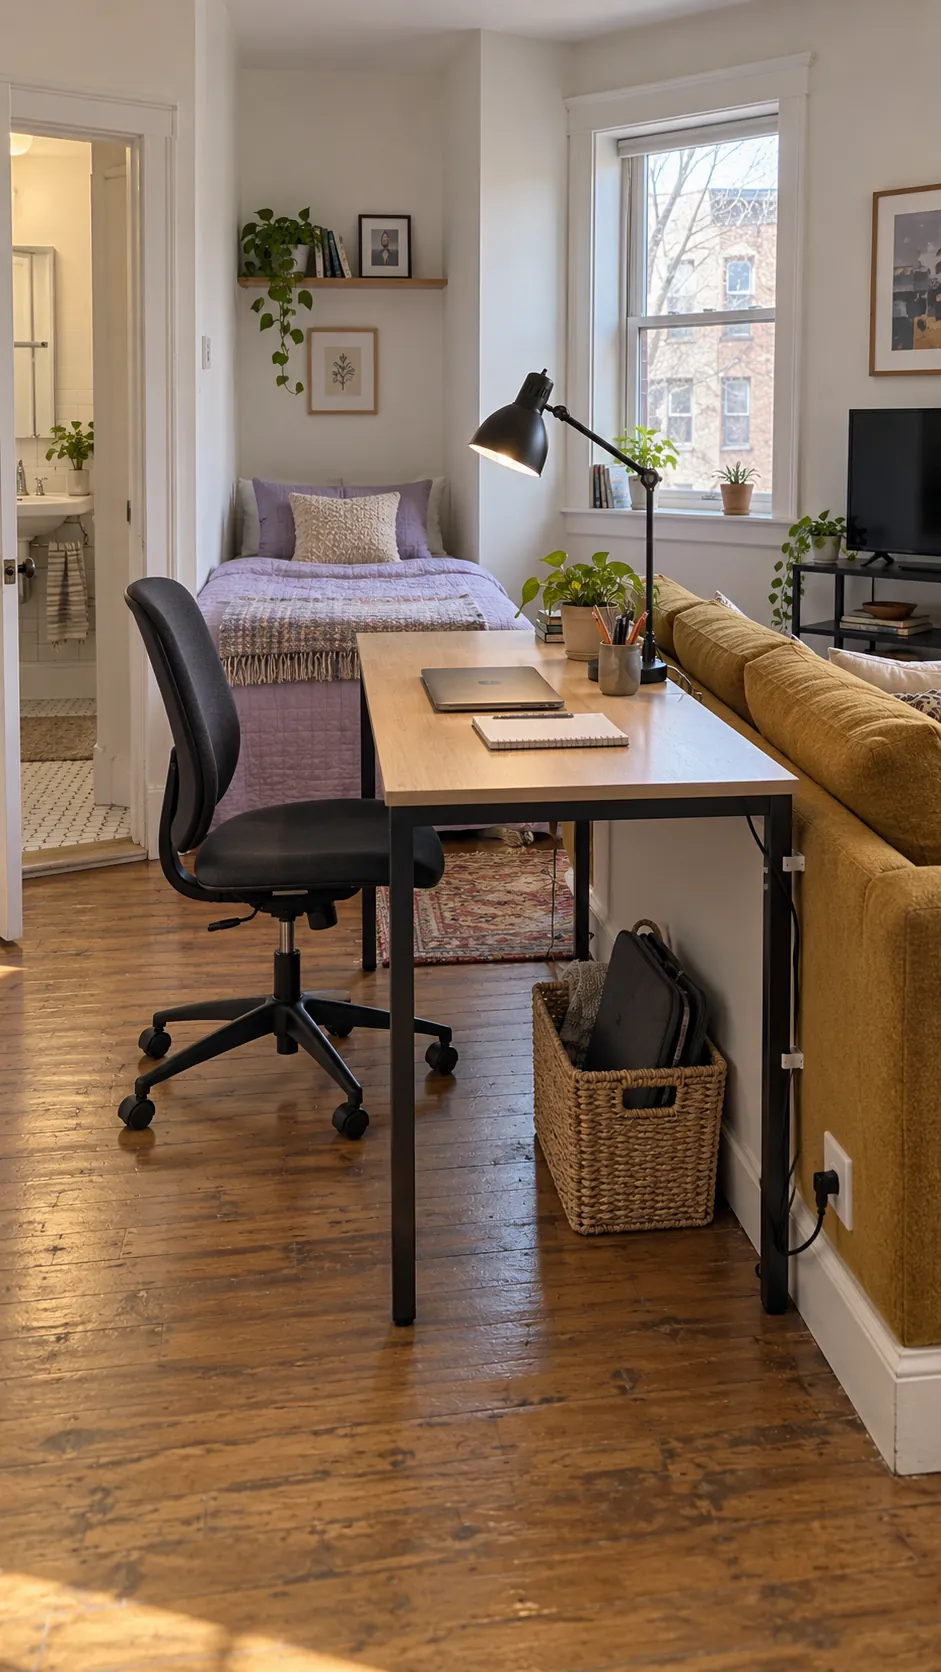
Turn the sofa so its back faces the sleeping area, with the seat looking toward the television or window. The upholstery becomes a low visual boundary without stopping daylight from crossing the room. Leave enough space behind it to walk to the bed without squeezing past the arm. This arrangement suits a rectangular studio where the sofa can float rather than sit against every wall.
Low Bookcase at the Bed Foot
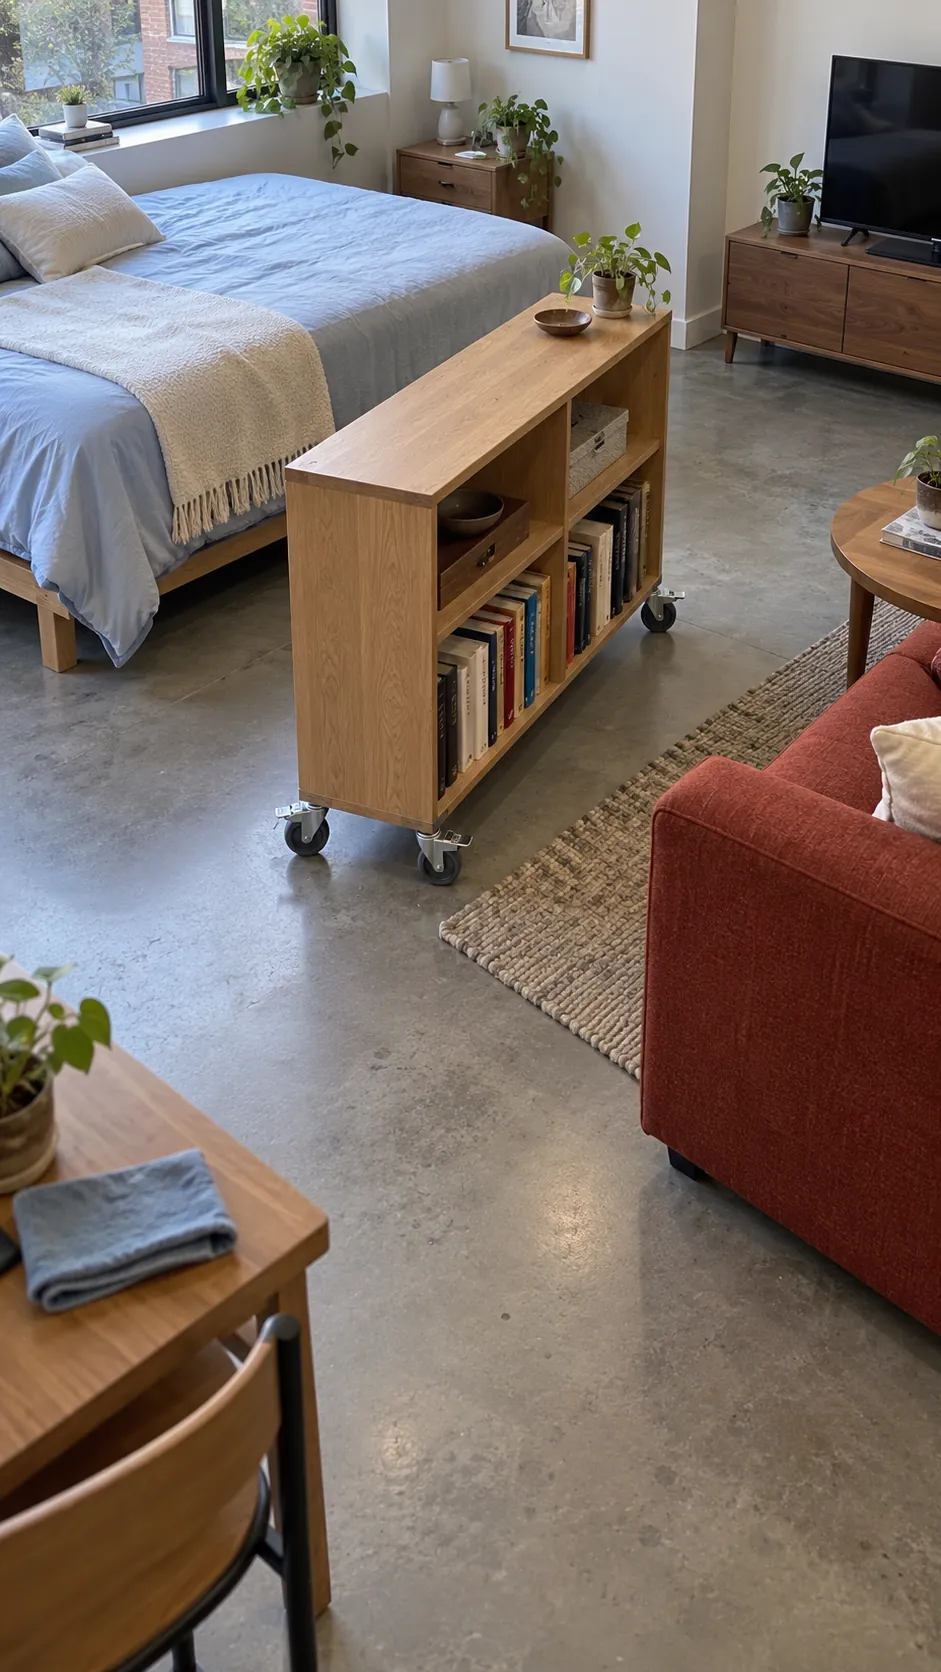
Place a low bookcase beyond the foot of the bed to mark where the living area begins. Open compartments keep the divider lighter, while a few baskets hide small items that would otherwise clutter both zones. Measure the space needed to change bedding before choosing the shelf depth. Use a stable unit and follow its anchoring instructions rather than relying on books to keep it upright.
Open Shelf Beside the Bed
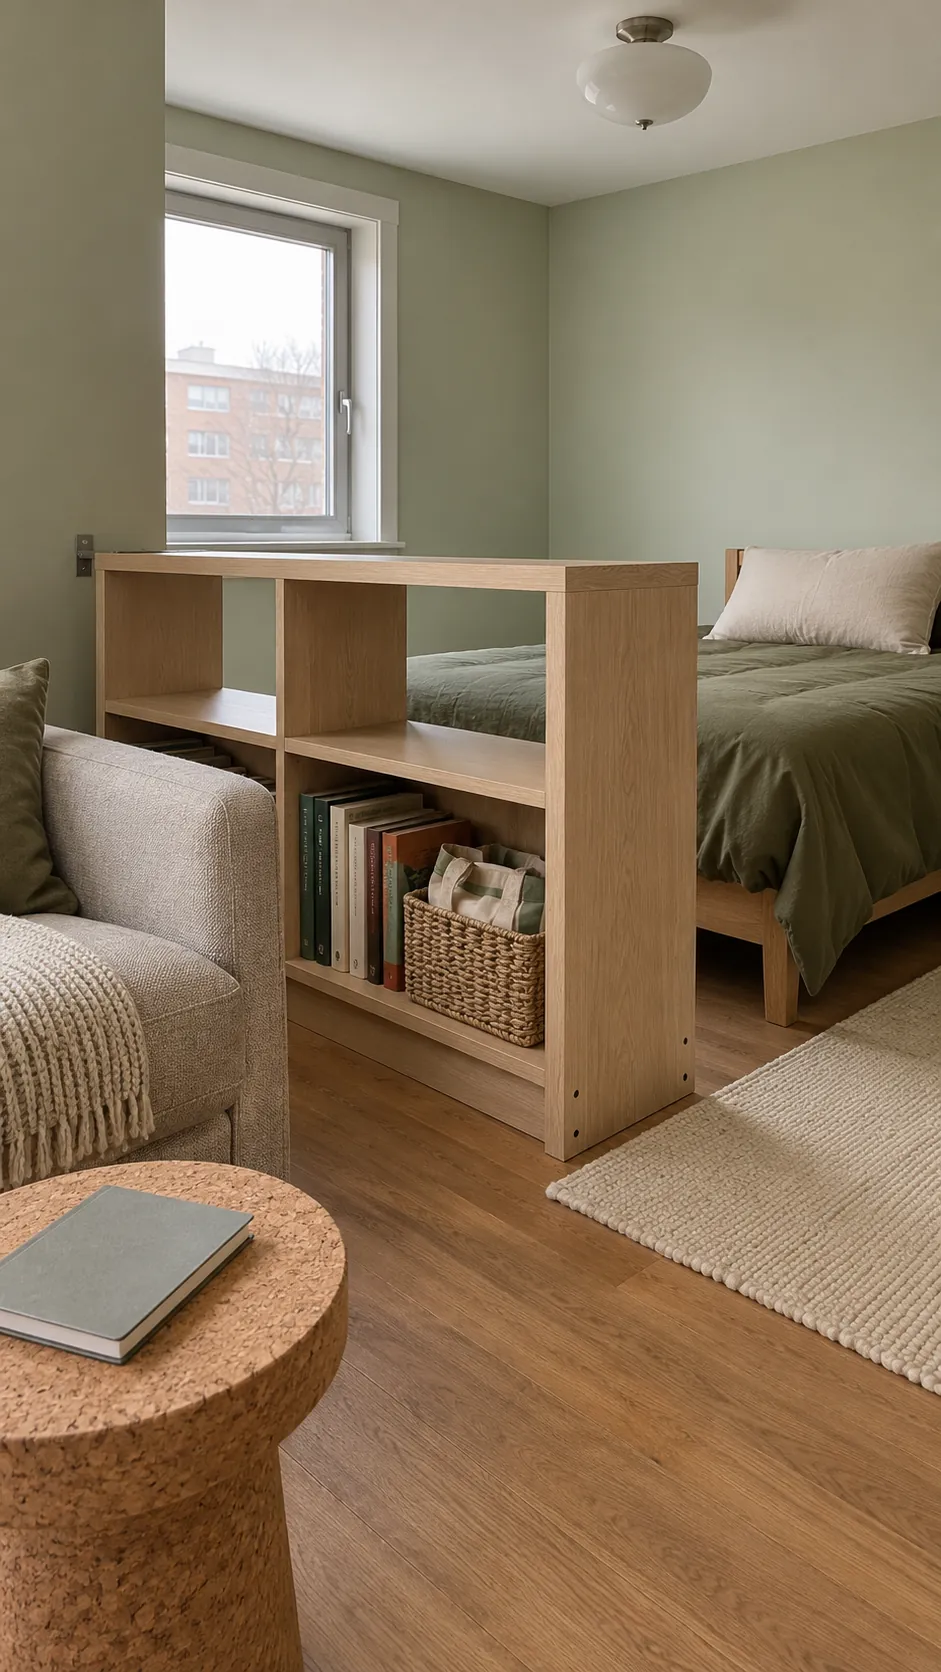
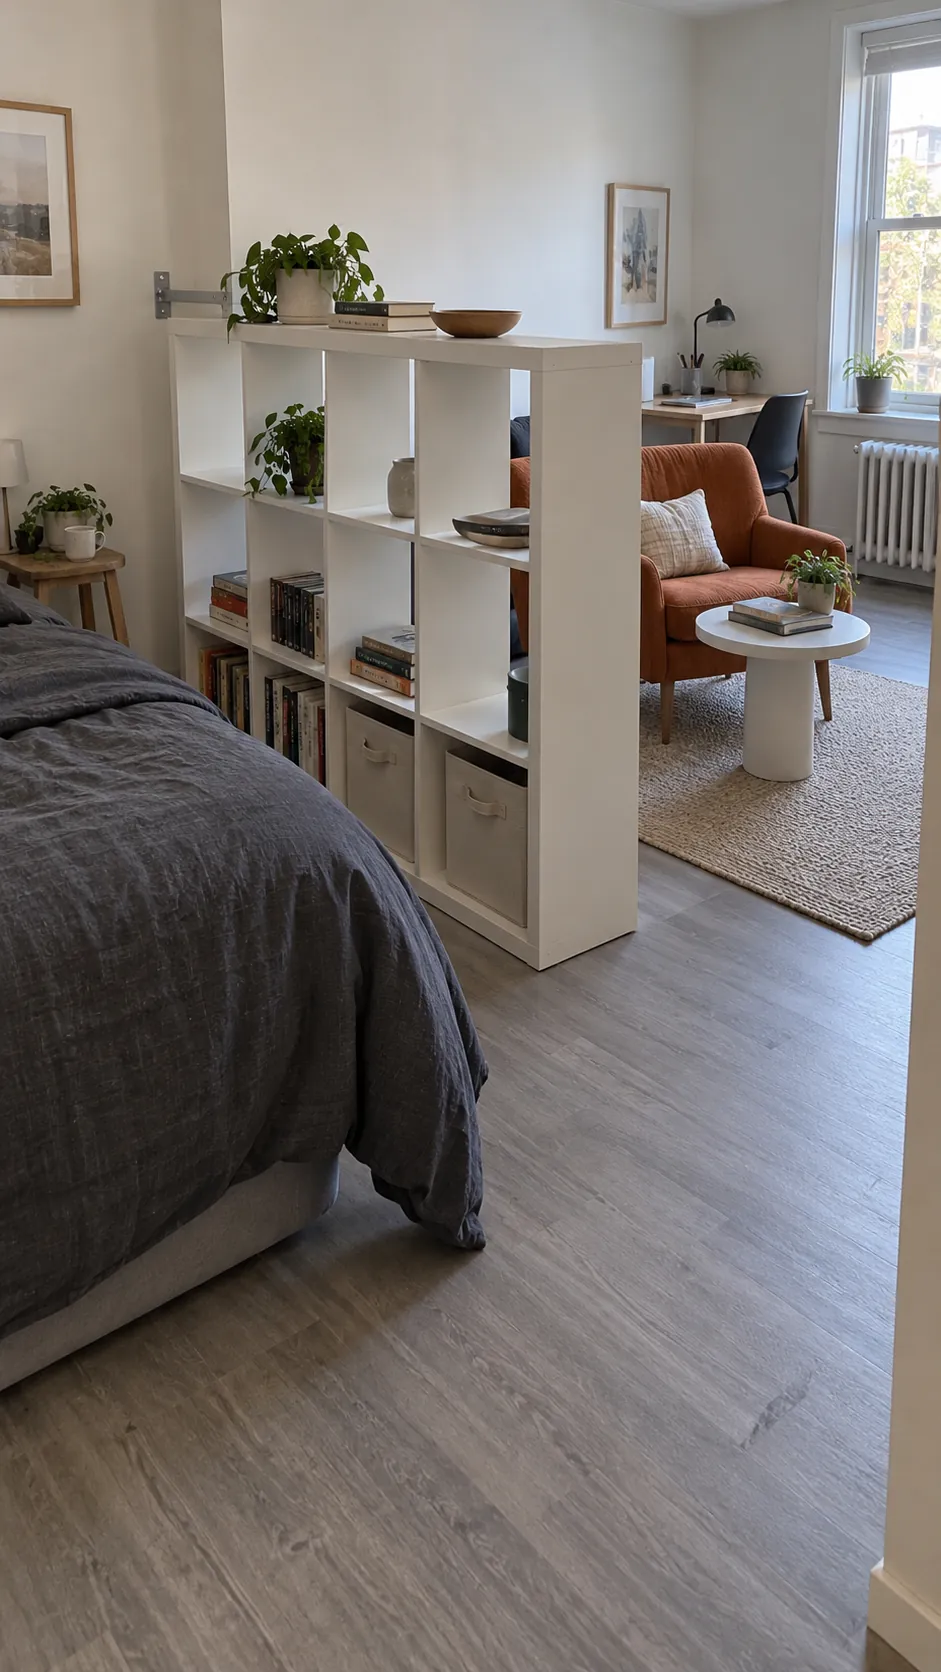
Run an open shelving unit along one side of the bed, leaving the other side available for access. The compartments break the view from the sofa while allowing light through their empty spaces. Put heavier belongings low and leave some upper cubes unfilled. A tall unit needs appropriate restraint, so confirm that your lease allows the required anchoring before buying it.
Curtain Across a Sleeping Corner
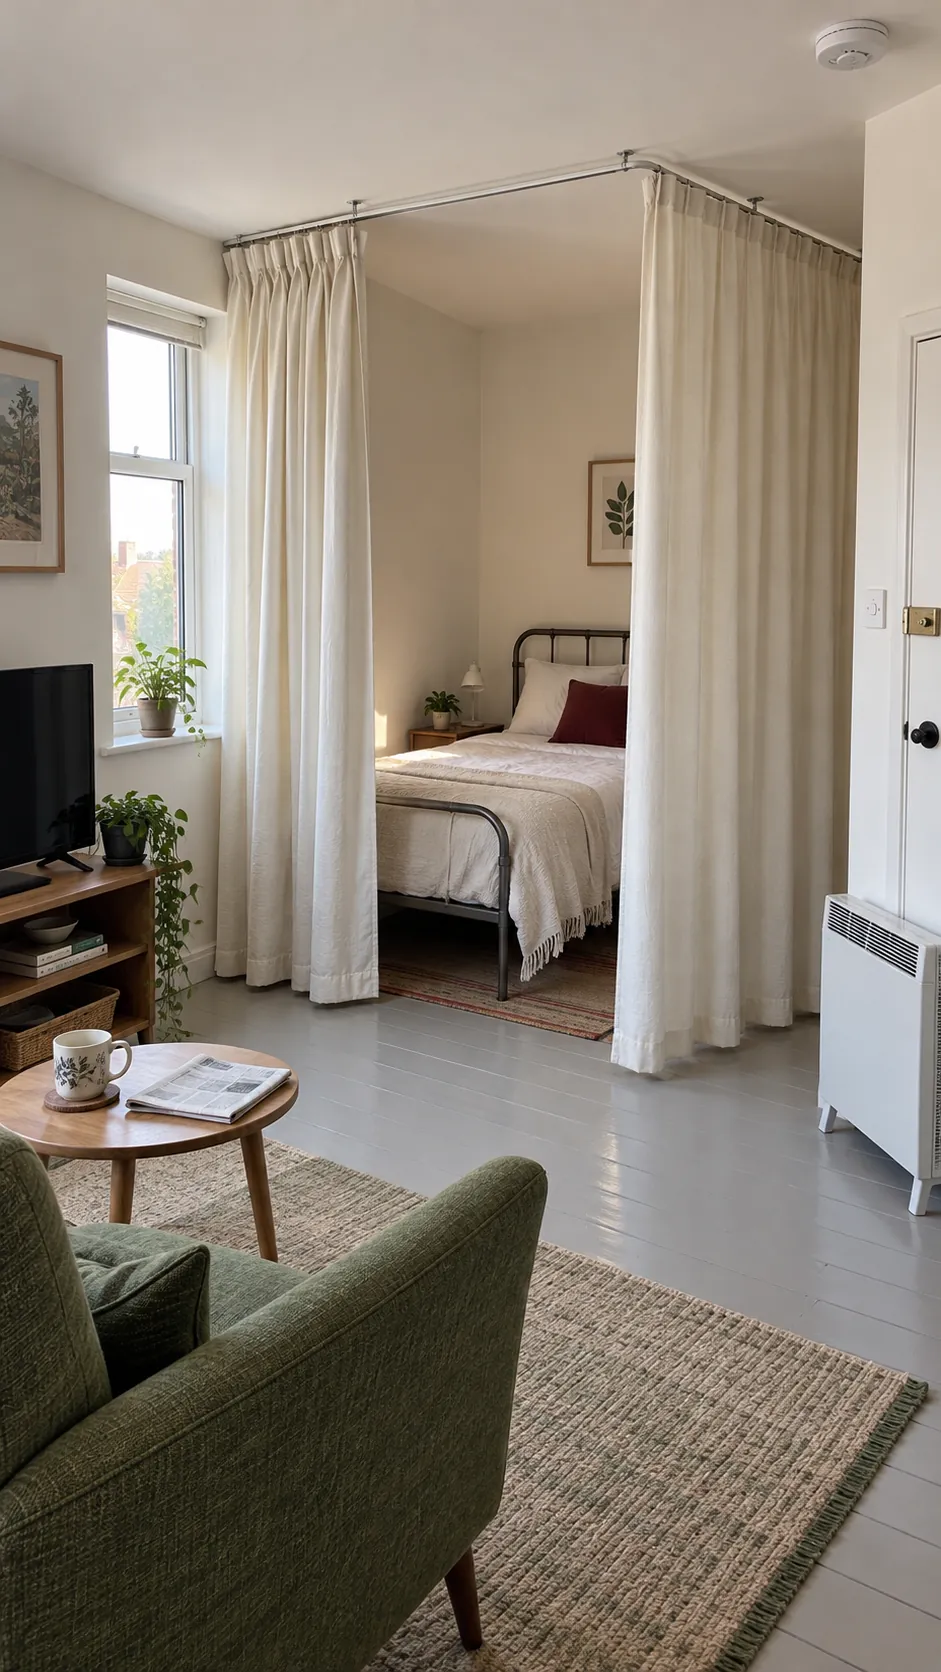
Draw a curtain around the bed corner when you want visual privacy, then pull it back during the day. Position the track so fabric does not cover a heater, vent, or required exit path. A ceiling attachment usually needs permission and suitable fixings for the ceiling material. Choose fabric with enough fullness to close cleanly, but remember that a curtain does little to isolate sound.
Folding Screen Along the Sightline
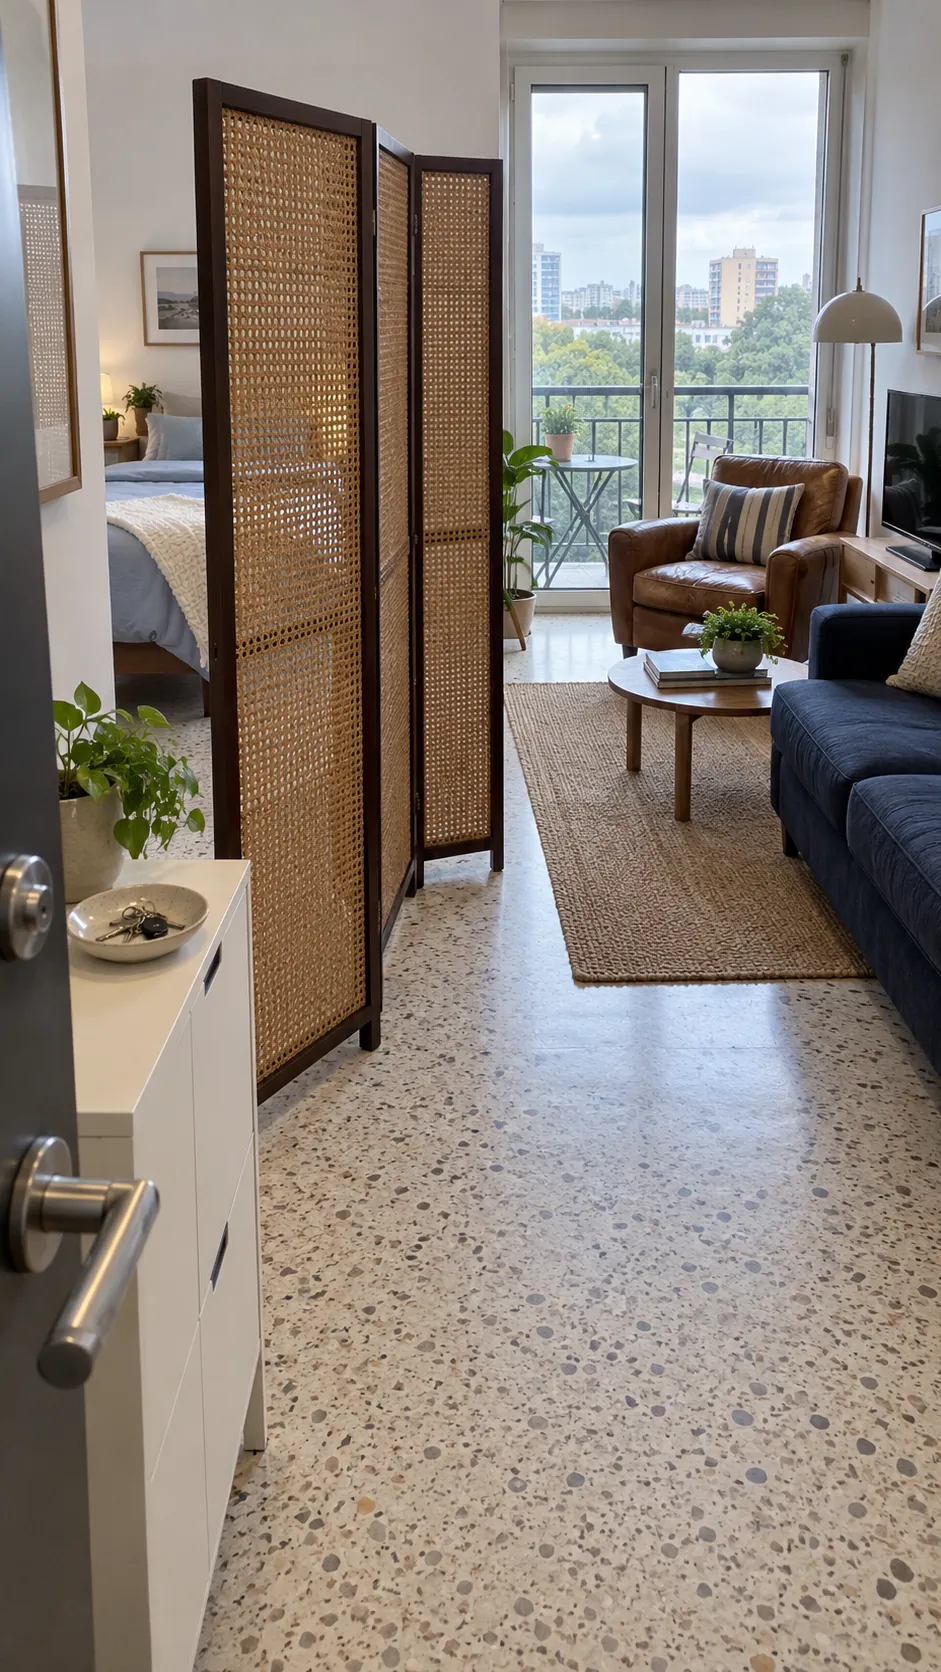
Angle a folding screen between the entrance and the bed instead of stretching it across the entire room. The offset blocks the most revealing sightline while preserving an opening toward the window. Spread the feet or panels as the manufacturer requires for stability. This is especially useful when guests mostly stay near the entry and you need a movable boundary.
Dresser Dividing Two Zones
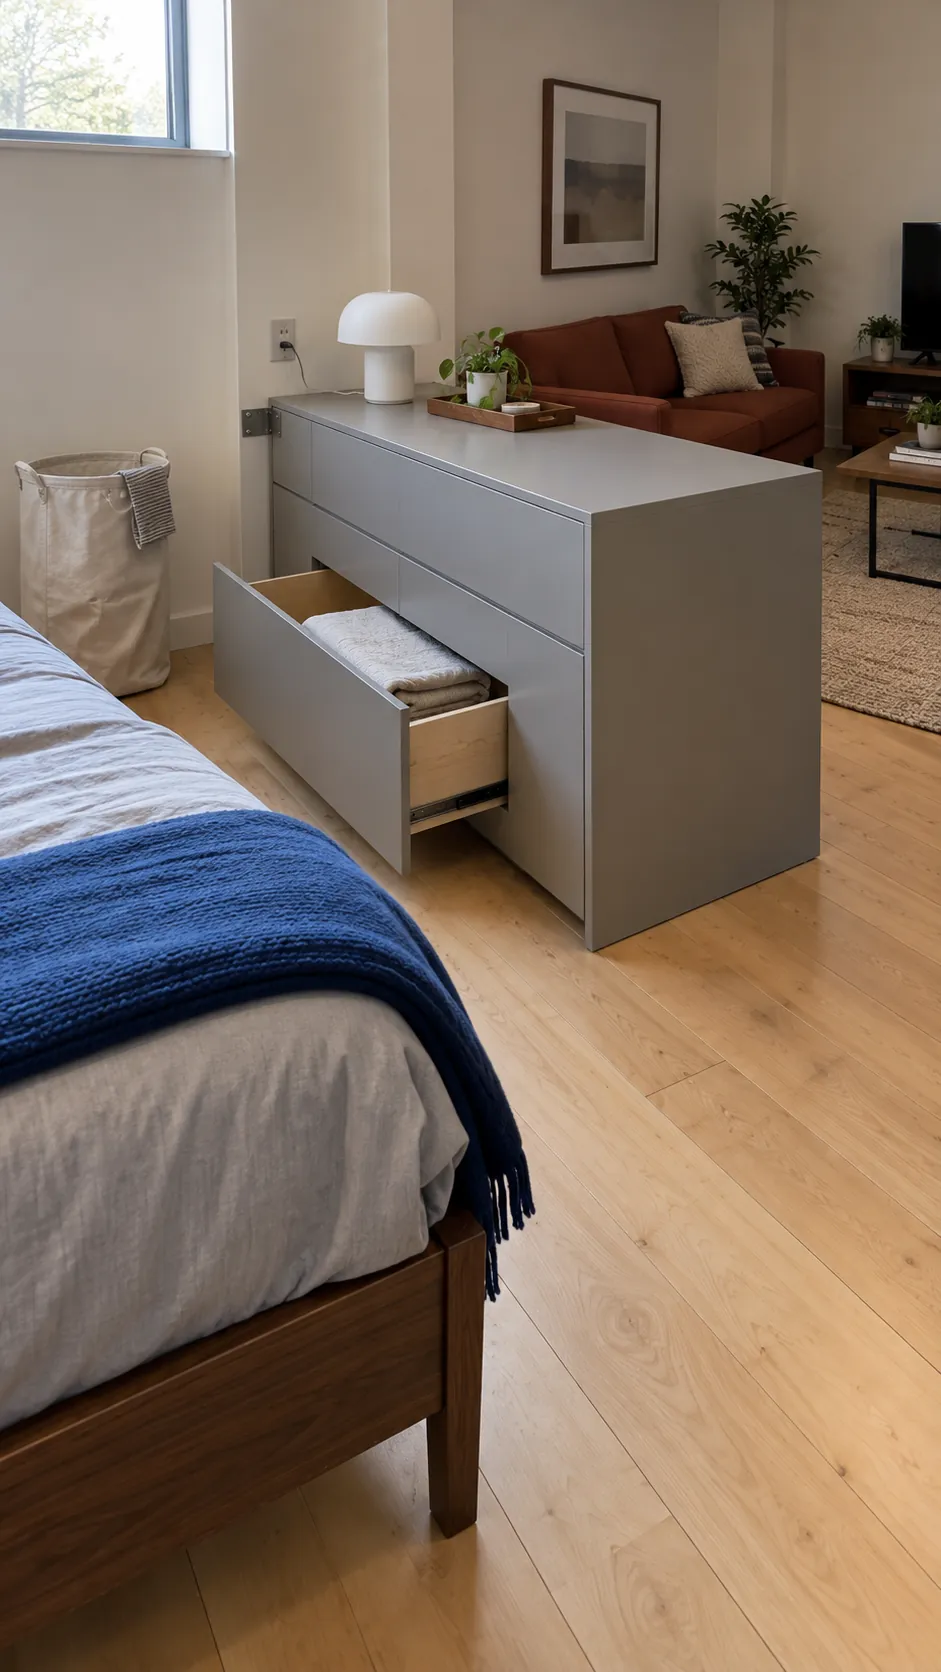
Use a dresser as the edge of the sleeping area, with its drawers facing the bed. The living side can face the finished back only if that surface is suitable to remain exposed. Allow the drawers to open fully without colliding with bedding or a chair. Confirm the furniture can be safely restrained in that position, since a floating arrangement is not suitable for every dresser.
Desk Between Bed and Sofa
Place the desk at the boundary between sleeping and sitting, facing into the brighter living area. Its surface creates a practical stopping point for work materials before they reach the bed. Keep the chair pullback area out of the main route to the bathroom. A lamp directed at the worktop helps you finish an evening task without flooding the sleeping corner with light.
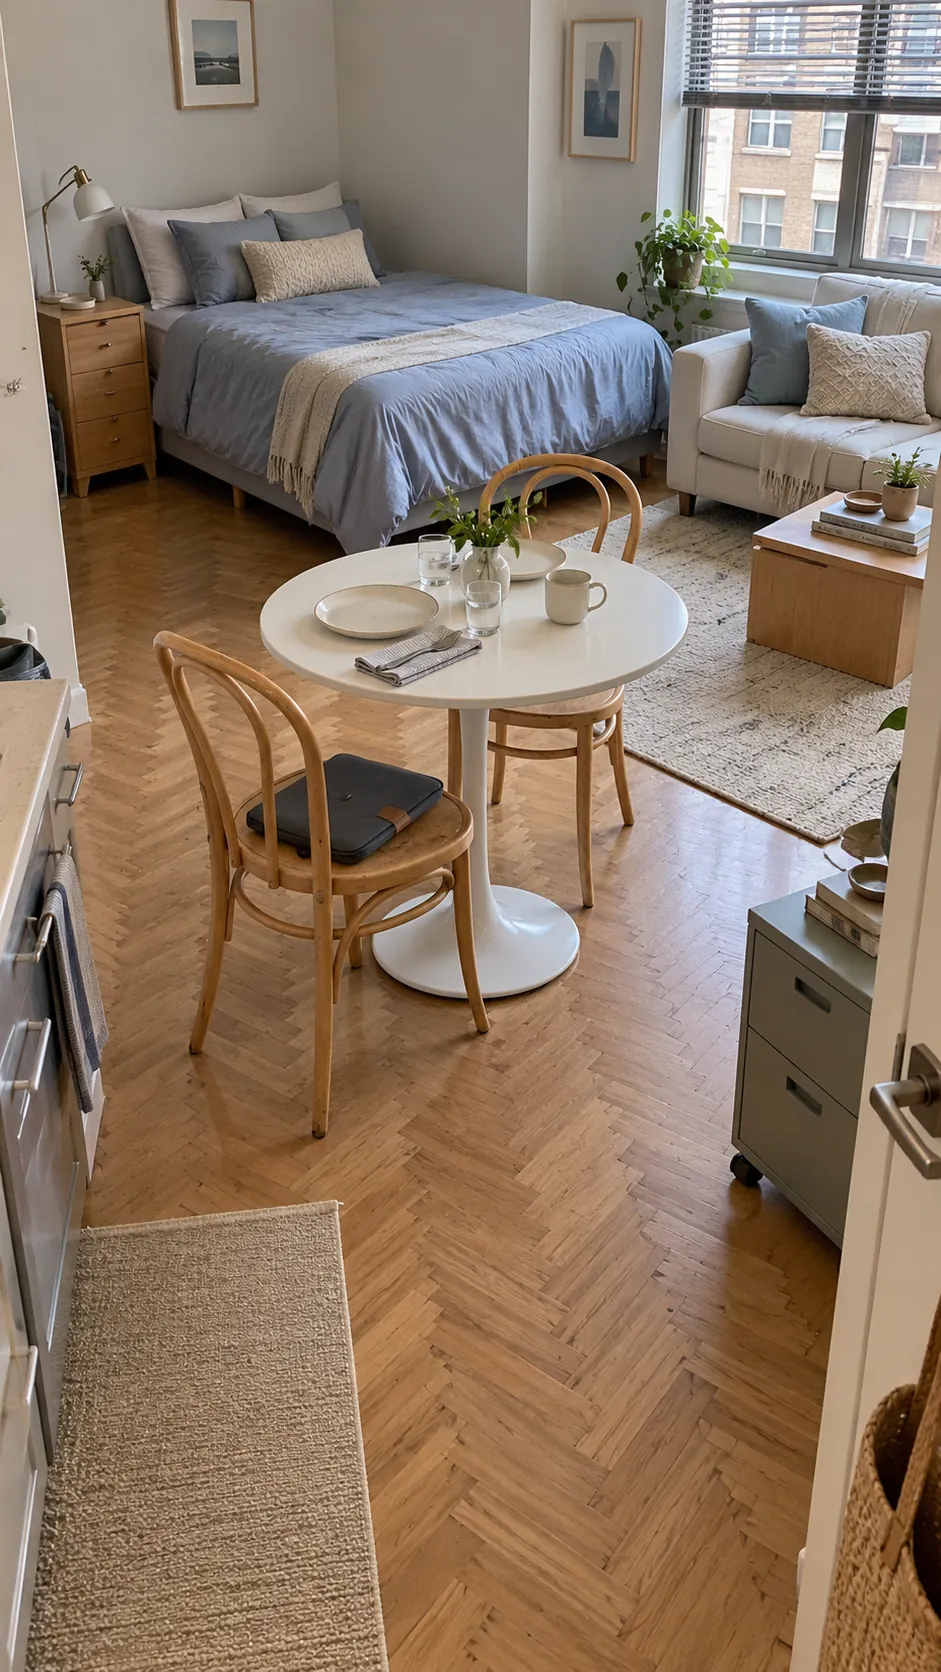
Dining Table as a Middle Zone
Set a compact dining table between the bed area and the lounge rather than beside the pillow. Eating becomes a separate activity even though all three zones share one room. Test the arrangement with chairs pulled out, not only pushed under the tabletop. If the table also serves as your desk, give cables and paperwork a dedicated place to disappear before dinner.
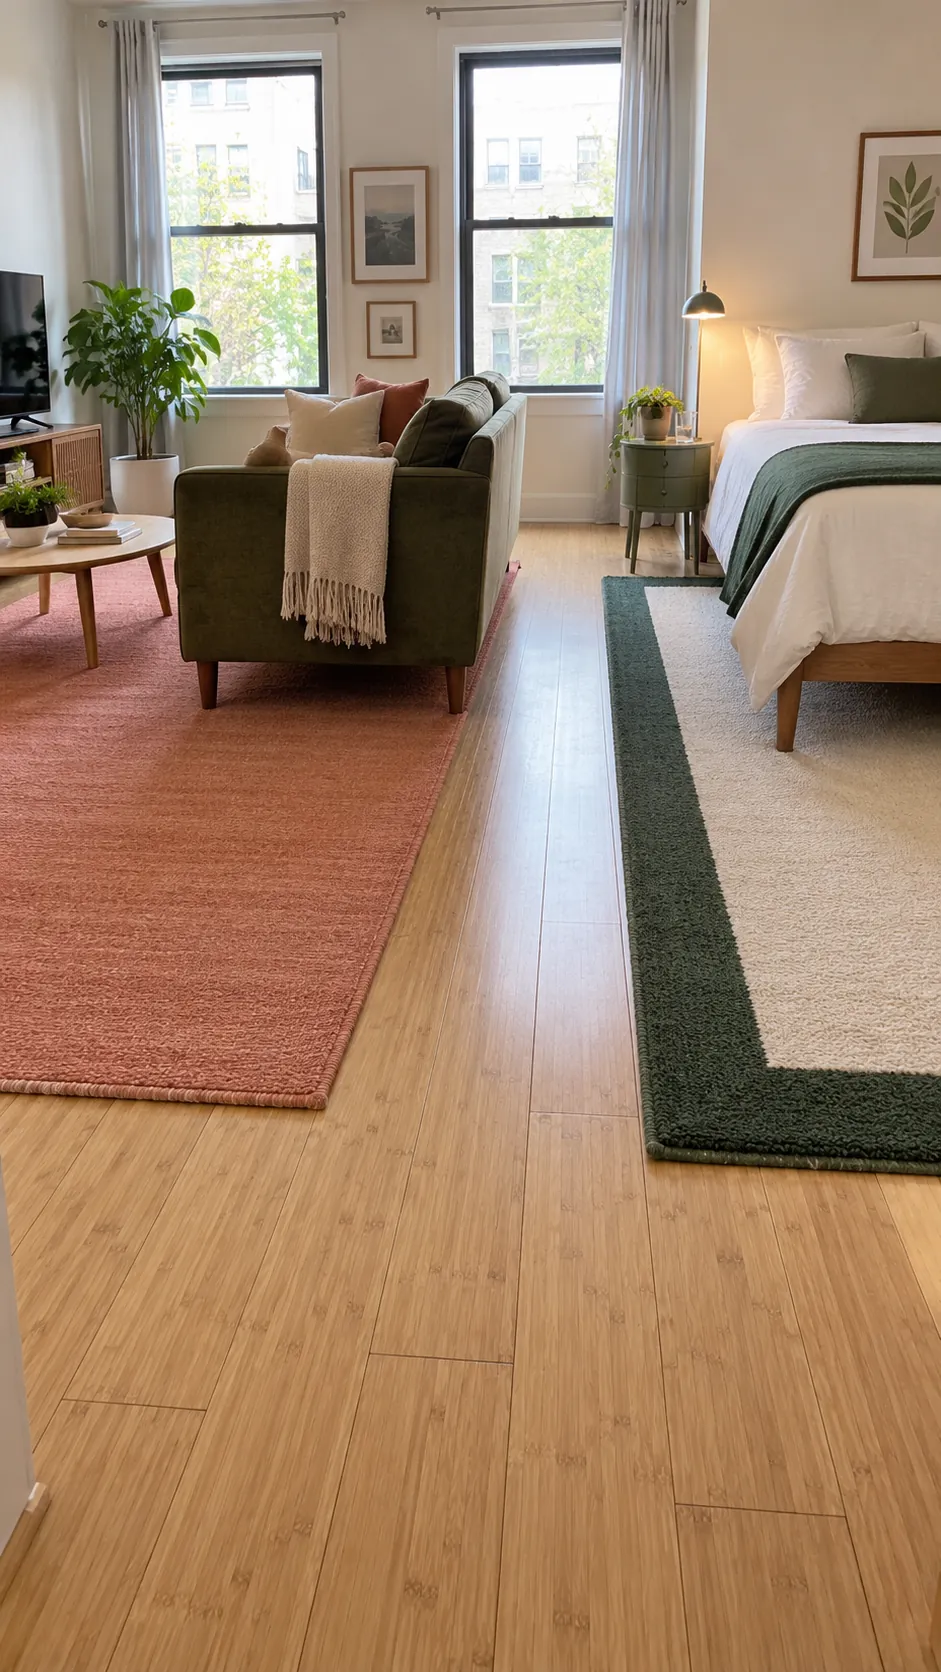
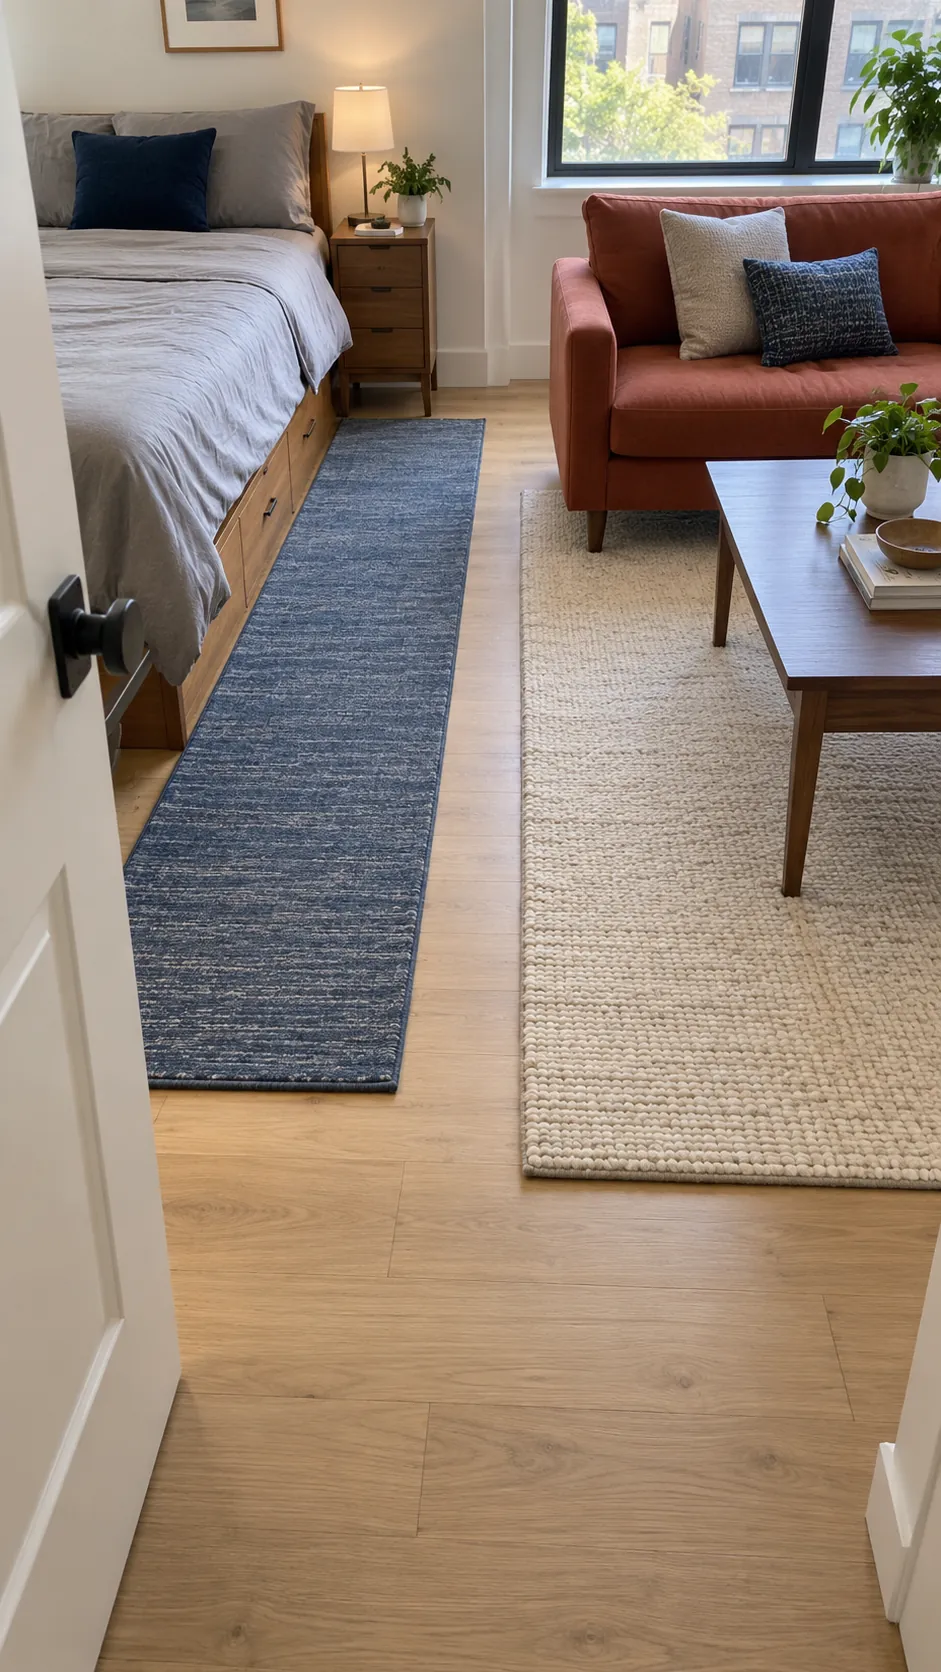
Two Rugs Defining Separate Rooms
Anchor the sofa and coffee table on one rug, then use a different rug or runner beside the bed. The contrasting edges establish studio living sleeping zones without adding a divider. Keep rug corners away from the busiest turning point and use a compatible nonslip underlay where needed. Choose the rug sizes around furniture placement so each zone feels deliberate rather than scattered.
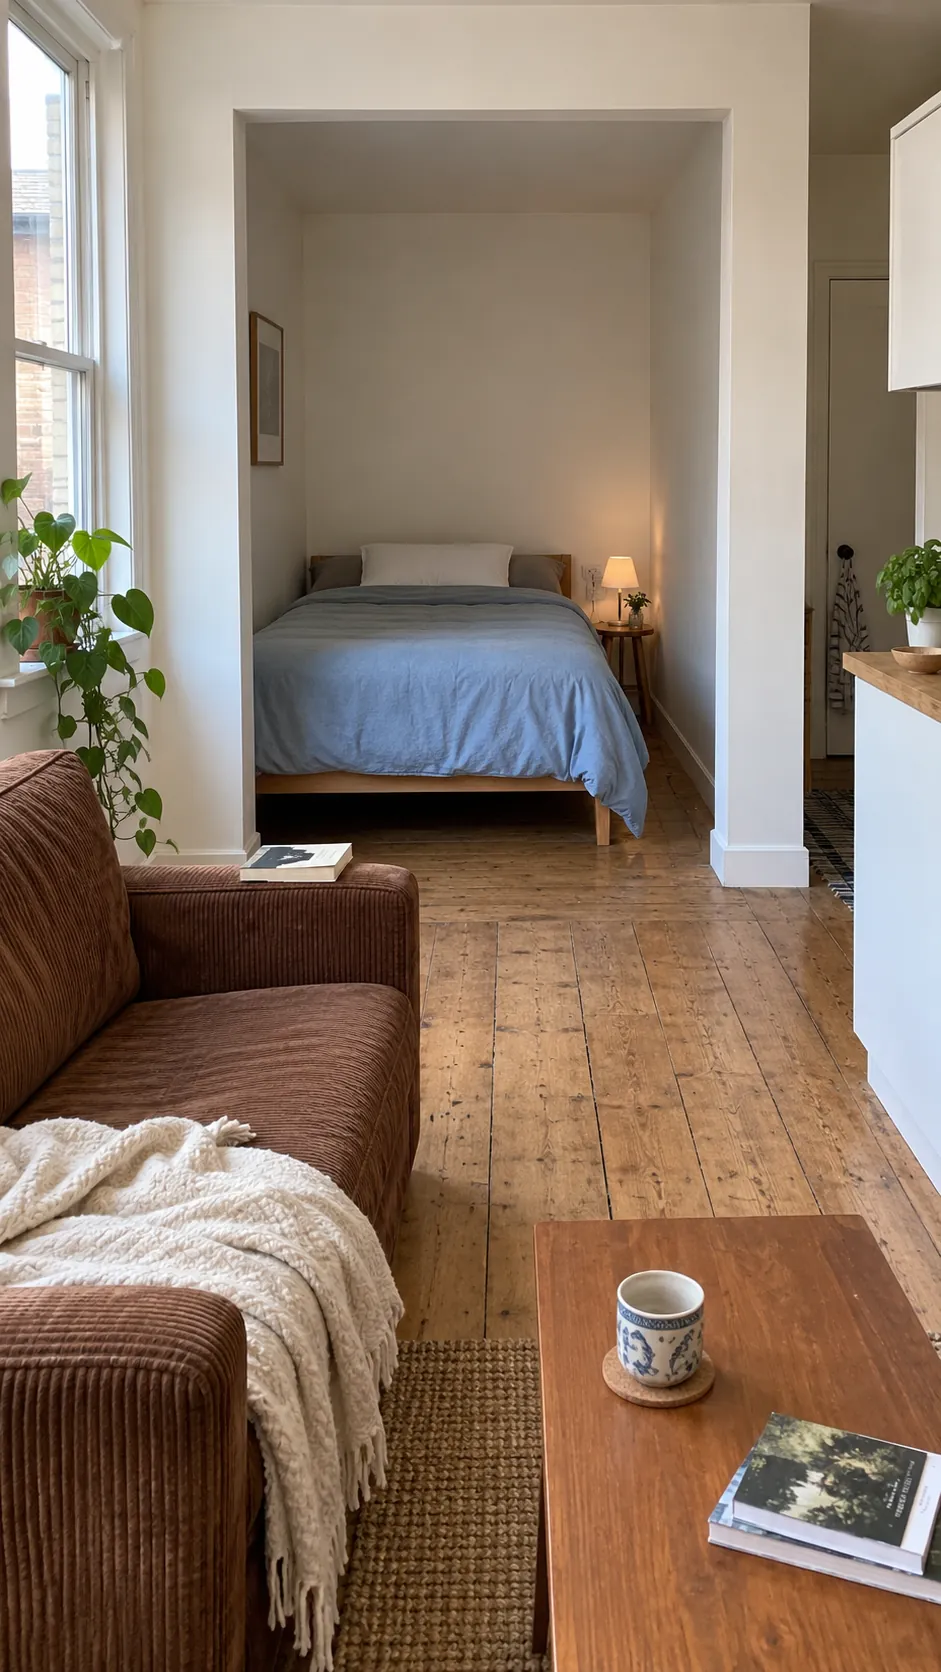
Bed in an Existing Alcove
Put the bed in an existing recess if the opening permits safe access and comfortable ventilation. The room shape already gives you a partial boundary, so bulky dividers may add little. Check the mattress width, bed frame, outlets, and overhead clearance before committing to the nook. Keep the living furniture in the main rectangle where it can share the available daylight.
Wardrobe Edge Shielding the Pillow
Position the bed so an existing wardrobe edge hides the pillow from the sitting area. This uses a fixed feature rather than adding another object to a small studio floor plan. Make sure wardrobe doors can open without striking the bed and that the bed does not block access to stored clothes. The effect is strongest when the lounge approaches the sleeping zone from an angle.
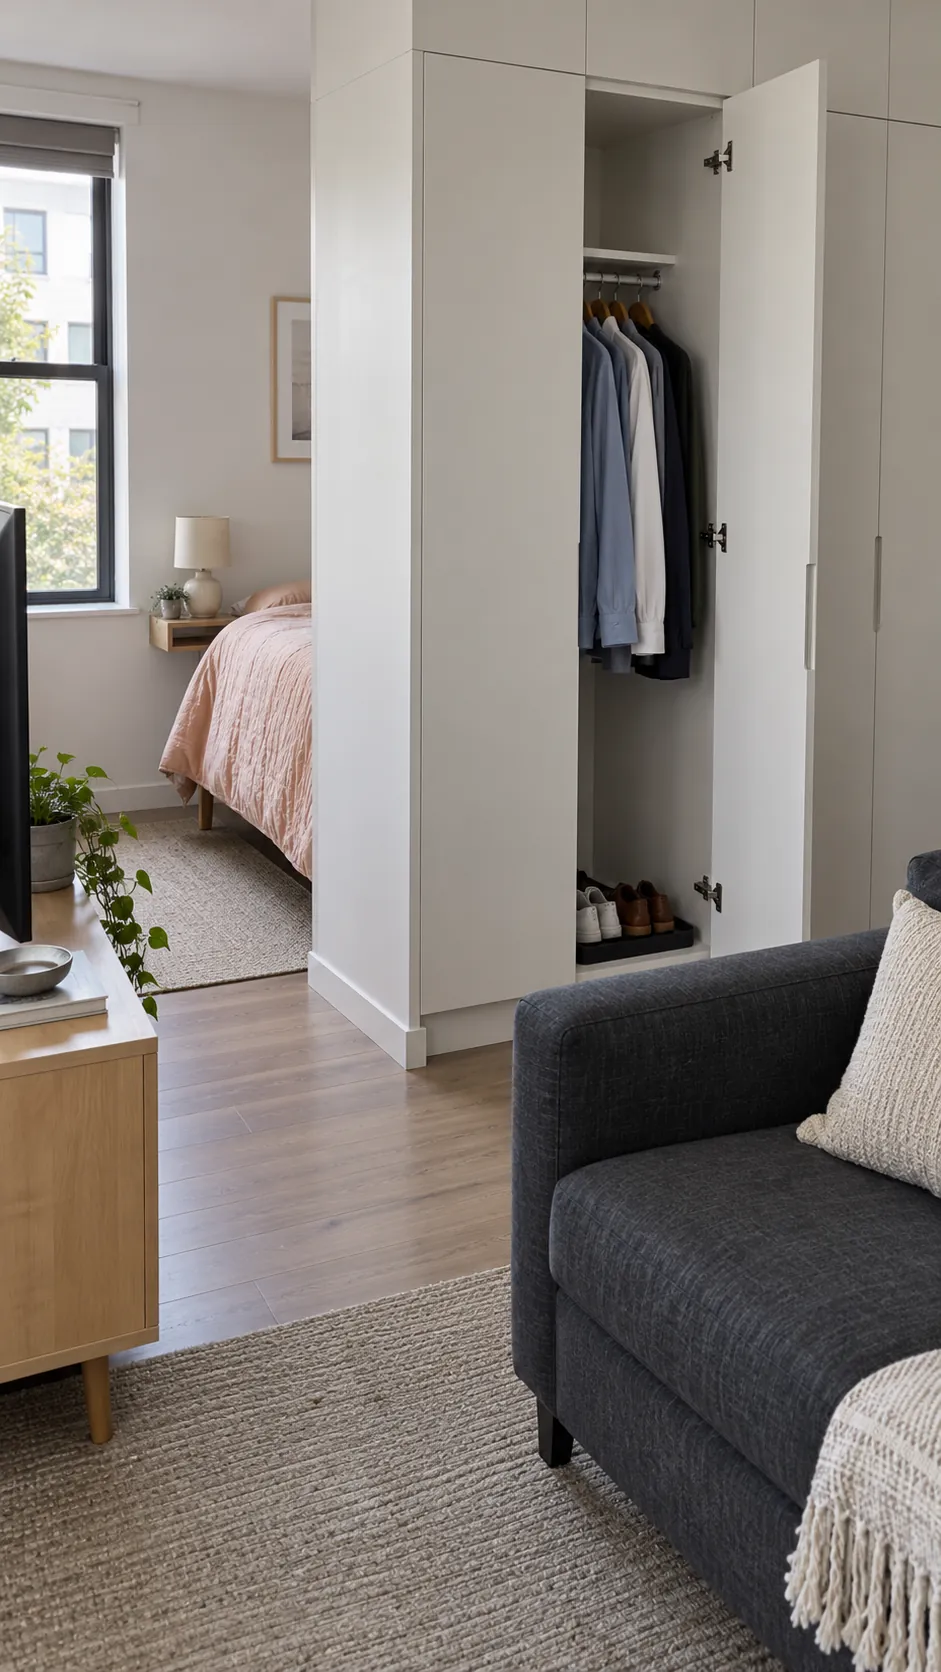
Bed on the Quiet Rear Wall
Reserve the rear wall for sleeping when the entry and kitchen create activity at the front. A chair or sofa nearer the entrance gives visitors a clear place to stop. Check whether the rear position still leaves a usable route to windows and required exits. This layout favors separation by distance, so avoid filling the gap with furniture that turns it into an obstacle course.
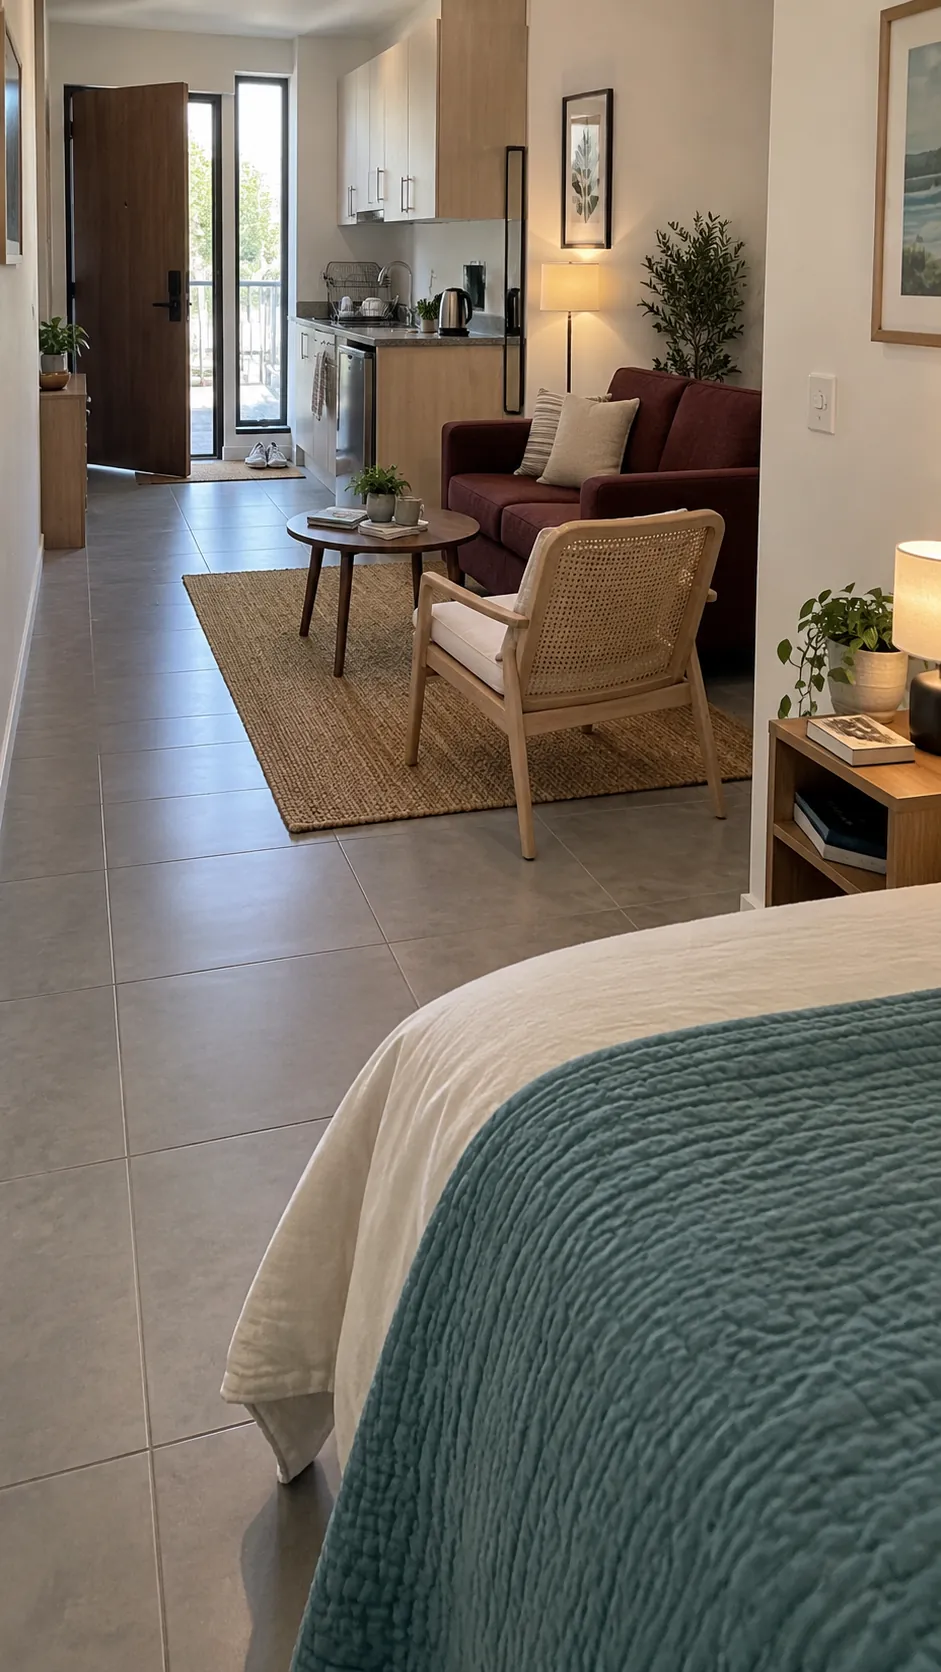
Living Area at the Only Window
Give the brightest part of the studio to the sofa and daytime activities, with the bed deeper inside. That choice can be useful when you spend most waking hours at home and the bed needs less direct light. Keep any boundary low enough that borrowed daylight still reaches the sleeping area. Consider an adjustable reading lamp so the darker bed corner remains comfortable after sunset.
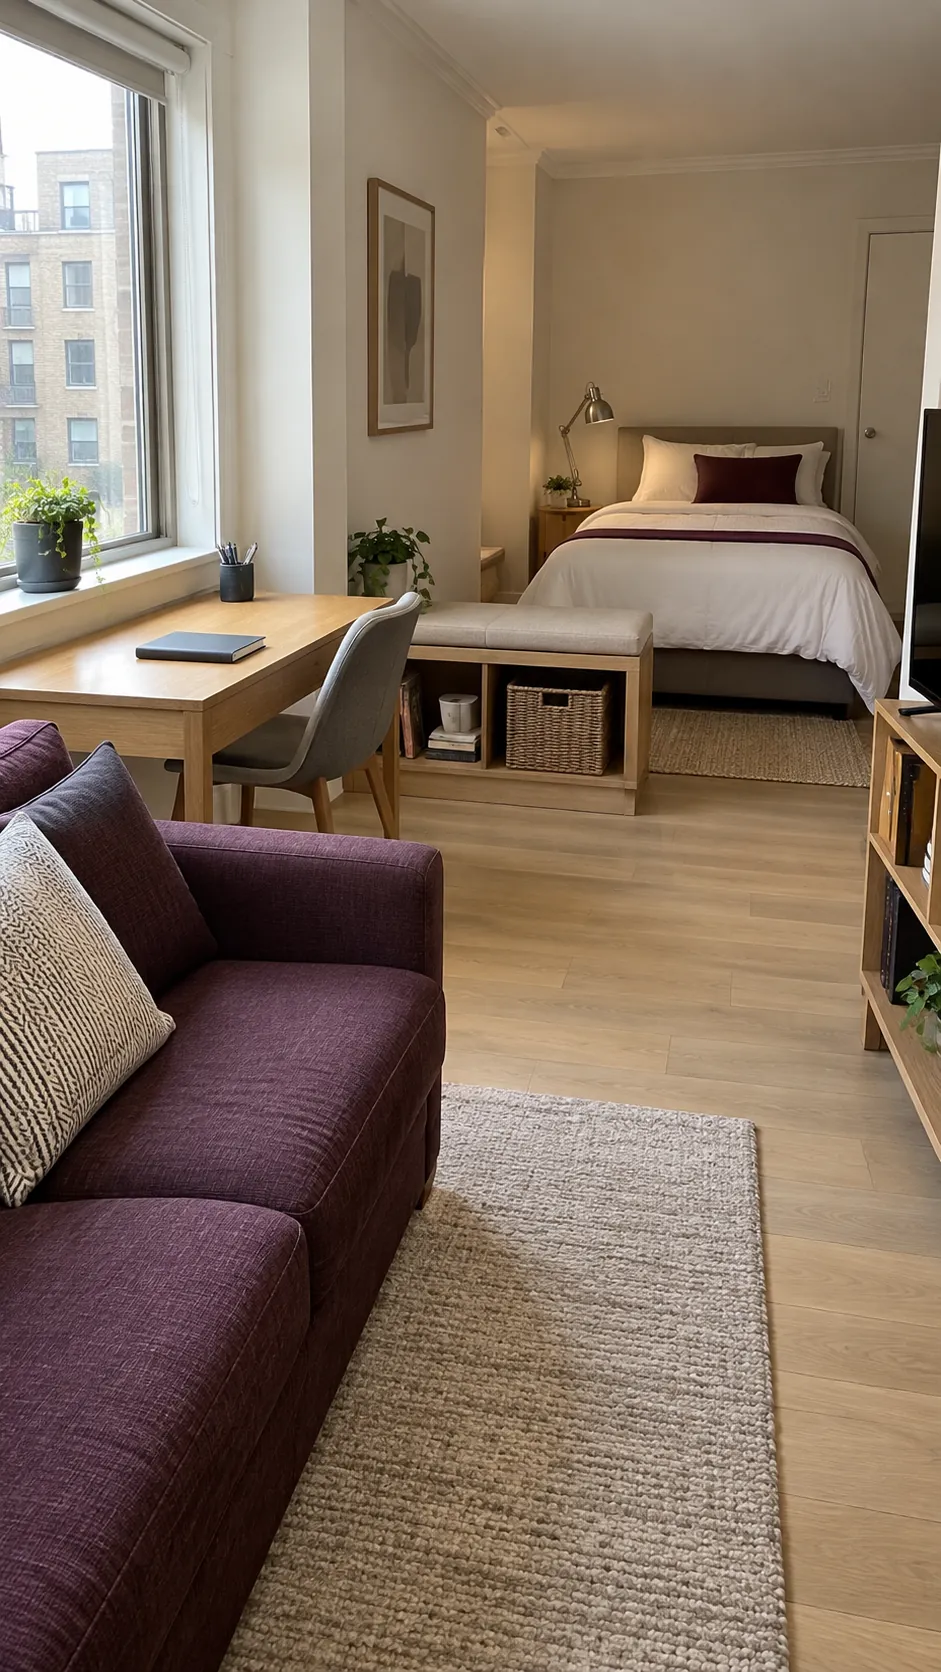
Bed Beside a Second Window
In a studio with two windows, assign one to the bed and one to the lounge. The separate light sources make a divider less likely to leave either zone gloomy. Place furniture so you can still operate the windows and reach blinds without climbing over the mattress. A screen between the zones can then focus on privacy rather than compensating for the room layout.
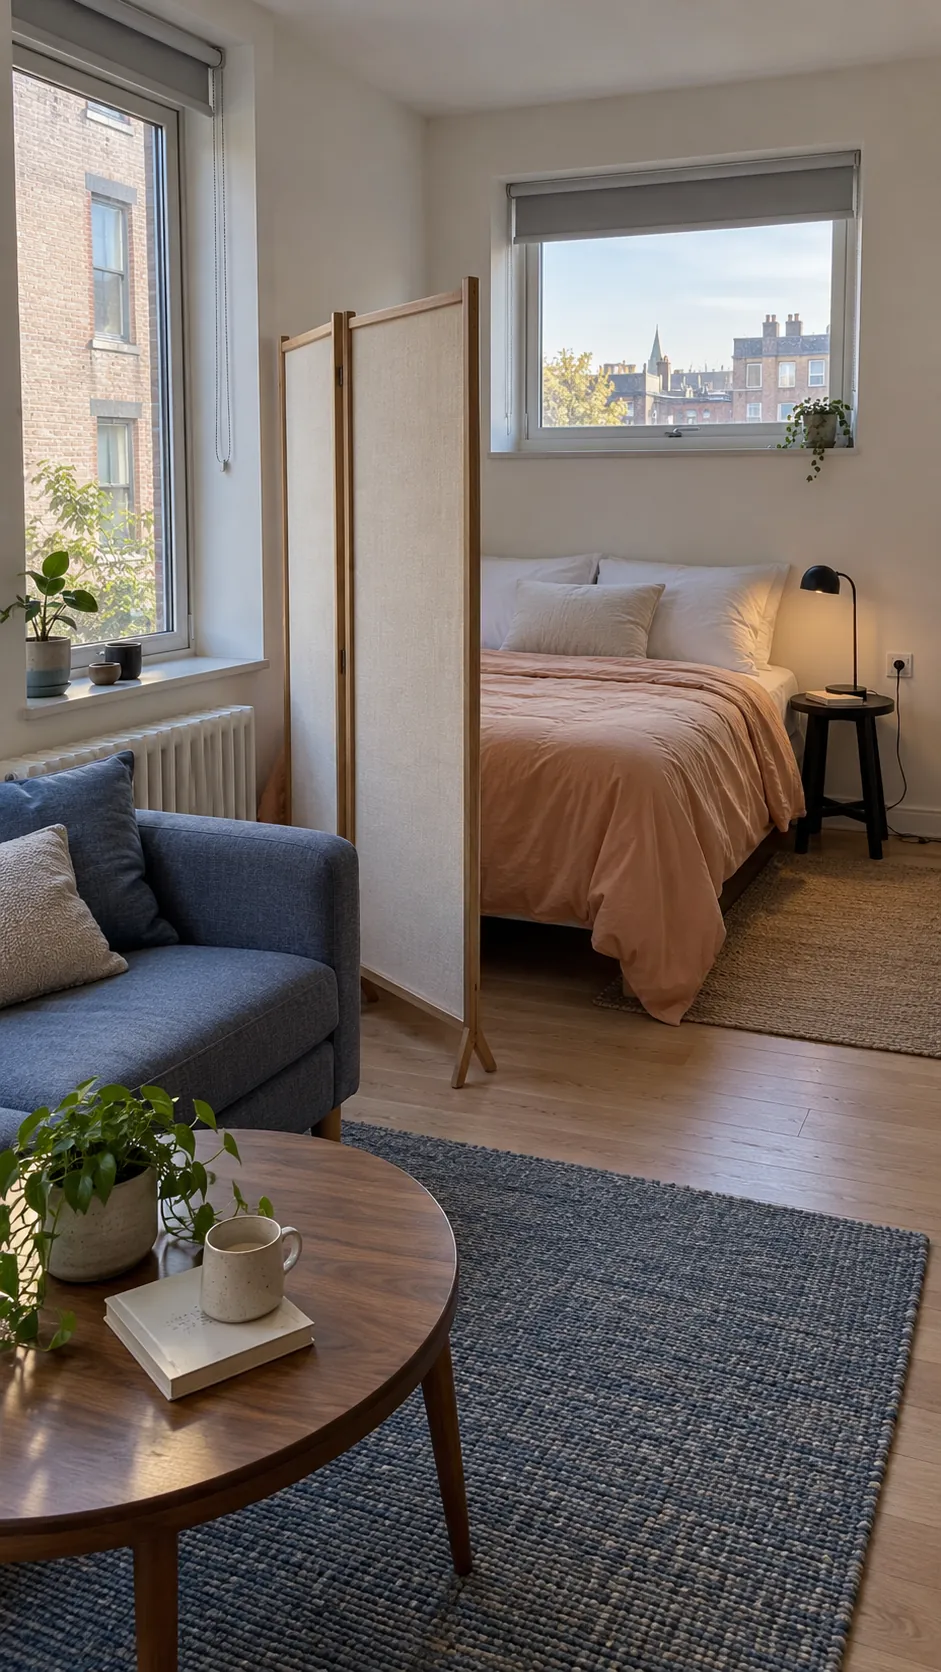
Parallel Zones in a Long Studio
Run the bed lengthwise along one wall and the sofa along the opposite wall, with a shared aisle between them. The furniture orientations make sleeping and sitting readable as two strips. A small divider near the bed head can hide pillows without consuming the whole aisle. Measure the narrowest point with bedding hanging over the frame, since that is the path you will actually use.
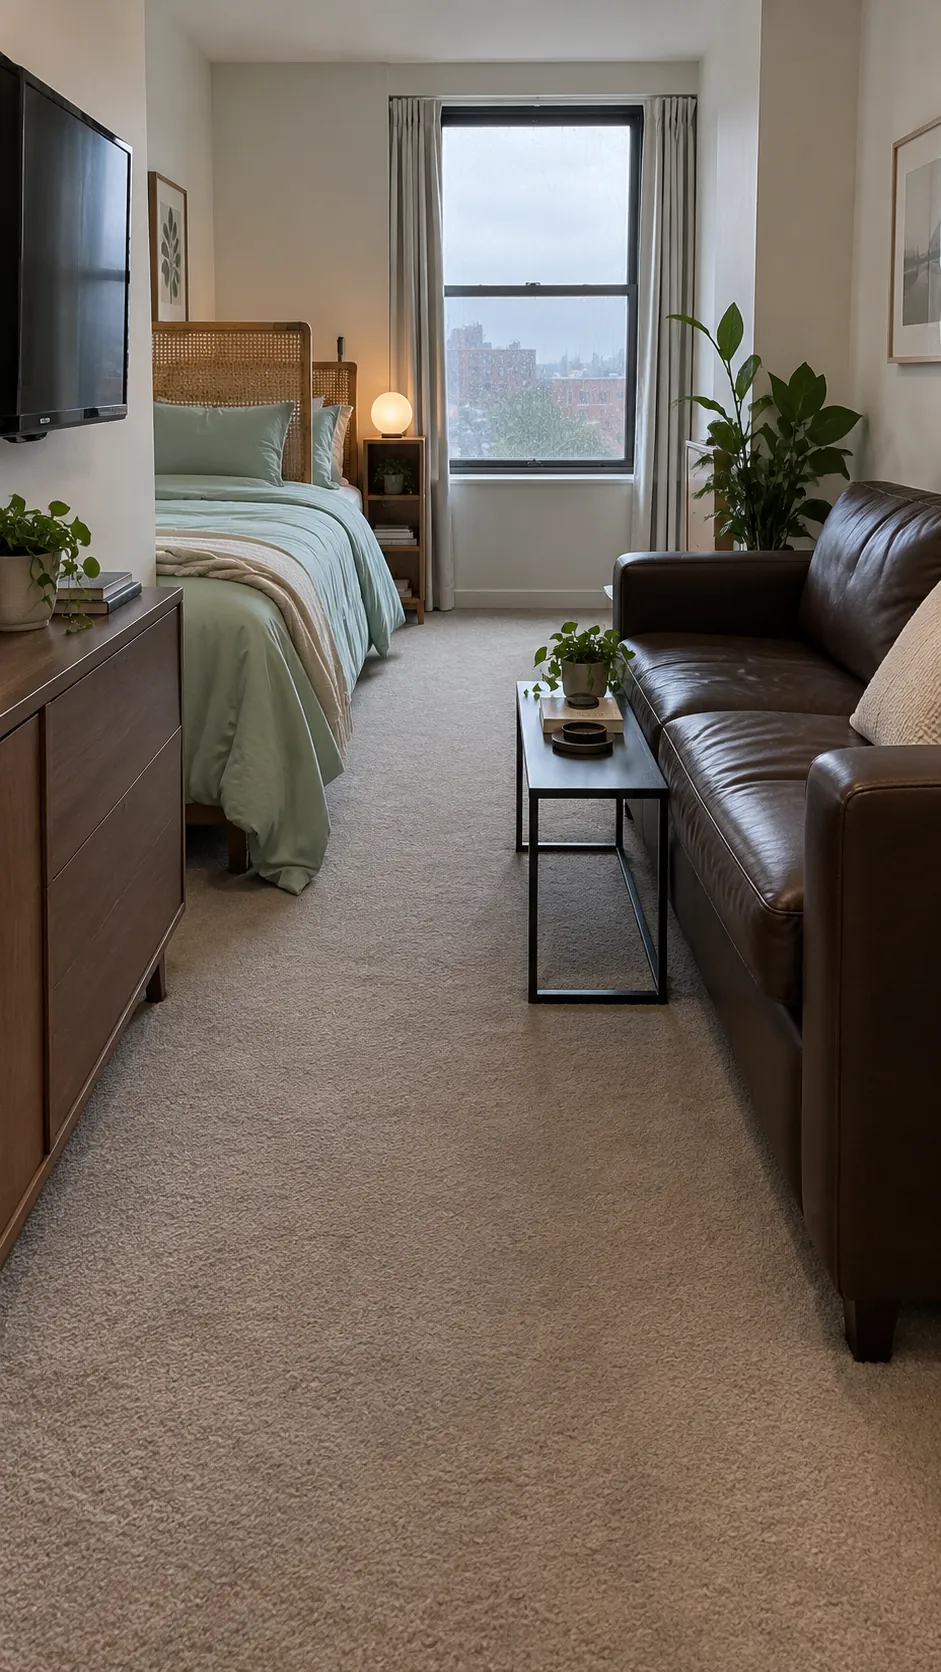
End to End Zones in a Narrow Room
Arrange the sleeping area at one end and the living area at the other when the studio cannot support parallel furniture. Keep a continuous route along one side so neither zone becomes a passage through the middle of the bed space. Use a short shelf or sofa back at the join rather than a deep cabinet. This approach works best when the room has enough length to keep the television comfortable to view.
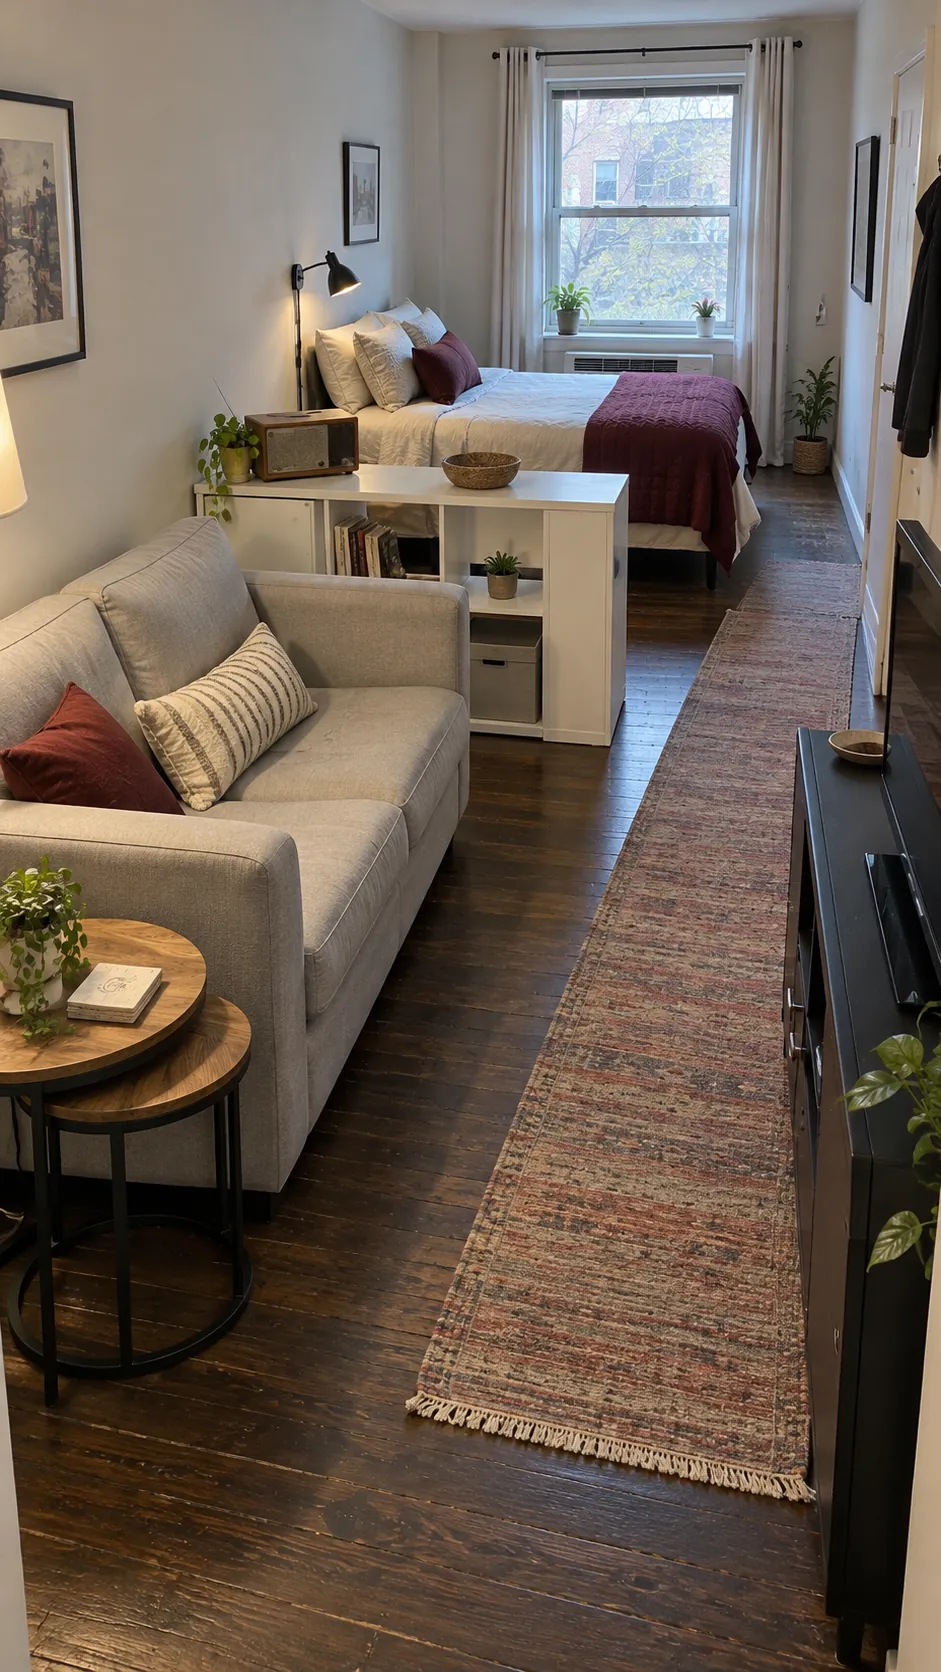
L Shaped Sofa Boundary
Use the return of a small sectional to outline the lounge, leaving the bed outside its footprint. The shape provides a visible corner even in an open plan studio zoning scheme. Choose the chaise side based on the entry route, because the wrong orientation can close the easiest path. Check the sectional dimensions against the door and delivery route as well as the final room position.
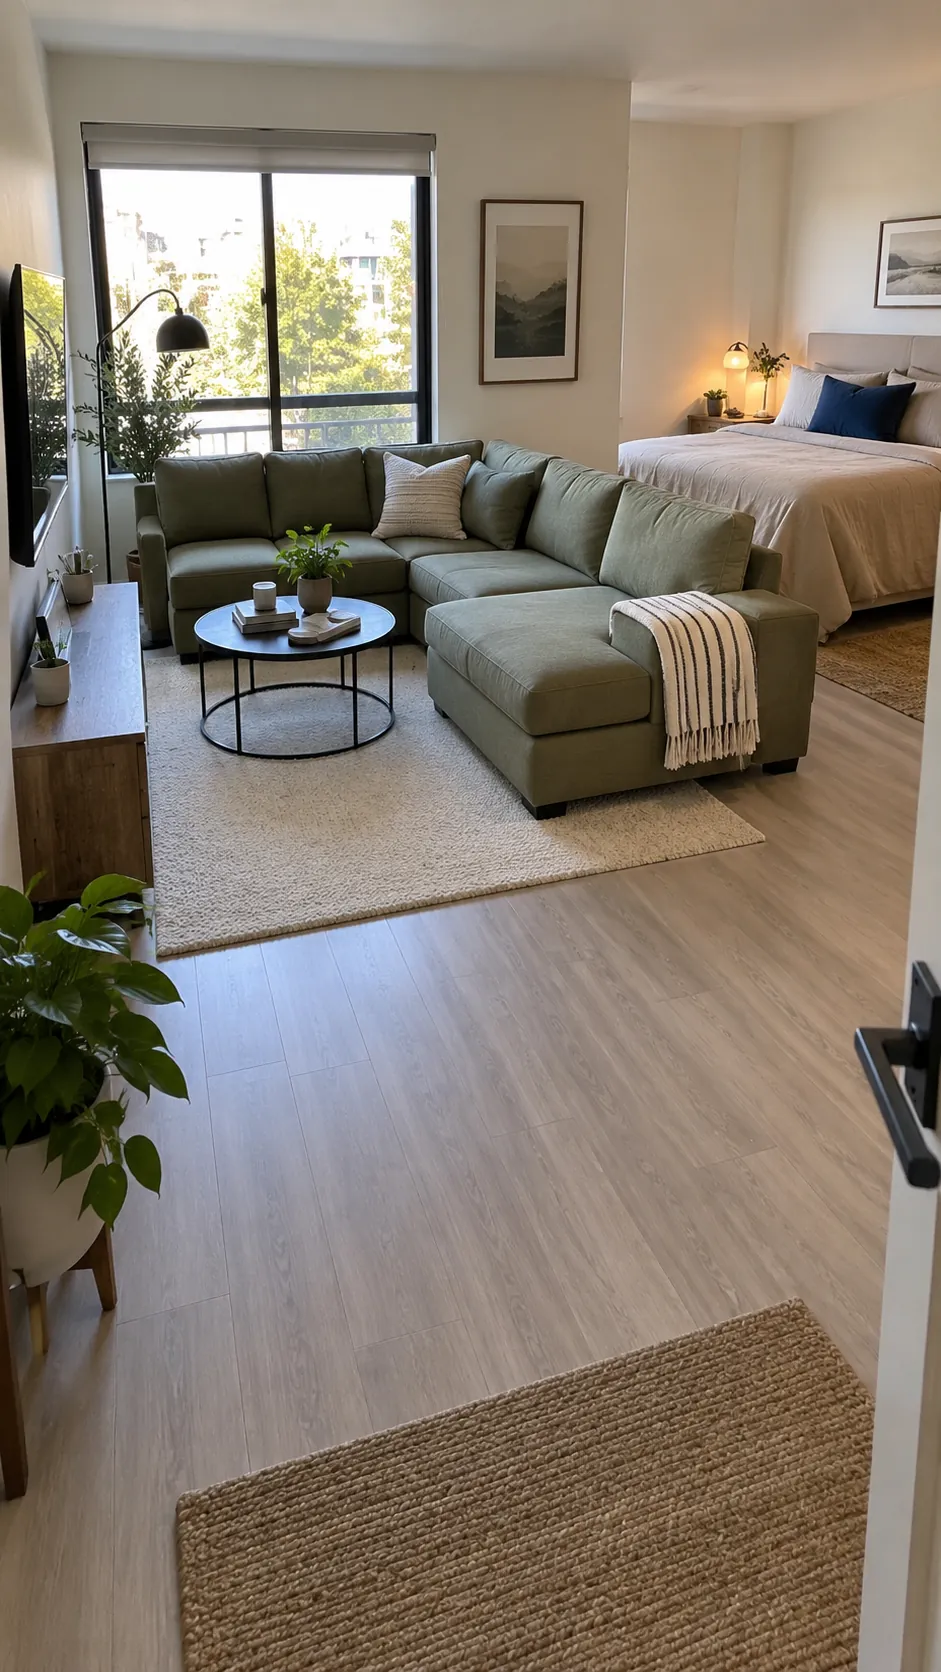
Armchair Turning Away From Sleep
Place an armchair at the edge of the lounge with its seat facing the sofa rather than the bed. That small turn tells guests where conversation belongs without needing a large barrier. A side table inside the seating group reinforces the arrangement and gives the chair a useful surface. Keep the chair light enough to move if you need more space to make the bed.
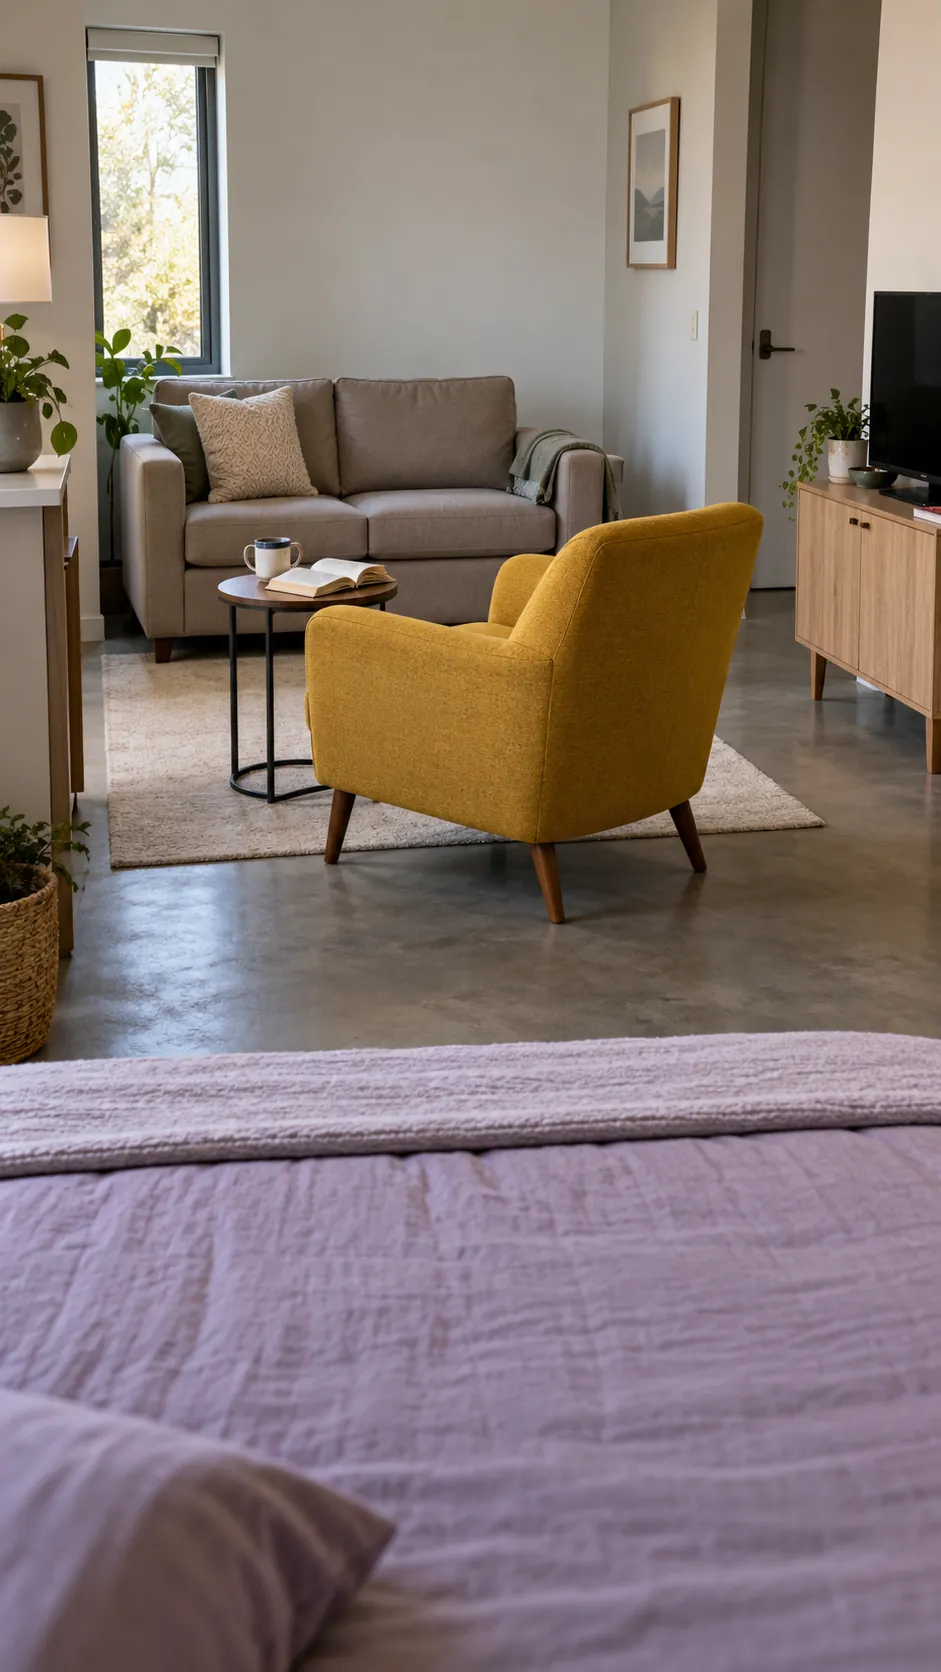
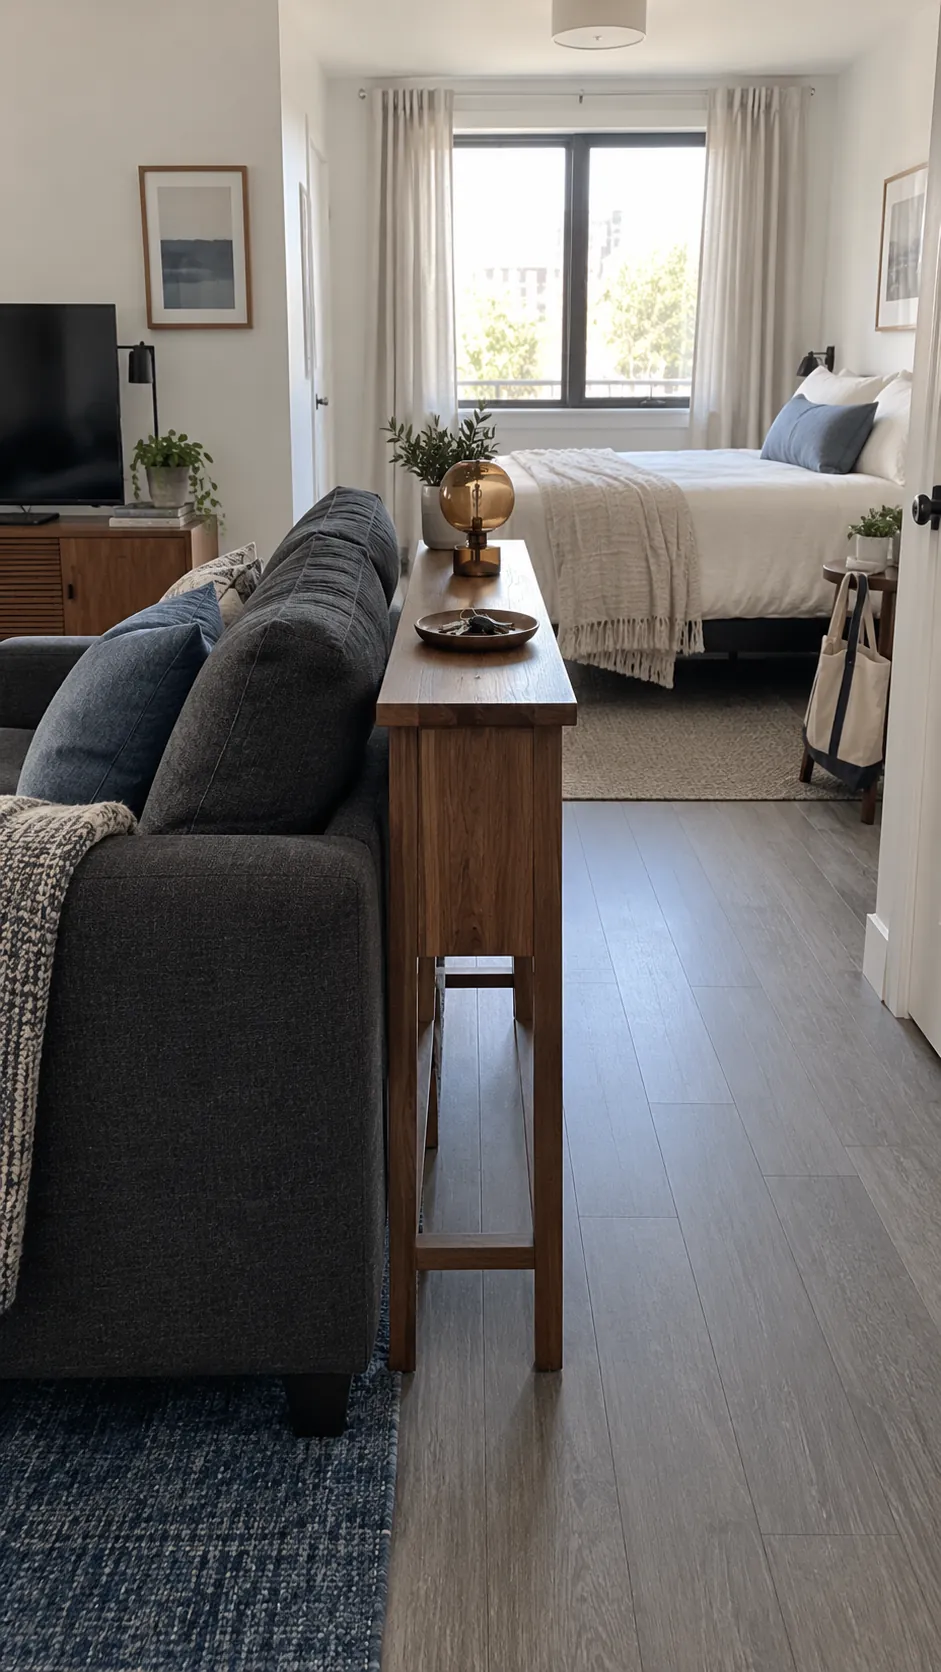
Console Behind a Floating Sofa
Add a shallow console behind the sofa to create a tidy border for the sleeping area. It can hold a small lamp and a tray, but avoid building a tall stack that blocks light or becomes unstable. Leave a separate route around the console rather than making the narrow gap behind it your only walkway. This suits a room that already has enough depth for a floating sofa.
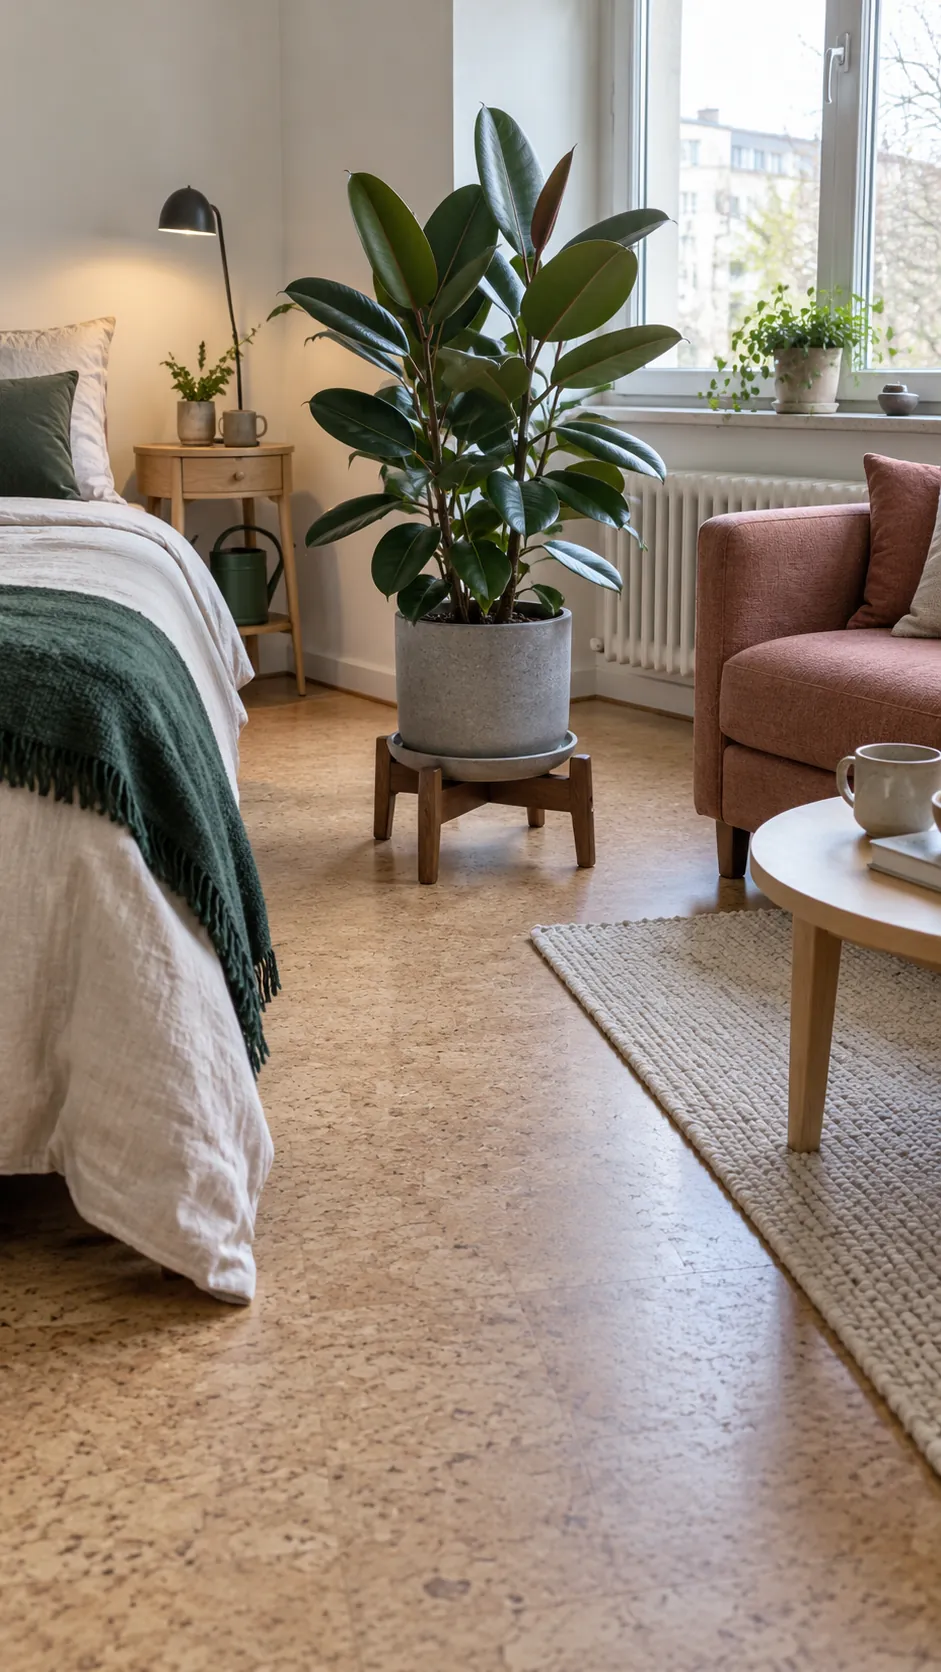
Plant Stand Framing the Boundary
Use one substantial plant on a stable stand to mark the transition between the bed and lounge. The foliage softens a sightline while leaving the room visually open. Pick a plant suited to the actual light and keep leaves out of doorways, heaters, and fan paths. If pets live with you, check plant safety and secure the pot where it cannot be easily knocked over.
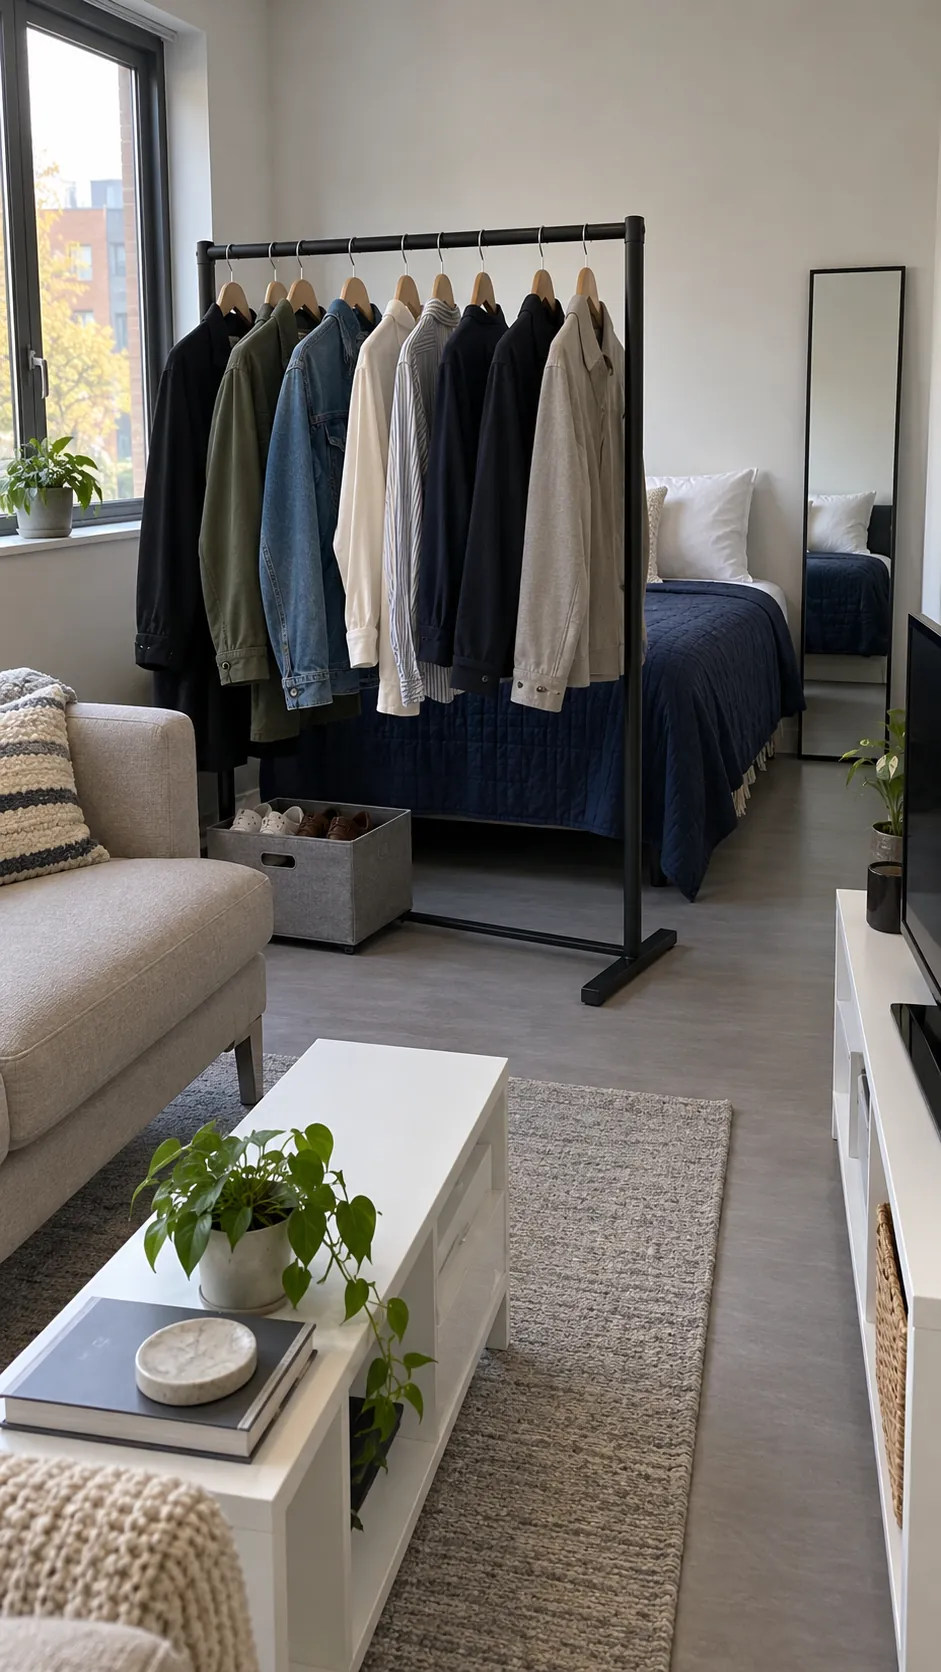
Clothing Rail at the Sleeping Edge
Place a freestanding clothing rail beside the sleeping zone when extra hanging space is already needed. A restrained row of clothes screens part of the bed while performing a real storage job. Leave enough room to reach both the hangers and the mattress without moving the whole rail each morning. Avoid overloading it, and use its rated capacity rather than treating the rail as a permanent wall.
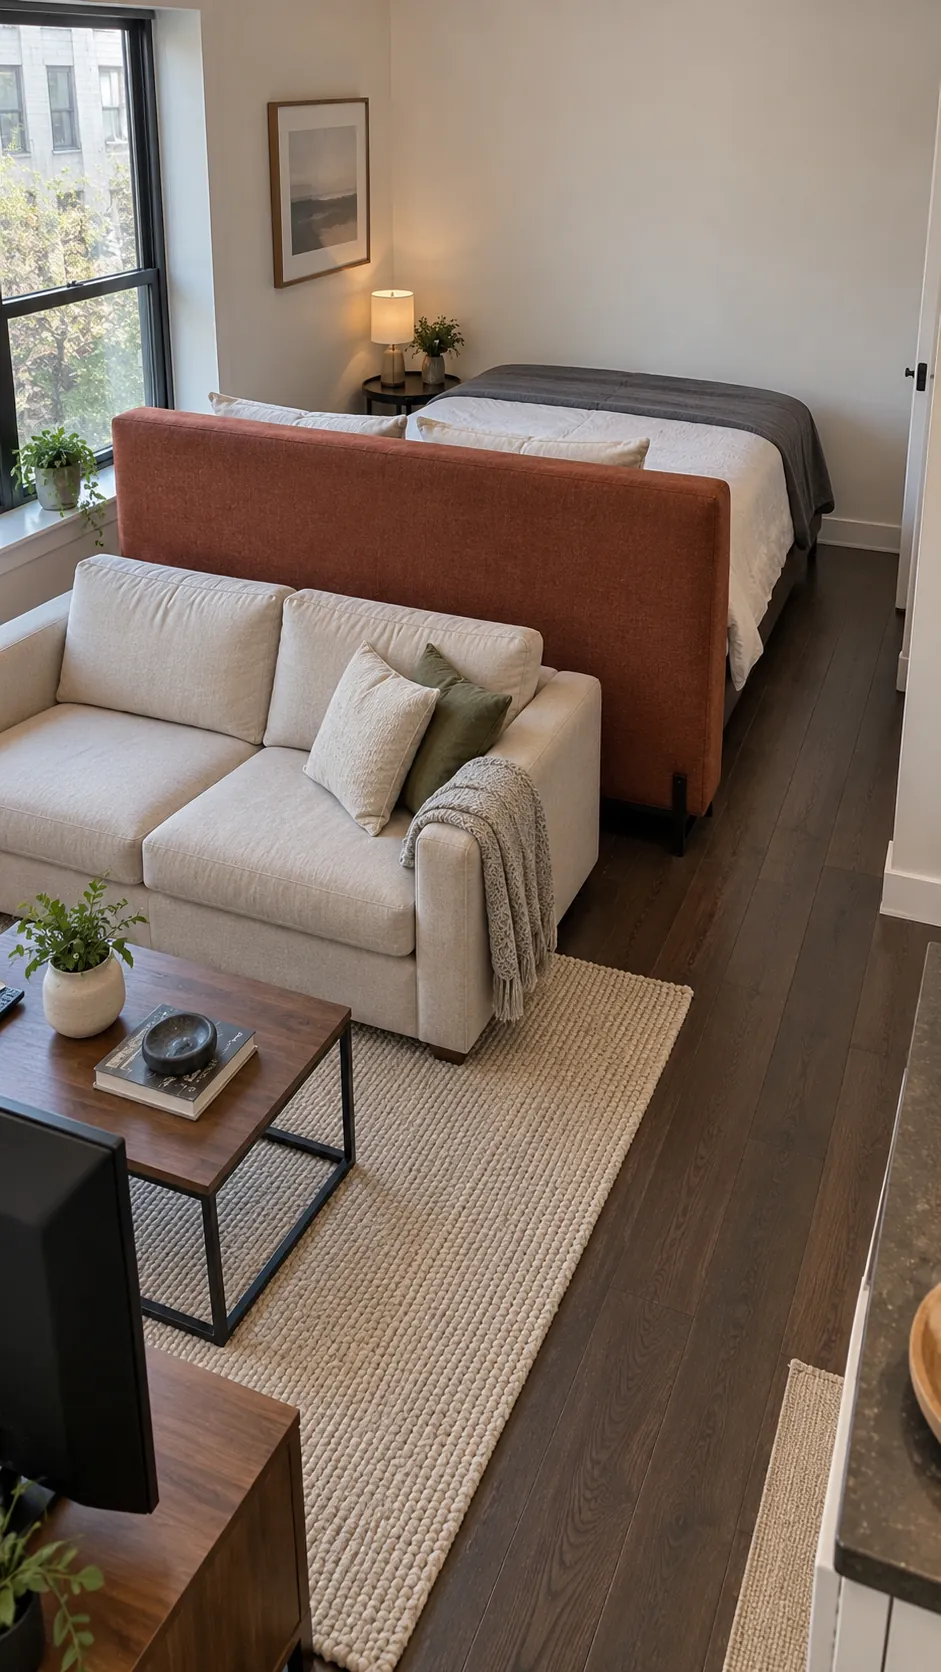
Headboard Facing the Living Room
Turn the bed so its headboard faces the lounge and its foot points toward the sleeping corner. A finished freestanding headboard can conceal pillows without hiding the whole room. Check that the bed design supports this placement, since some headboards depend on a wall or frame connection. Add bedside lighting on the sleeping side so lamp cords do not run across the living route.
Twin Bed Along a Side Wall
Use a single bed along the side wall when one sleeper values daytime floor space more than a wider mattress. Keep cushions at the wall only if they help the bed serve as occasional seating. Give the main lounge its own chair so the mattress does not become the default place for every activity. Before buying, compare the actual frame footprint rather than only the advertised mattress dimensions.
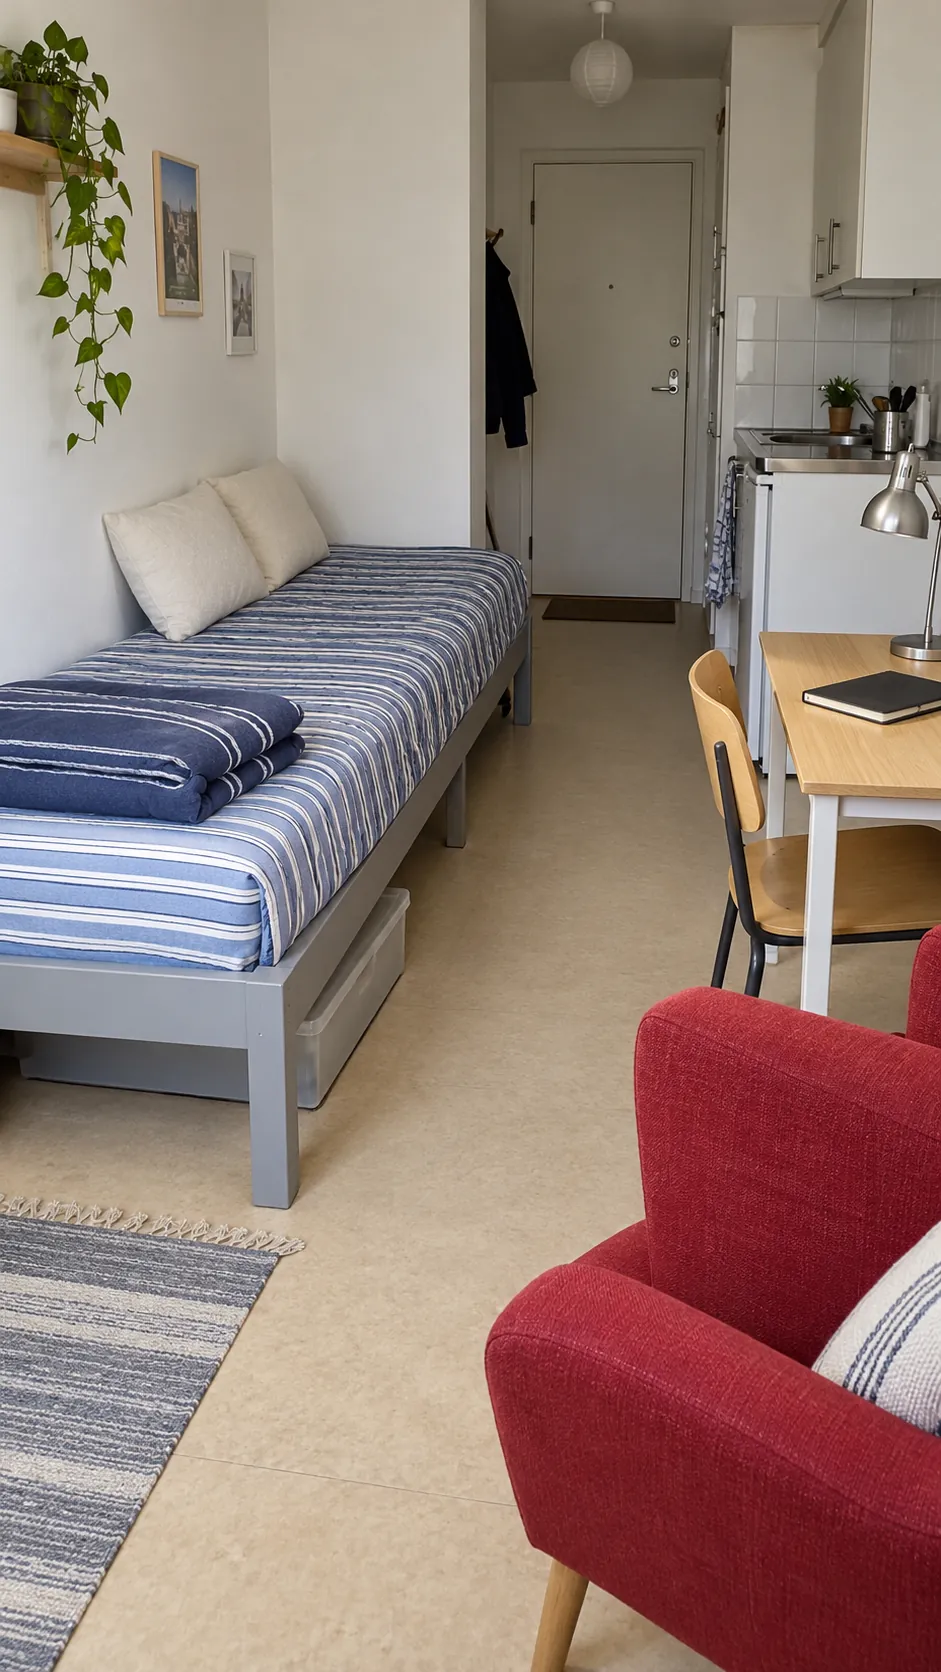
Daybed Facing Away From the Lounge
Orient a daybed toward a small reading corner while the sofa faces the television. The different directions create two uses without a physical divider. Store the sleeping pillows and duvet nearby so changing between day and night does not require carrying bedding through the room. A daybed still needs a mattress and support system suited to nightly sleep if it is your primary bed.
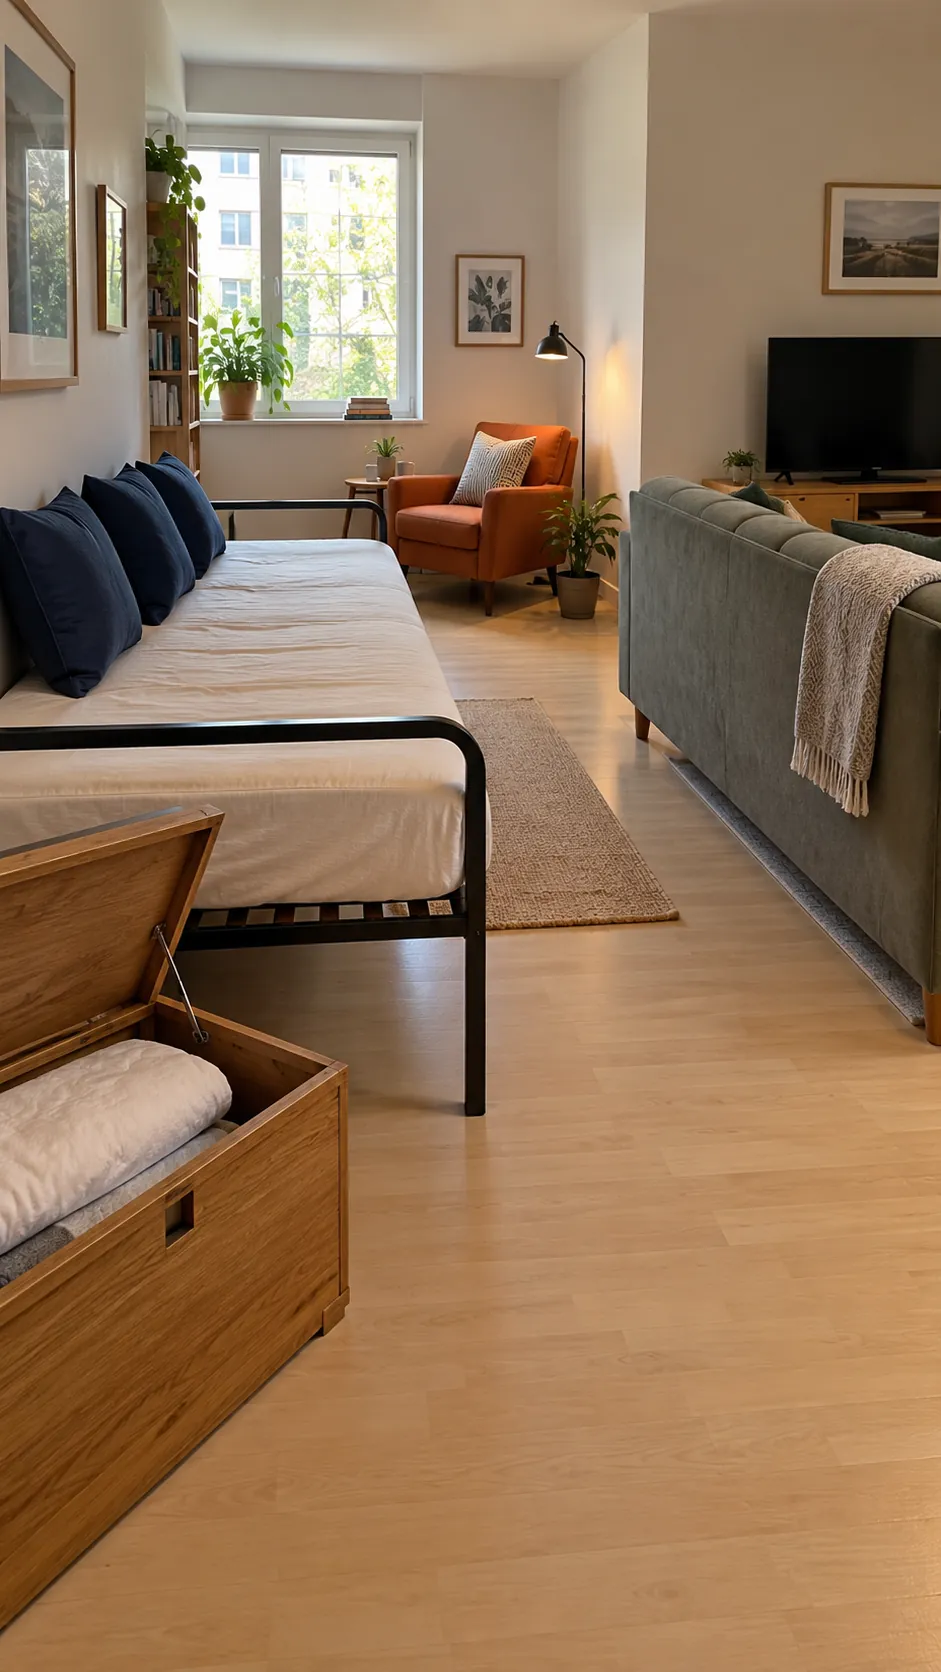
Wall Bed With a Dedicated Seating Zone
Use a professionally installed wall bed to free the sleeping footprint during the day while keeping a permanent seating area beside it. Confirm the wall construction, attachment requirements, lease permission, and full operating clearance before choosing the system. The bed must lower without moving heavy furniture or striking a light fitting. Keep the opening route clear every night so the mechanism does not turn bedtime into a room reshuffle.
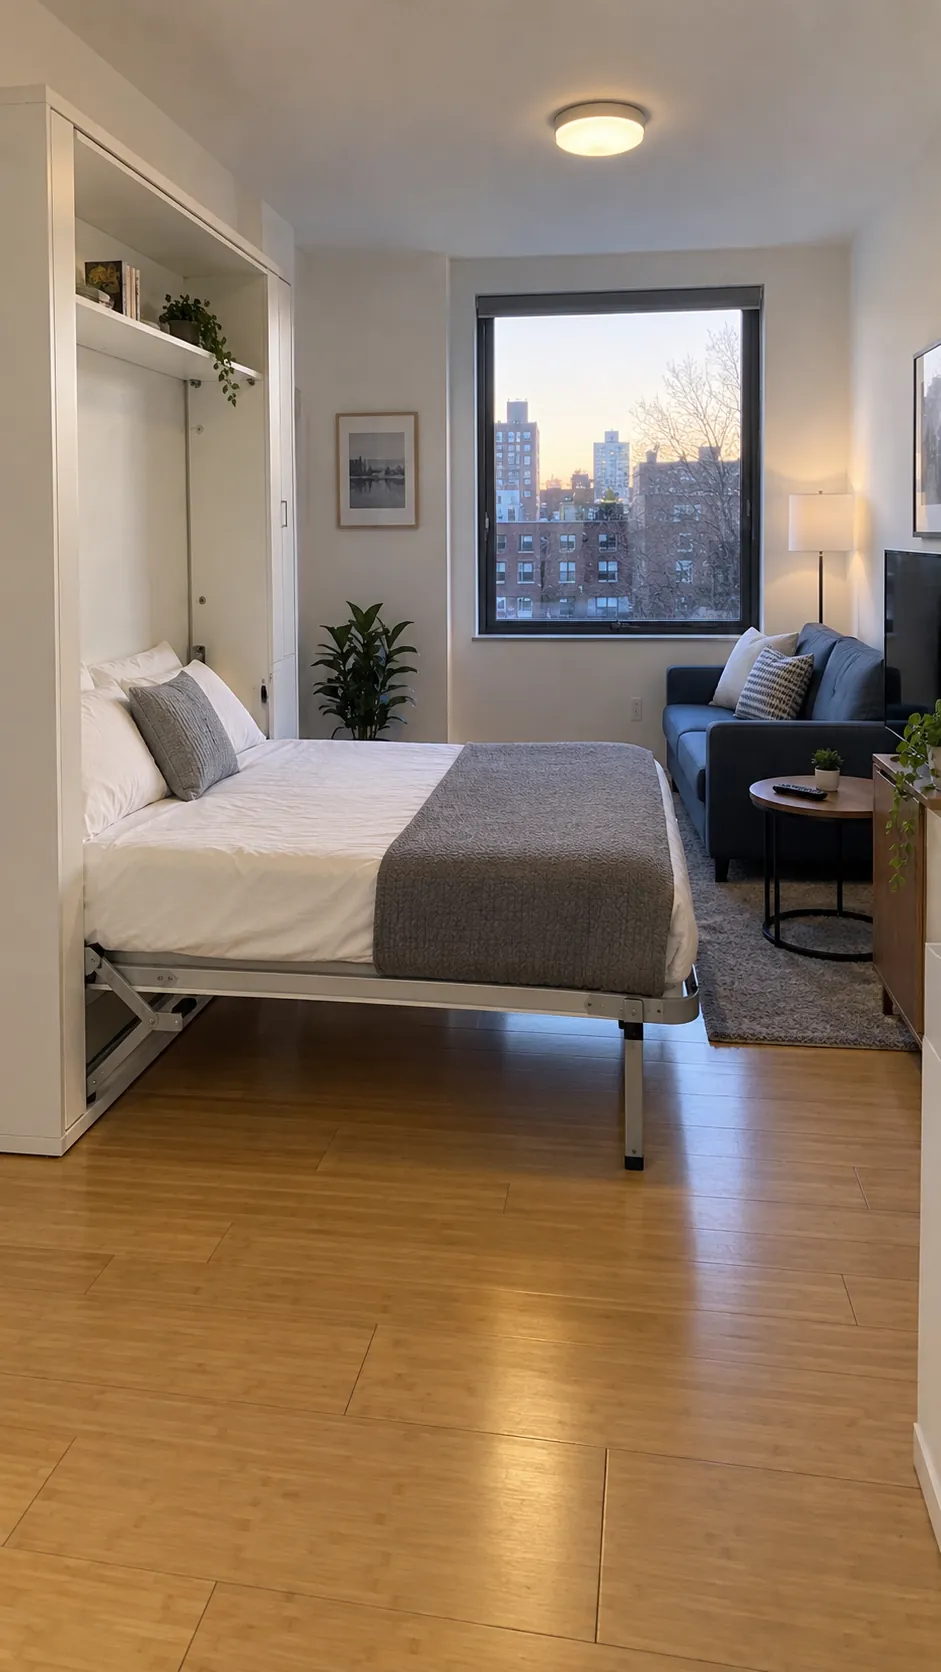
Storage Bed Anchoring a Quiet Corner
Choose a storage bed for the quieter corner and keep the lounge outside the drawer or lifting access area. The extra storage can reduce the need for a second bulky cabinet between zones. Check whether the mechanism opens safely under any sloping ceiling or nearby shelf. Put frequently used objects where you can reach them without repeatedly lifting a mattress or moving bedside furniture.
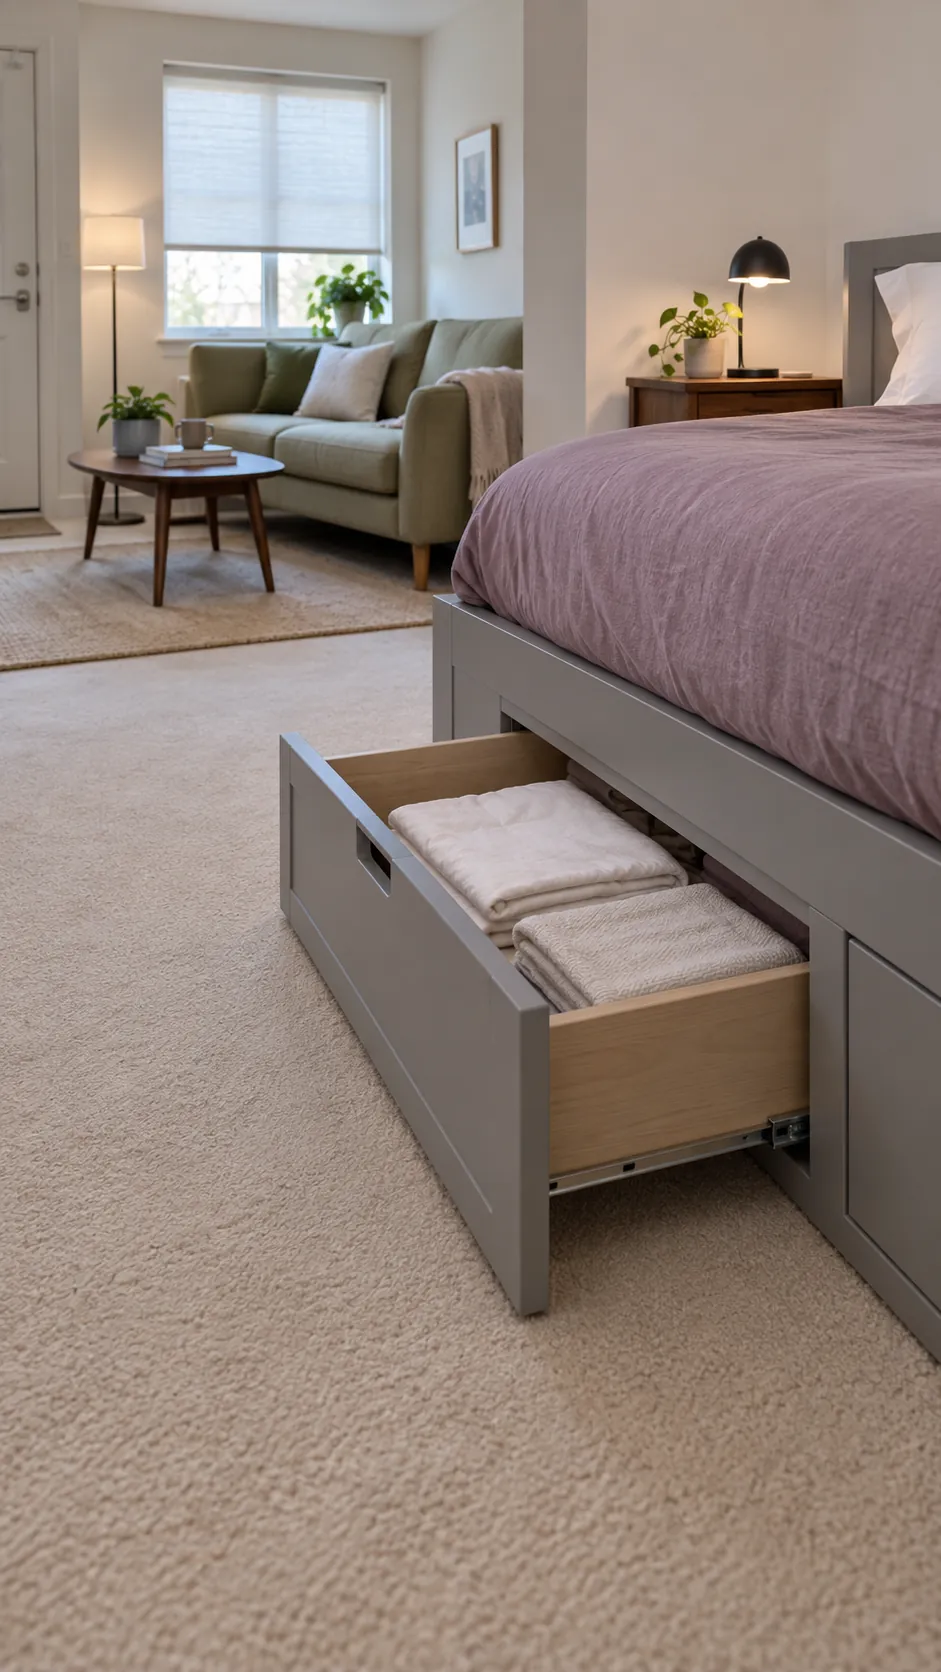
Rolling Shelf for Flexible Privacy
Use a purpose designed rolling shelf to alter the boundary when guests arrive or when you need more daylight. Park it in a stable position and lock the casters where the design provides locks. Keep the load low and balanced instead of stacking heavy objects at the top. This layout fits a studio where occasional rearrangement is helpful but a tall fixed unit would make cleaning difficult.
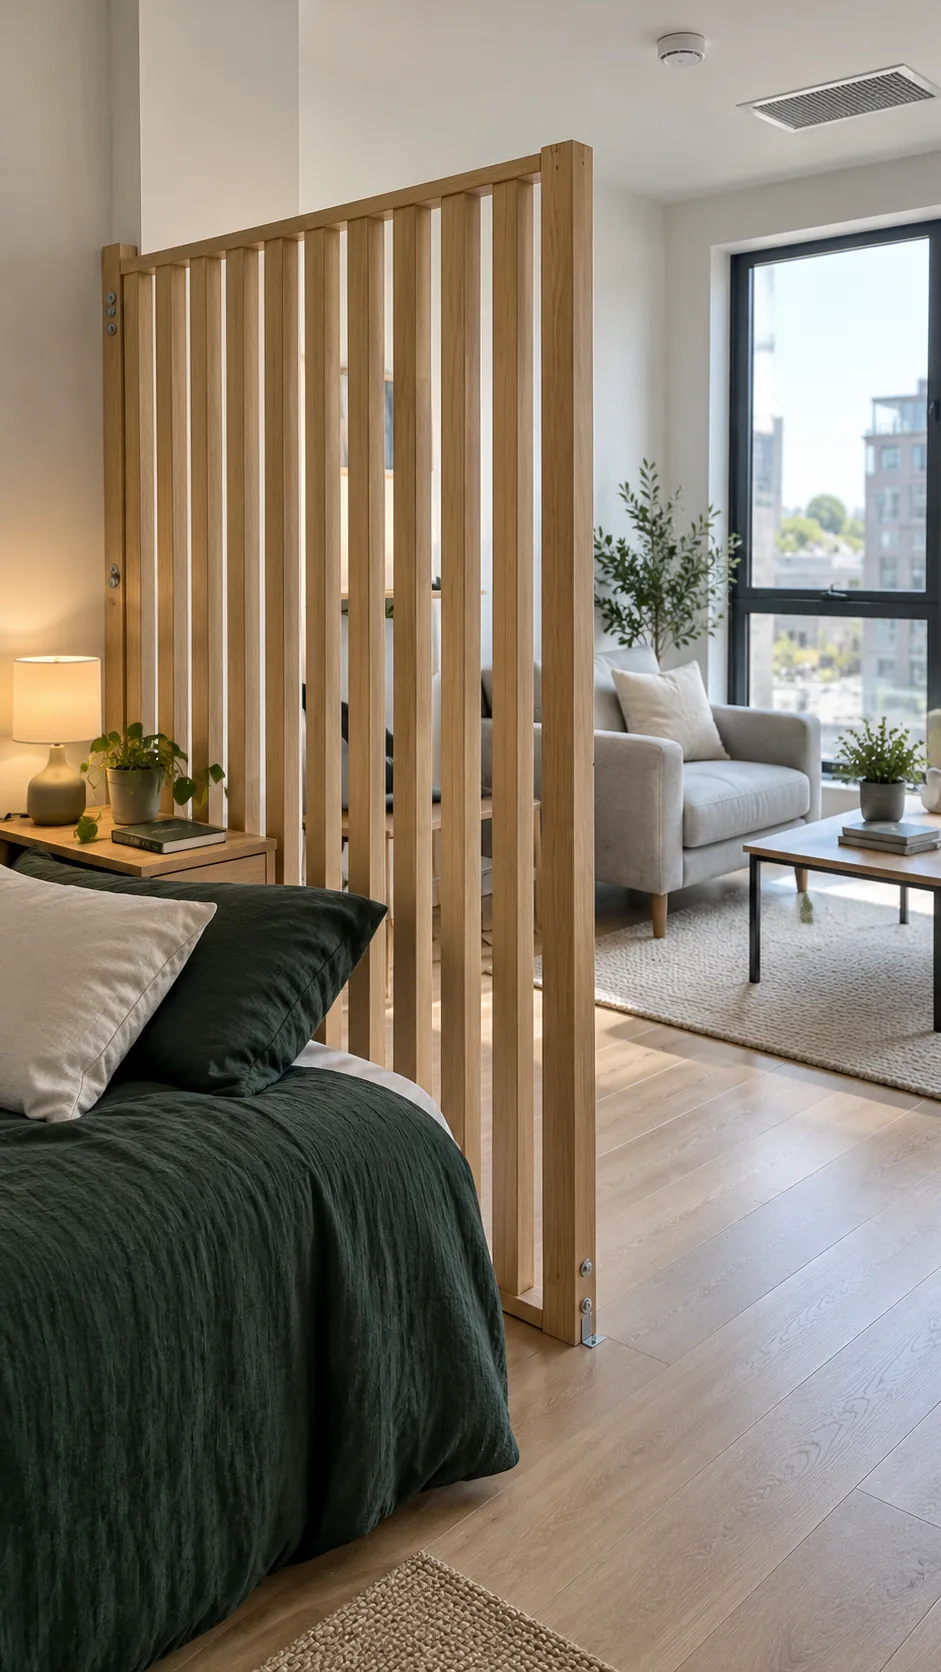
Short Slatted Divider at the Bed Head
Install a short slatted divider near the pillow area only when the support method is safe and permitted. The gaps maintain some light transfer while interrupting the direct view of the bed. Treat it as visual separation rather than soundproofing or a substitute for a bedroom wall. Avoid any attachment that depends on an unsuitable ceiling, and leave vents and sprinklers clear.
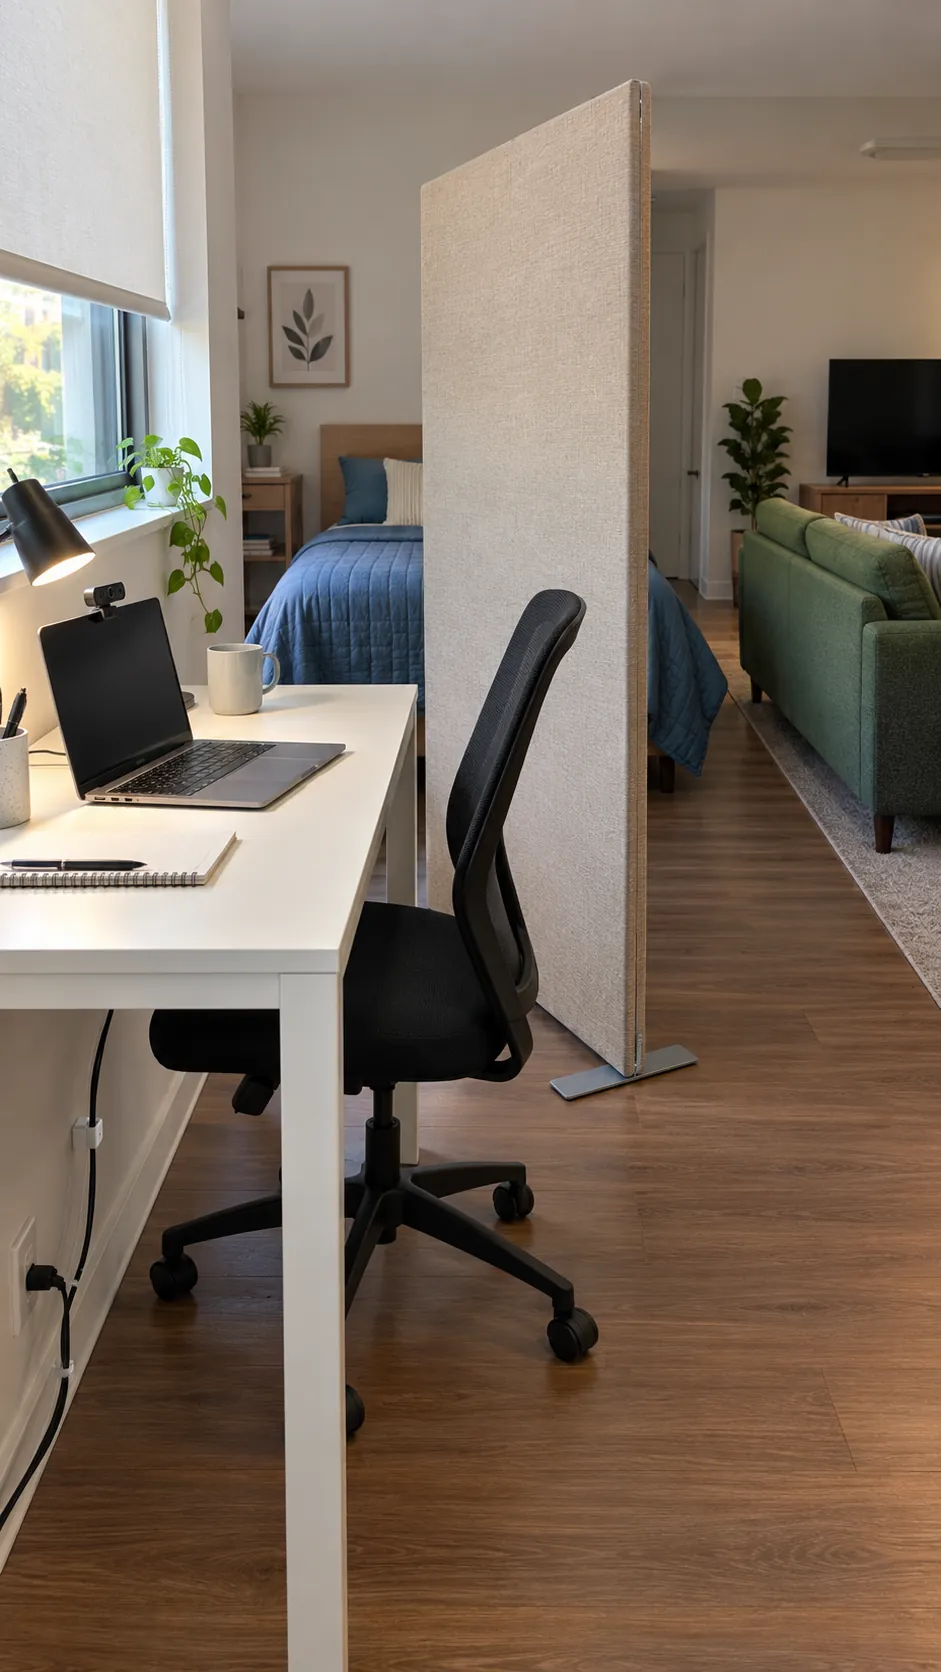
Fabric Panel Behind the Desk
Place a stable fabric covered screen behind the work desk so the bed stays outside the video call background. The desk faces the living zone, while the panel covers only the area the camera would see. Check the view using your actual camera height before buying a larger screen. Route power along the room edge rather than under the chair wheels or across the bed access path.
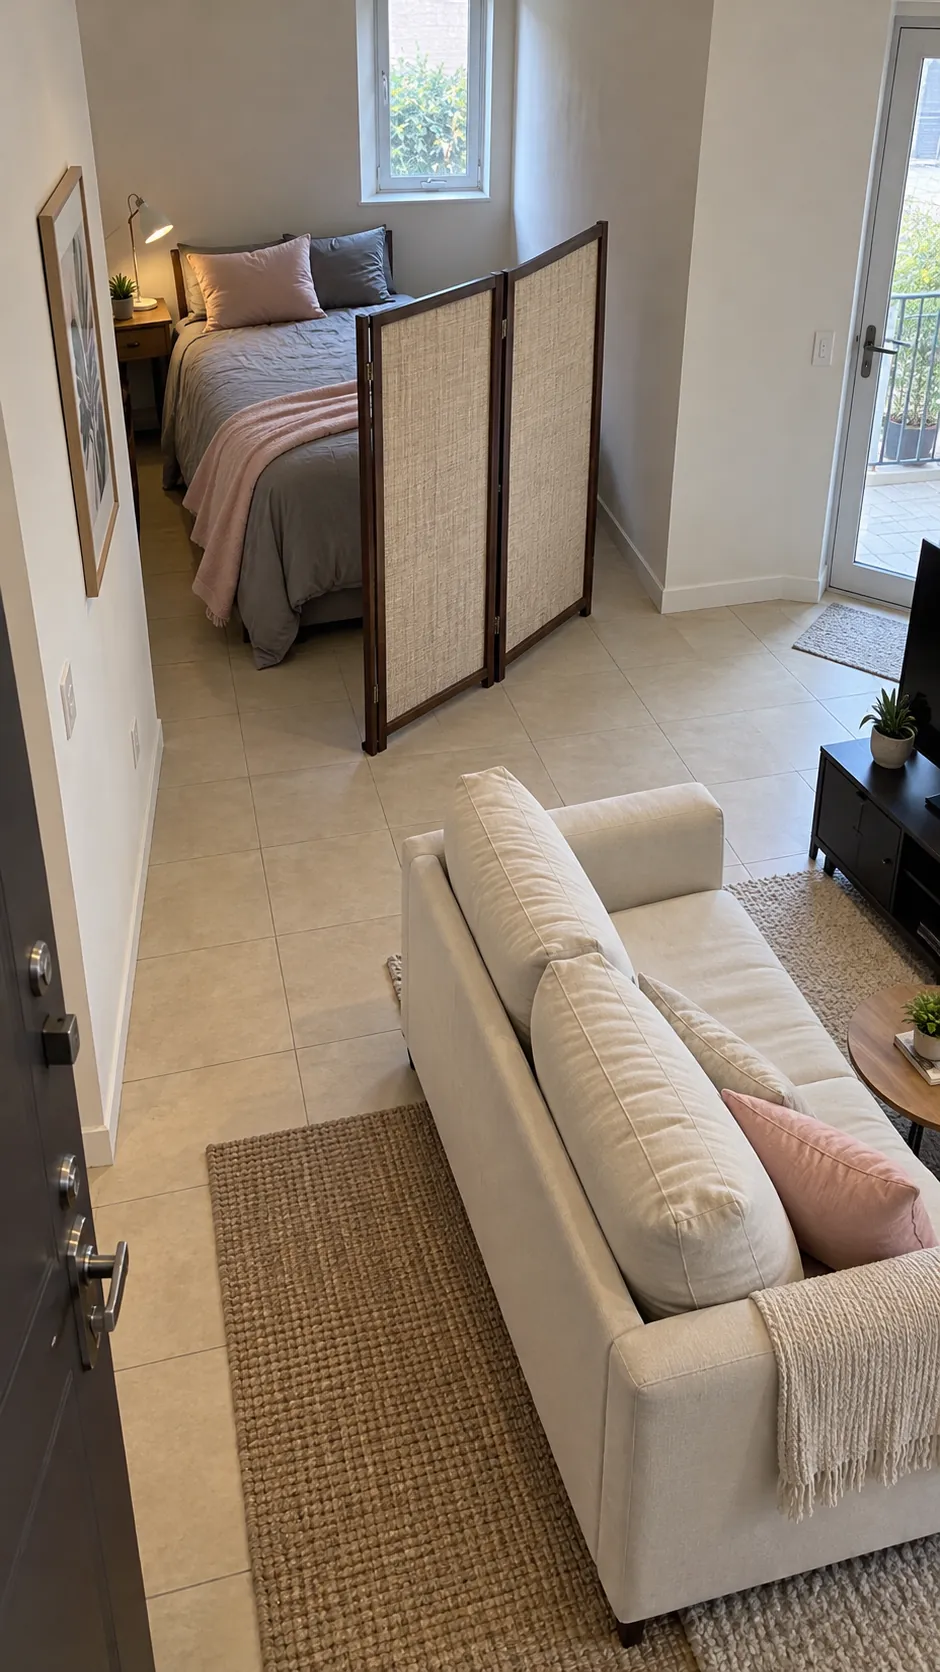
Corner Bed With a Diagonal Screen
Tuck the bed into a corner and angle a screen across the exposed outside edge. The diagonal can shield the mattress while leaving a wider opening than a straight divider across the room. Test the screen footprint with its panels spread to their safe angle. This suits an irregular room where a square boundary would waste the small wedge of space near the entrance.
Bedroom Runner Beside a Living Rug
Use a narrow runner along the bed access side and a larger rug under the lounge furniture. The different shapes distinguish circulation for sleep from the broader area for sitting. Choose pile heights that do not interfere with doors or rolling storage. The arrangement is useful when a second full rug would overlap the first and make the studio feel busier.
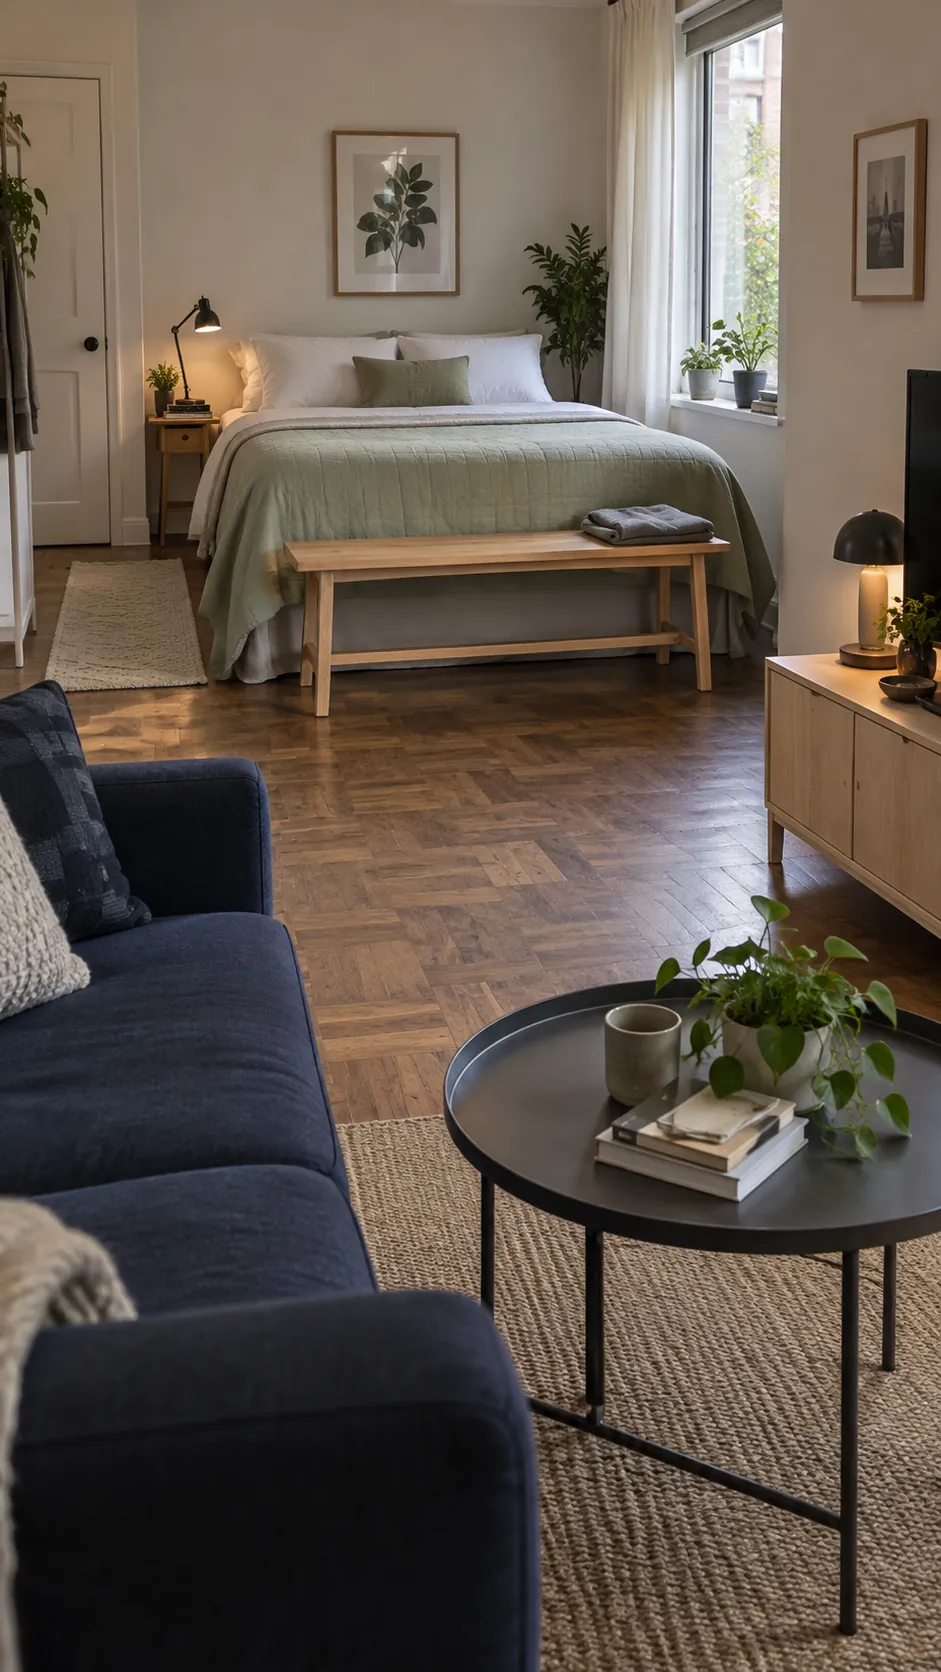
Bench Marking the Foot of the Bed
Place a slim bench at the foot of the bed with the sofa beyond it. The bench gives the sleeping zone a clear end and can support dressing without requiring a chair beside the pillow. Keep its top mostly empty so it remains useful each day. Allow space to pass around it and avoid a deep upholstered model if the room already has limited clearance.
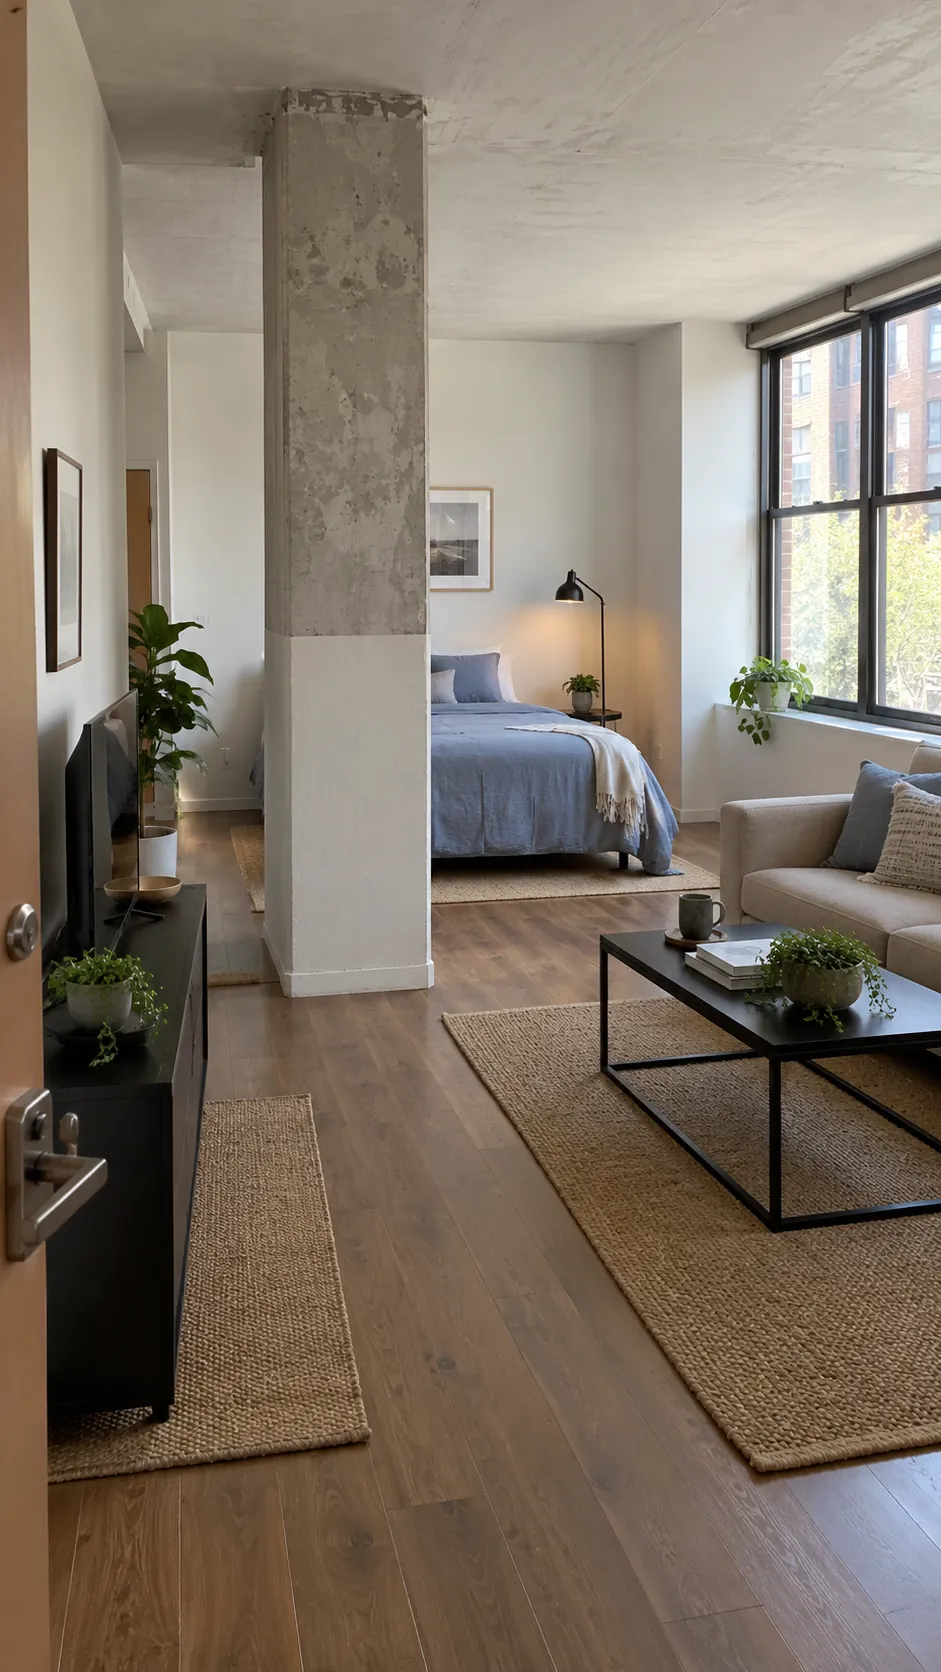
Bed Behind an Existing Structural Column
Align the sleeping area behind an existing column so it interrupts the view from the entrance. Keep the lounge on the open side of the column where seating can form a coherent group. Measure the routes on both sides, because a column can create a pinch point even when the floor area looks generous. Do not attach furniture or fixtures to structural elements without the proper permission.
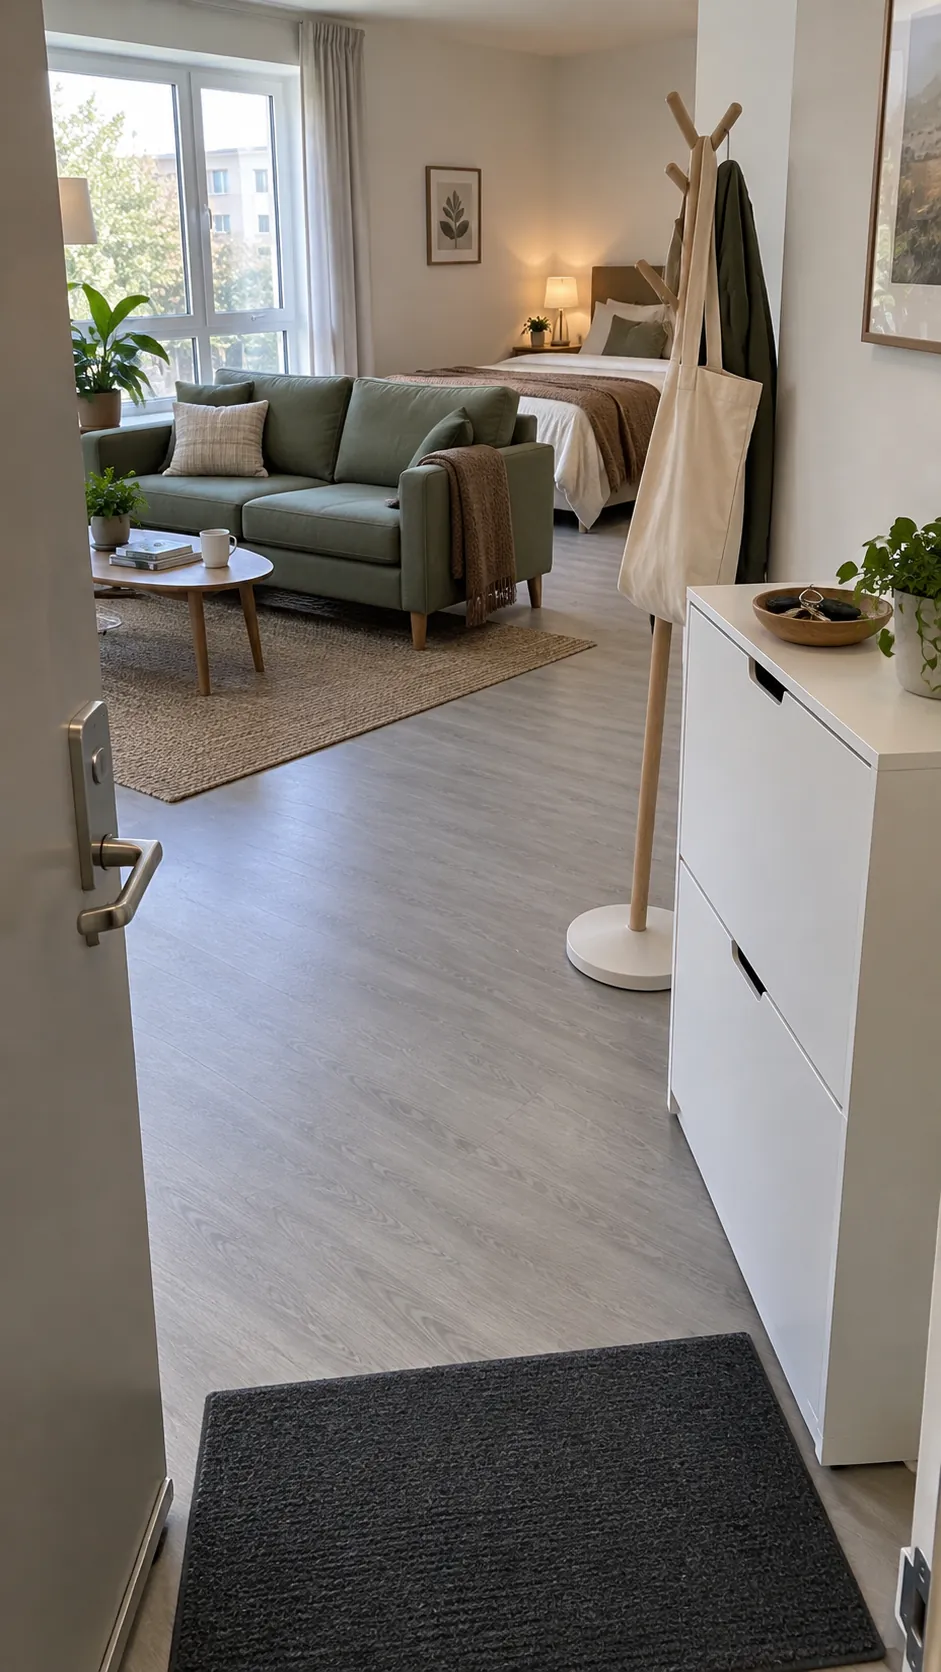
Entry Storage Leading Into the Lounge
Put practical entry storage beside the door and route arriving guests directly toward the sofa. Locate the bed beyond that first stopping point so shoes and bags do not spread into the sleeping zone. Keep the door swing and required exit route completely clear. The distinction comes from where activities start, making this useful when the studio is too small for another divider.
Lounge Across From a Recessed Kitchen
Use the open area opposite a recessed kitchenette as the living zone, with the bed farther along the room. The kitchen edge helps establish a daytime area without moving fixed appliances. Keep seating outside appliance door swings and away from cooking heat. A low divider near the bed can reinforce the boundary while preserving the route between the sink, entry, and bathroom.
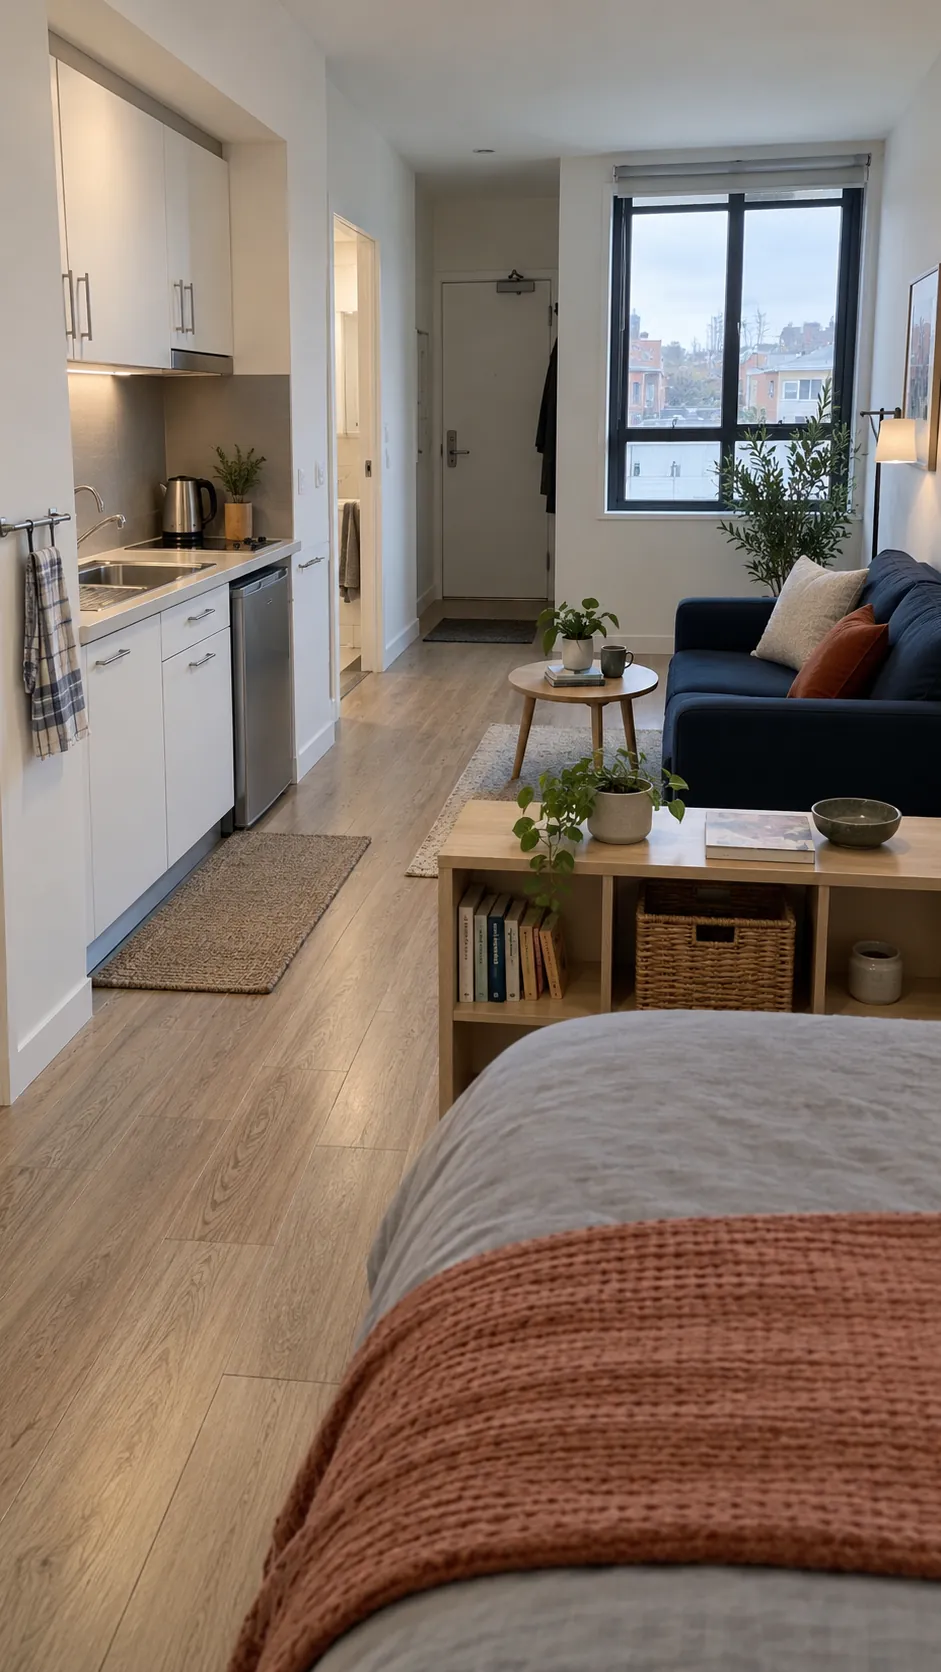
Separate Task Lights for Each Zone
Give the lounge a floor lamp and the bed a shaded reading light so each area can operate independently. Place the furniture first, then choose light positions that illuminate the intended activity without shining directly into the other zone. Use bulbs and fixtures suited to the fittings, and keep lamps clear of curtains and bedding. Walk the room after dark before finalizing the arrangement, because the most useful boundary may be where light stops rather than where furniture ends.